

Dehancer plugin for Adobe Photoshop / Lightroom Classic / Capture One currently supports source images in sRGB IEC61966-2.1 color space (other color spaces will be supported as well in the future).
Please consider that Film Emulation usually doesn’t require any gamut wider than sRGB due to the natural printed media gamut compression, therefore you won’t get any theoretical or practical benefits from working in Adobe RGB or ProPhoto RGB.
It is important that the same color management is consistent throughout the entire processing and viewing pipeline.
Please follow the recommended settings:
1. Display Setup
- Set your display to its native sRGB color gamut mode if possible.
- Use the appropriate calibration profile built especially for your display in sRGB, Gamma 2.2 (color temperature is insignificant).
💡 On Mac you can also use the Internet and Web (sRGB) reference display preset provided with your new MacBook Pro or Pro Display XDR.
2. Adobe Photoshop
- In Photoshop, go to Edit -> Color Settings… and set the parameters as shown below:
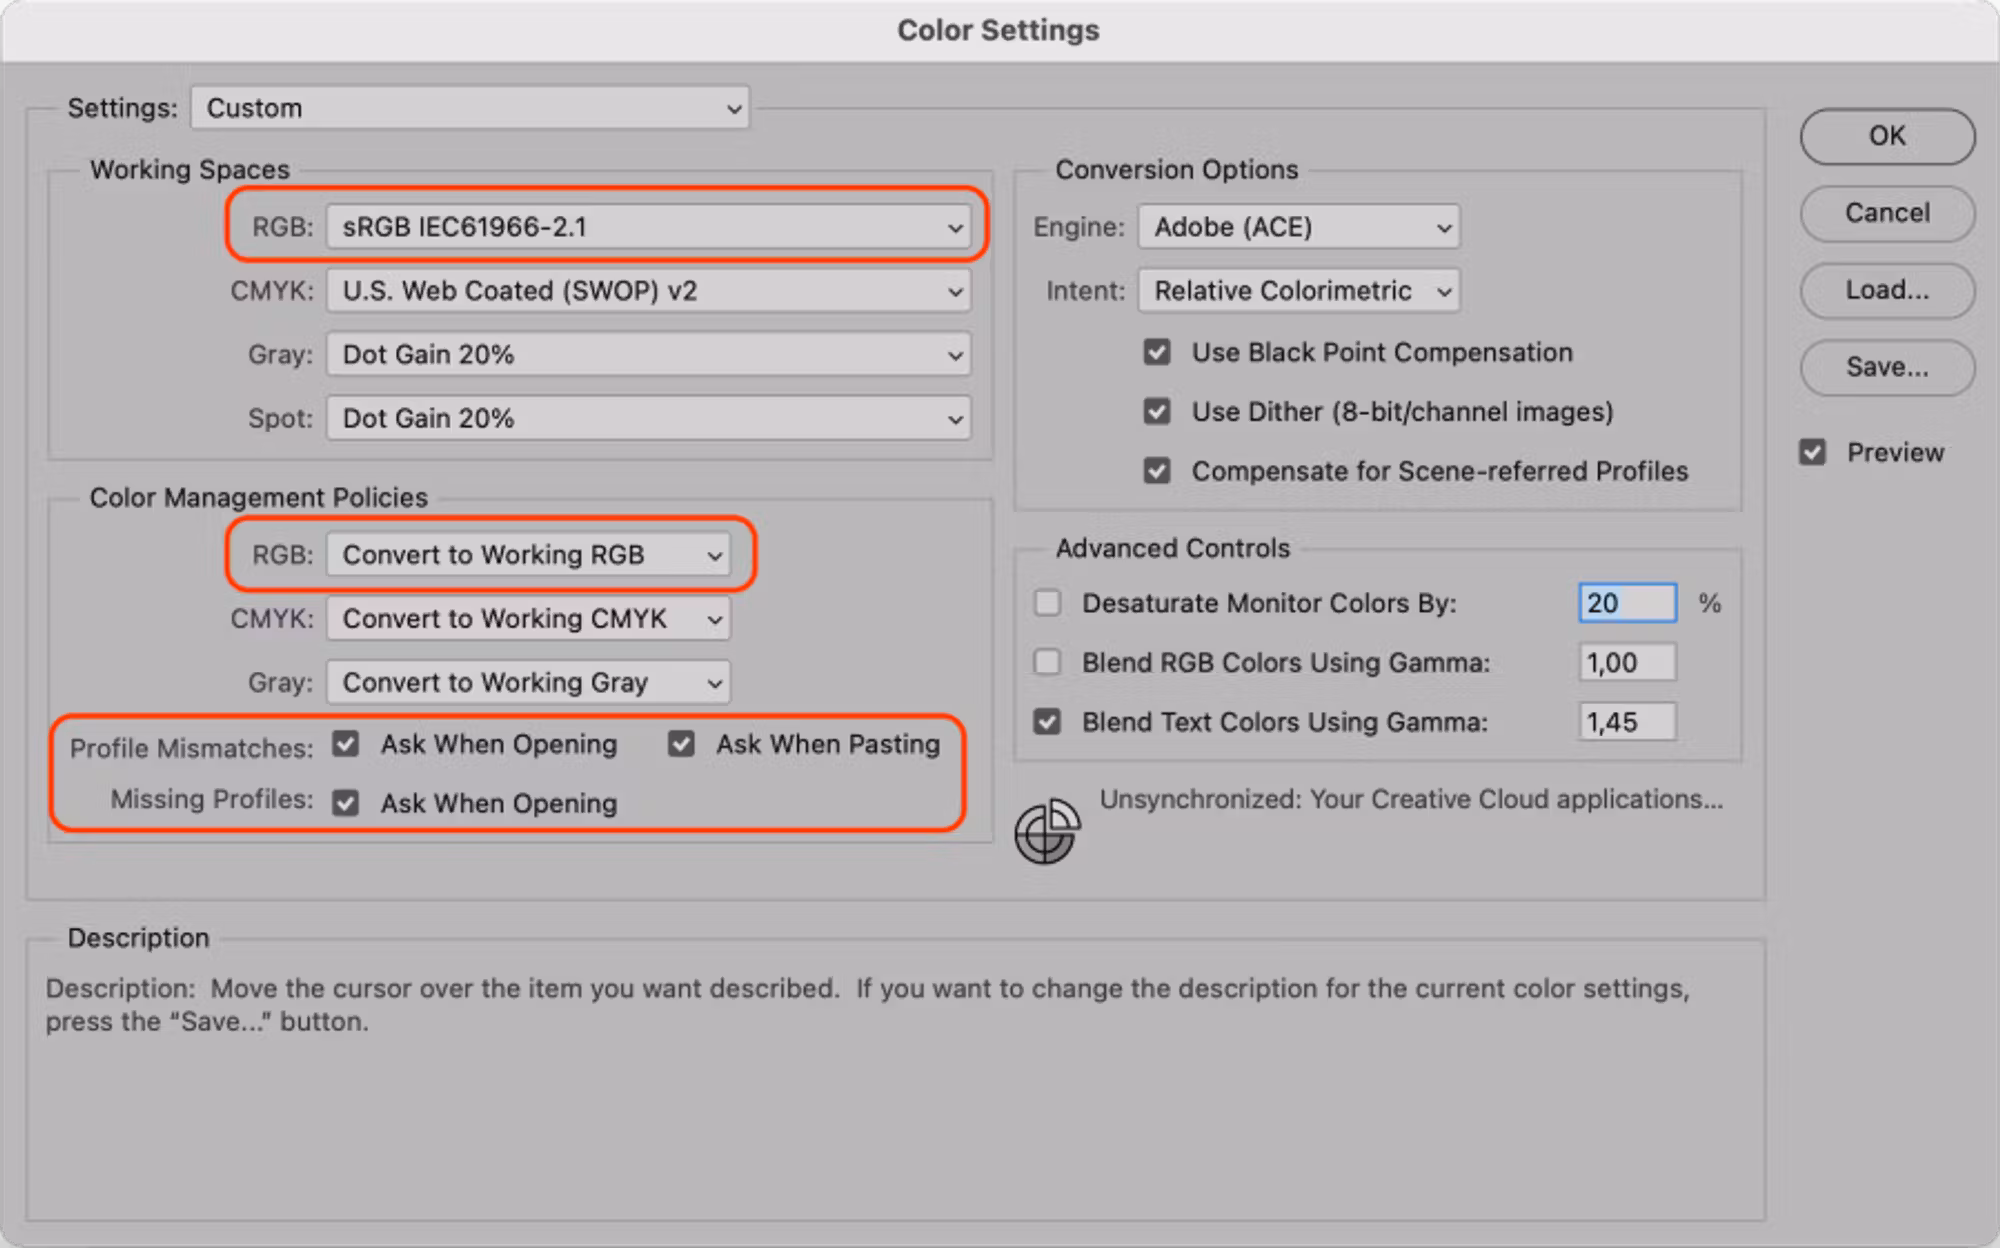
- Set the working space to sRGB IEC61966-2.1
- In the Color Management Policies section, select the Convert to Working RGB mode, and turn on the checkboxes indicated. Now, when you open the photo, the color space mismatch will be checked and a conversion to sRGB will be suggested.
3. Adobe Camera Raw
Go to Photoshop -> Preferences -> Camera Raw… and adjust the settings as shown here:
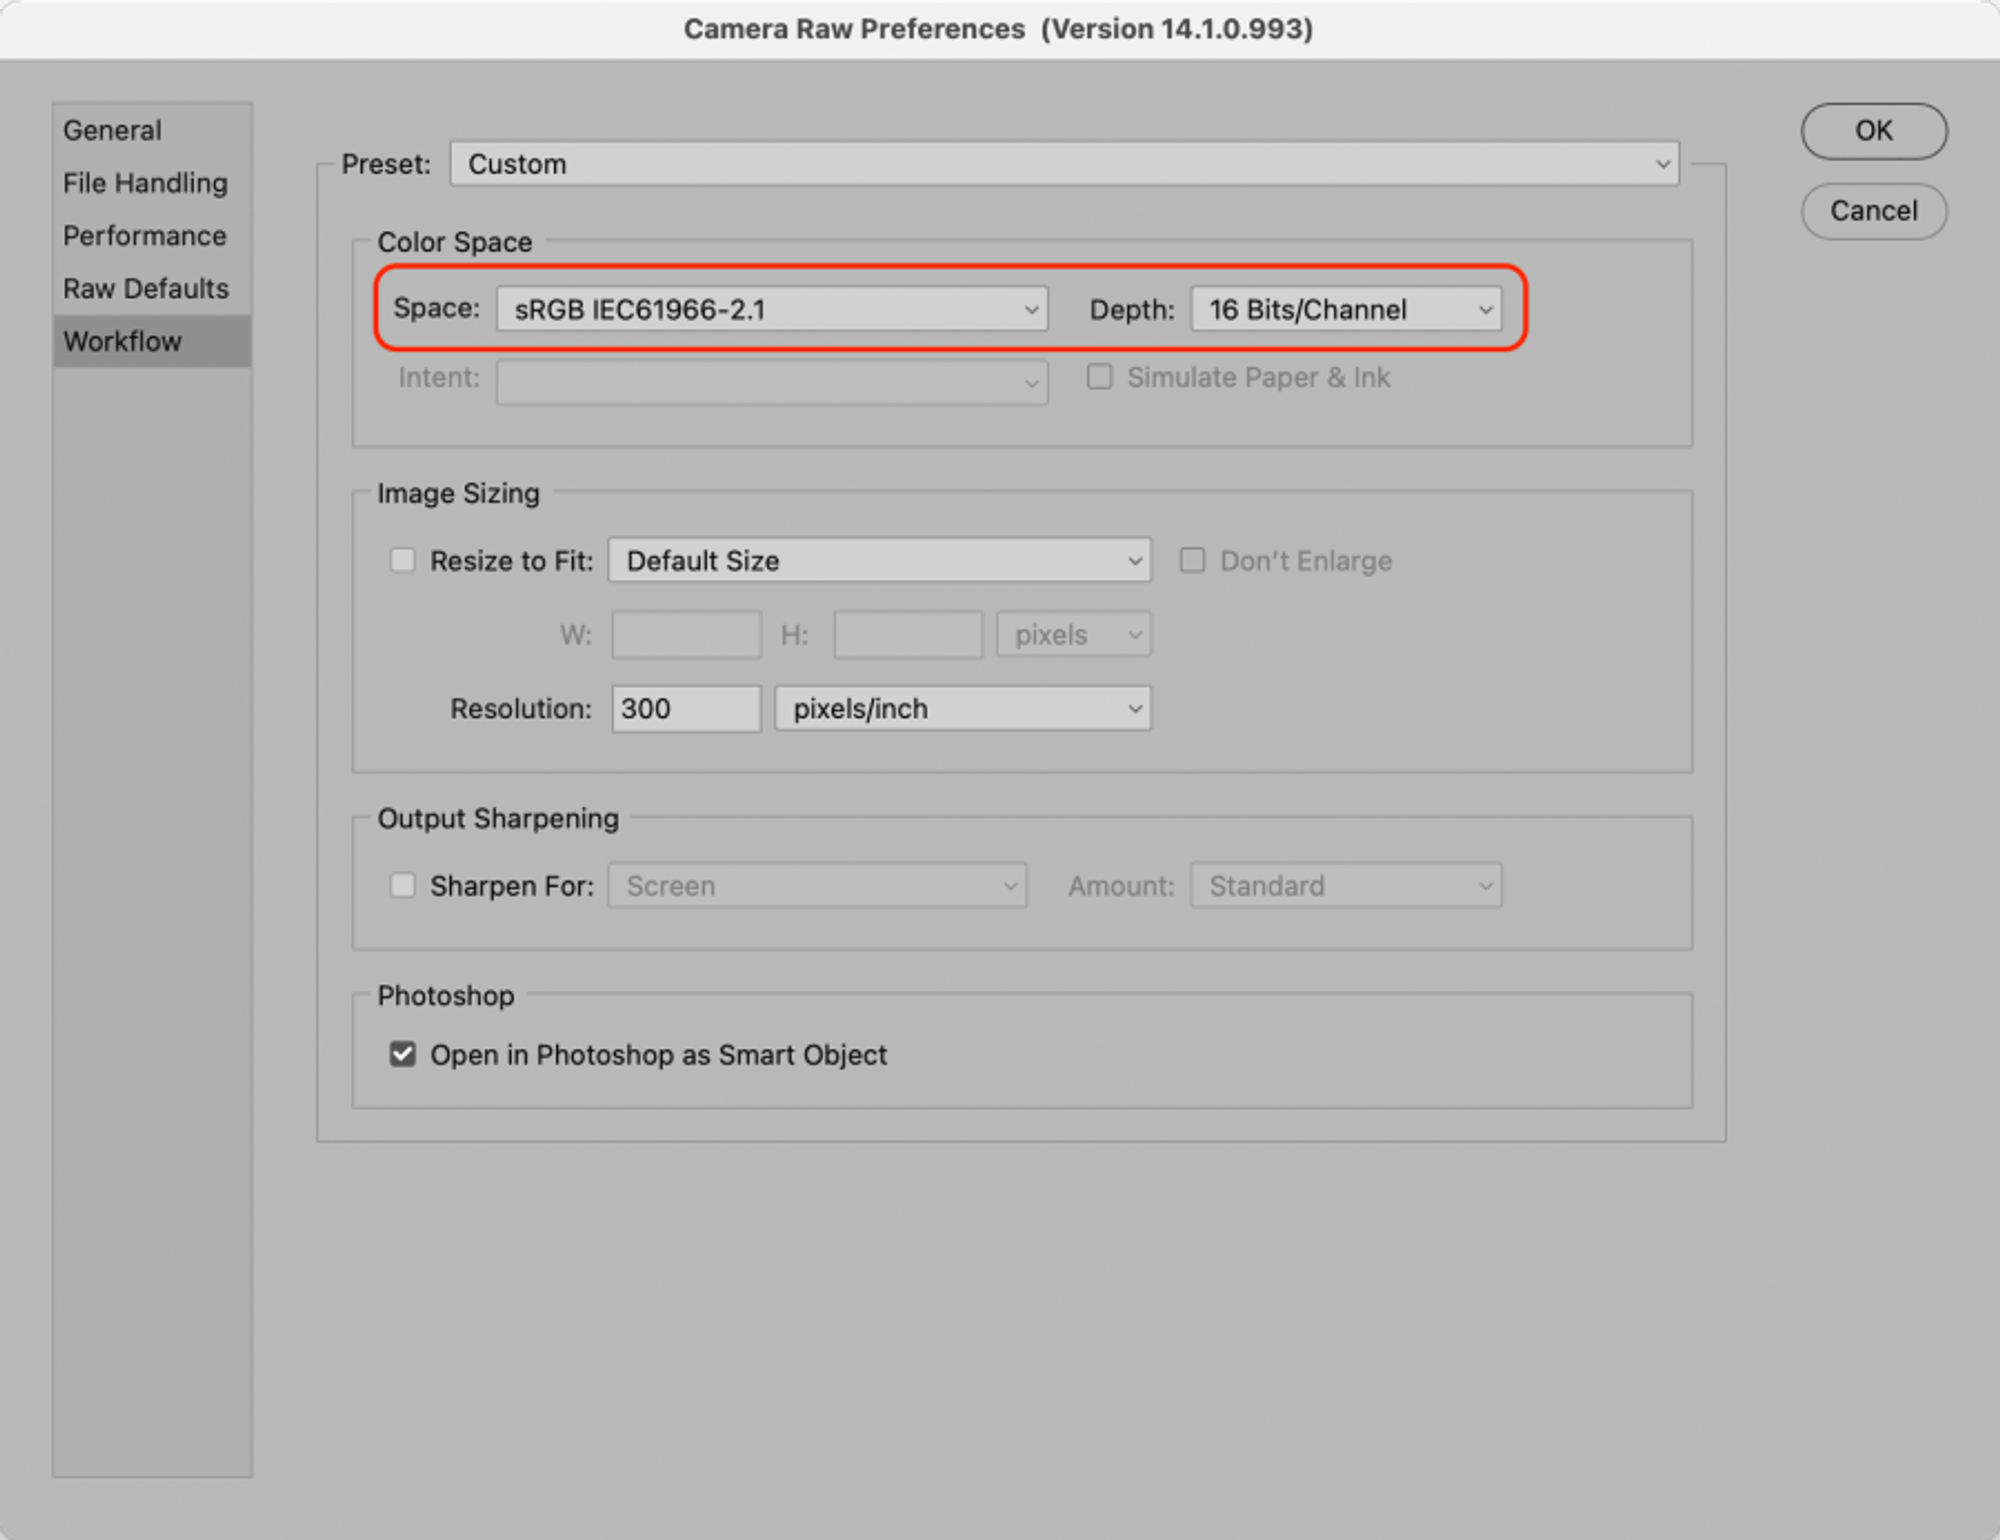
- Select the sRGB IEC61966-2.1 color space
- Set the color depth to 16 bit
4. Adobe Lightroom Classic

Check the settings in Lightroom Classic → Preferences → External Editing
- Use TIFF format
- Select the sRGB workspace
- Set the color depth to 16 bit
Use the same settings when exporting from Lightroom if you plan to process it later in Photoshop.
5. Capture One Pro
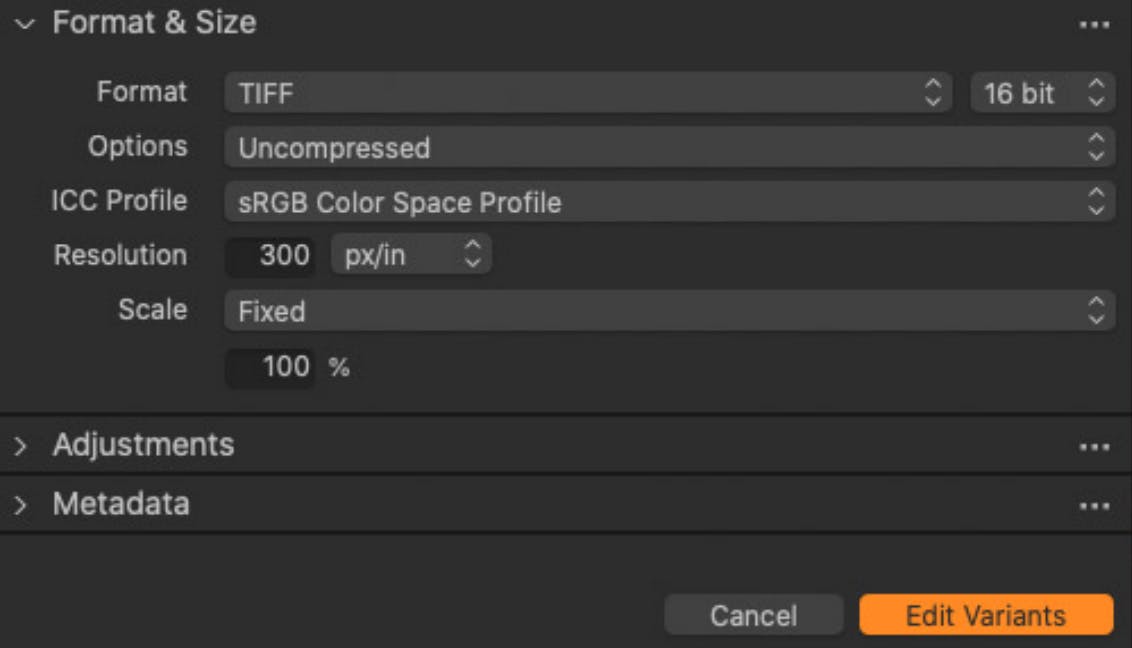
In the dialogue that follows the Edit With… command, select the appropriate options:
- Format: TIFF 16 bit
- ICC Profile: sRGB Color Space Profile