
Featured in: Dehancer Pro
The Academy Color Encoding System (ACES) is fully supported in selected Dehancer products. Dehancer works in ACES similar to the standard DaVinci color science YRGB.
1. What is ACES?
ACES stands for Academy Color Encoding System, developed by the Academy of Motion Picture Arts and Sciences, USA.
‘The Academy Color Encoding System (ACES) is a global standard for interchanging digital image files, managing color workflows and creating masters for delivery and archiving. ACES is a global standard for interchanging digital image files, managing color workflows and creating masters for delivery and archiving.’
So, ACES ensures seamless interchange of high quality motion picture images regardless of source.
ACES pipeline includes a range of different color spaces with dedicated conversion curves, Input Device Transform (IDT), Output Device Transform (ODT) and other profiles and parameters. Each image transformation is described by a data set that may include mathematical functions, matrix transforms and LUT colour conversion tables.
All calculations in ACES are floating point and scene-referred. Relative theoretical brightness allows working with values less than 0 and greater than 1 – there is no theoretical upper and lower bound. ACES is also capable of encoding all colors that human is capable of seeing. This extends limits beyond the color coverage of the source material, and allows working more carefully with shadows and highlights, avoiding clipping during processing and data storage.
The ACES standard has been developed since 2004. Now it is the basic requirement for digital output media in companies such as , HBO and others.
In addition to data storage and sharing standards, ACES also provides image processing working space with all the benefits of floating point computing.
2. Key benefits of ACES workflow
2.1 Unified color management
Unified color management for diverse video and image sources, including computer graphics (VFX), motion picture cameras and even film. This greatly simplifies the editing and grading process with different cameras.
IDT camera profiles require precise measurement of the spectral characteristics of the camera sensor. This provides a more accurate and consistent interpretation of colour and contrast.
Even if there is no proprietary camera profile provided, any source data in typical formats (i.e., Rec.709) will be automatically converted into ACES working space, ensuring a uniform interpretation and allowing for unlimited grading possibilities.
2.2 Flexible color control
Color correction in ACES is based upon logarithmic functions, giving the flexible and smooth color and contrast control taking into account human perception and basic aesthetics.
ACEScct — a Quasi-Logarithmic encoding, commonly used within color grading systems – gives a film-like response to contrast and exposure changes with analogue feel.
While color wheels, curves and other DaVinci Resolve tools work in ACES differently, it helps to achieve impressive and precise results significantly faster as well as you improve your skills.
2.3 Grading without clipping
In terms of dynamic range and color gamut there is a lot of extra headroom in ACES. Floating point math without strict bounds gives easier control of darkest shadows and brightest highlights without clipping.
This could be especially useful when working with high contrast sources (Rec.709, ‘Flat’ profiles common to action cameras, drones, smartphones, etc.)
2.4 Built in support for a variety of Log and Raw formats
There are built-in profiles for all major camera makers: Arri, Red, Canon, Blackmagic Design, Panasonic, Sony. Log and Raw files from all supported cameras are identified and treated with ACES color science automatically. There is no need for additional input setup.
Additionally, the Raw demosaic stage is performed directly into the ACES internal working space, bypassing the intermediate conversion and minimising the possible loss of color accuracy associated with this conversion.
2.5 The entire workflow is streamlined
The ACES system is designed to control the complexity inherent in managing a multitude of file formats, image encoding, metadata transfer, color reproduction, color correction and any image interchanges that are present in the current motion picture workflow.
Project data is stored and processed in extended color space and then could be aesthetically converted to cover any technical needs. This significantly simplifies digital distribution for different devices (including those that do not yet exist) and different services.
All you need is the output device profile, the rest is done automatically with ACES Output Device Transform (ODT) pipeline.
3. How to use ACES with DaVinci Resolve?
Blackmagic Design is an official member of the ACES project. Its software DaVinci Resolve fully supports this standard, and thus gives specific opportunities in image processing to colorists.
3.1 ‘Classical’ approach to ACES
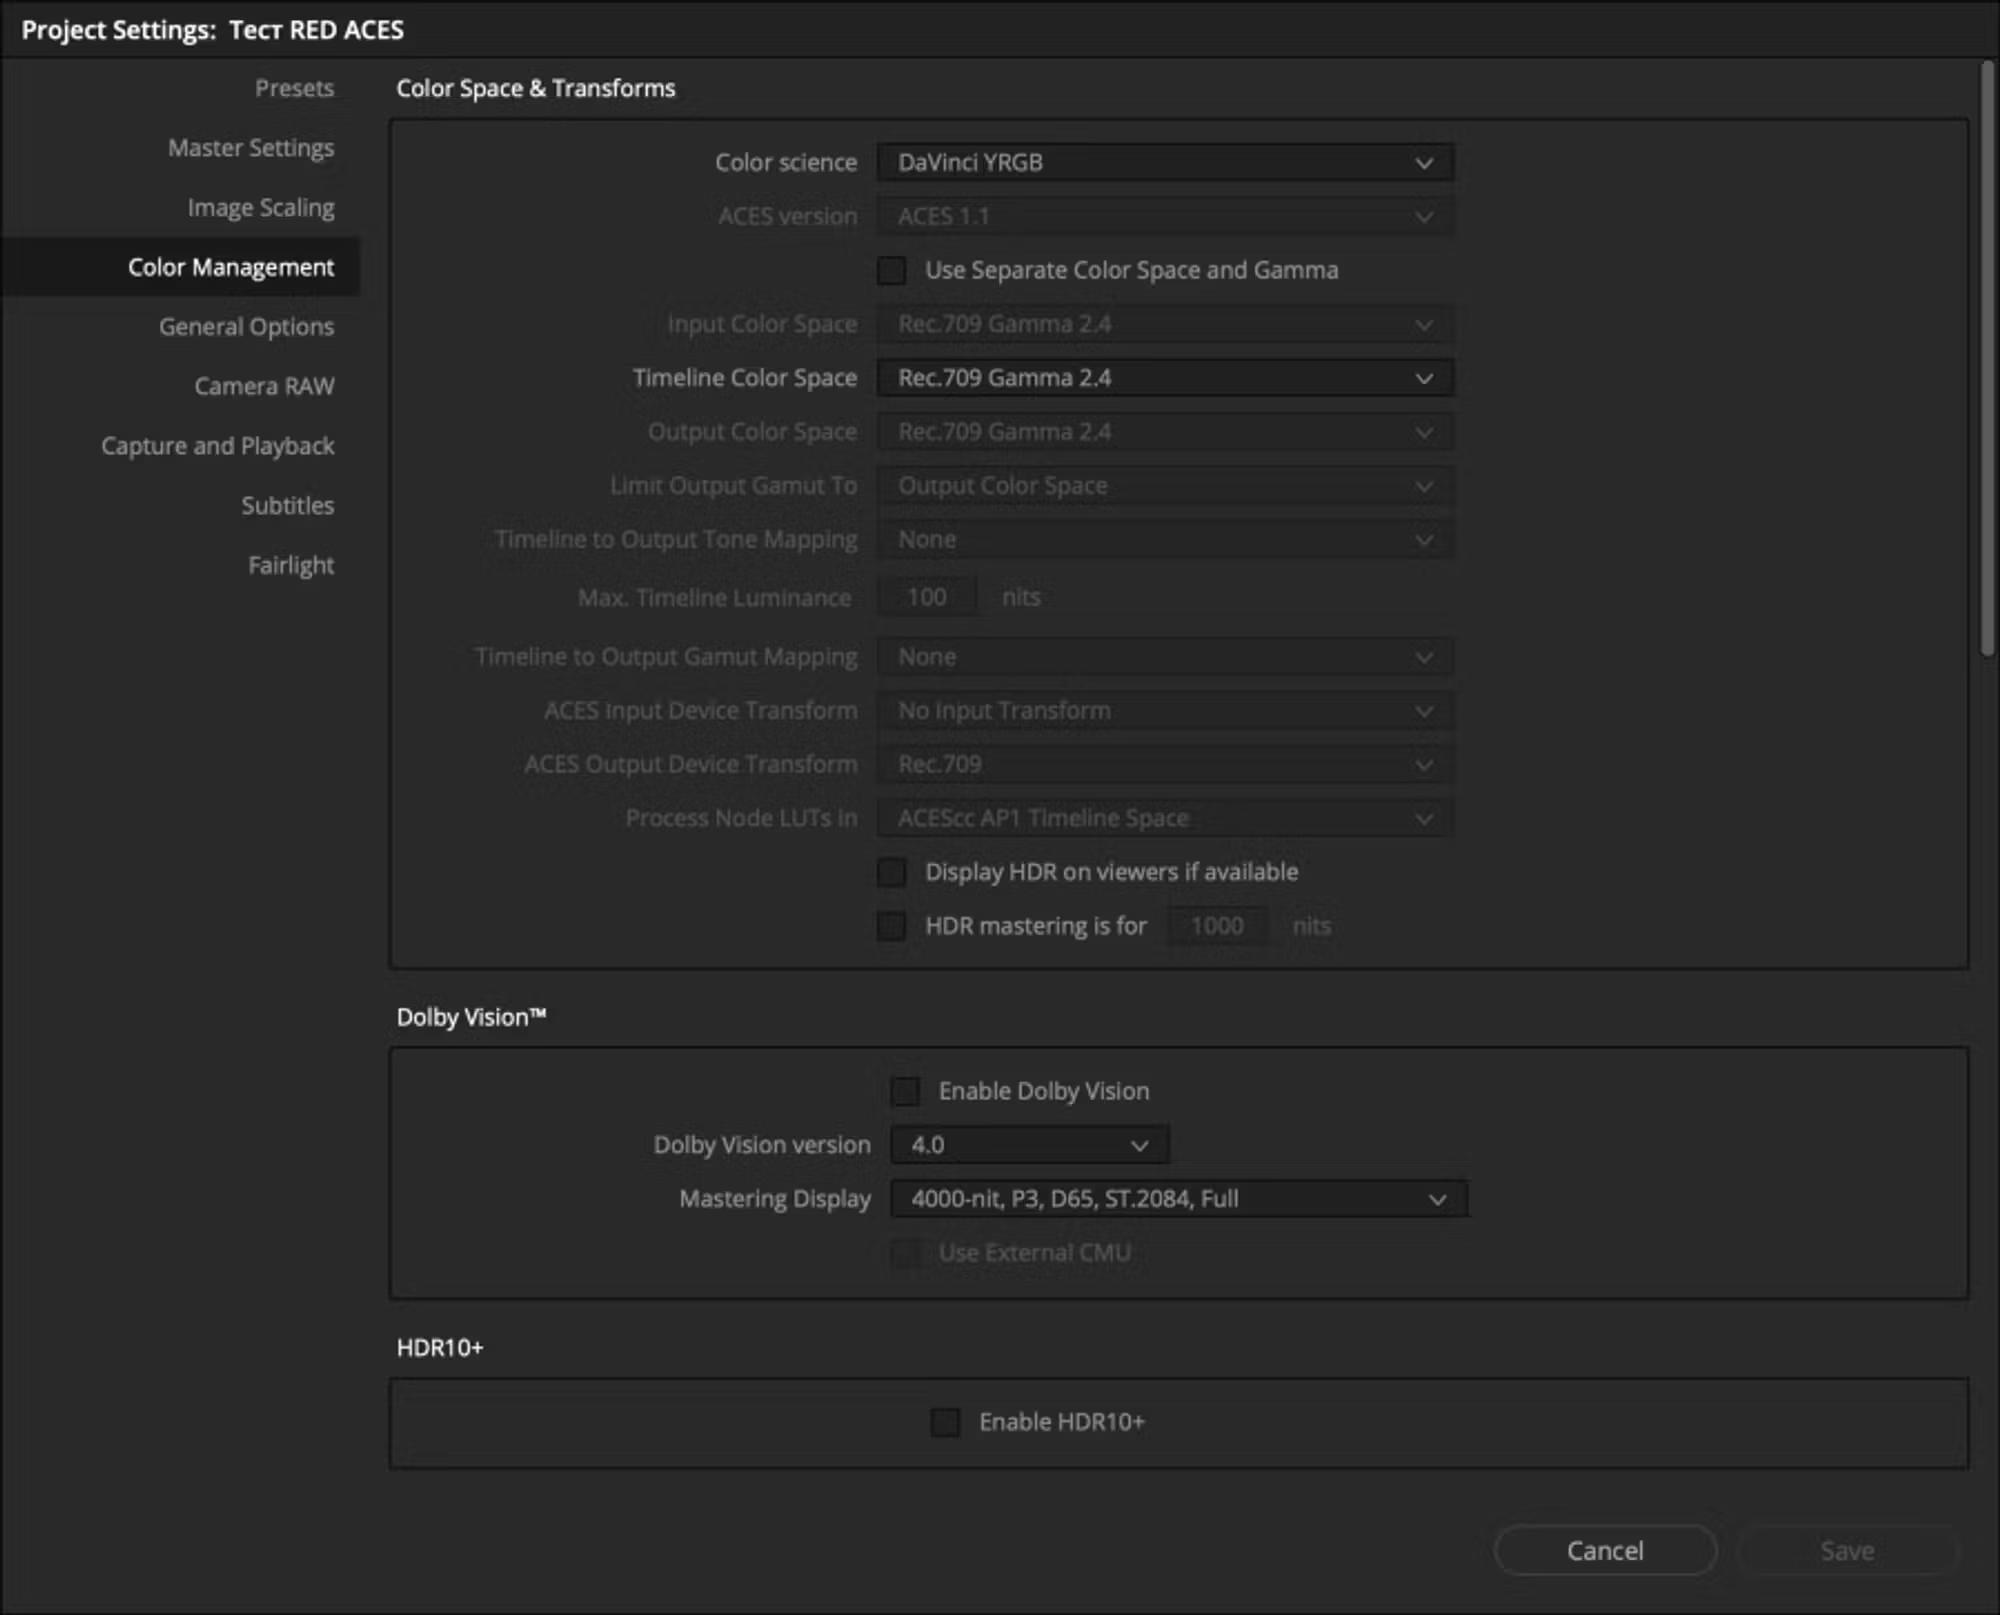
The basic and most common grading workflow in ACES suggests working within this space from beginning to end. For that purpose, you should set Color Management parameters in the project settings as follows:
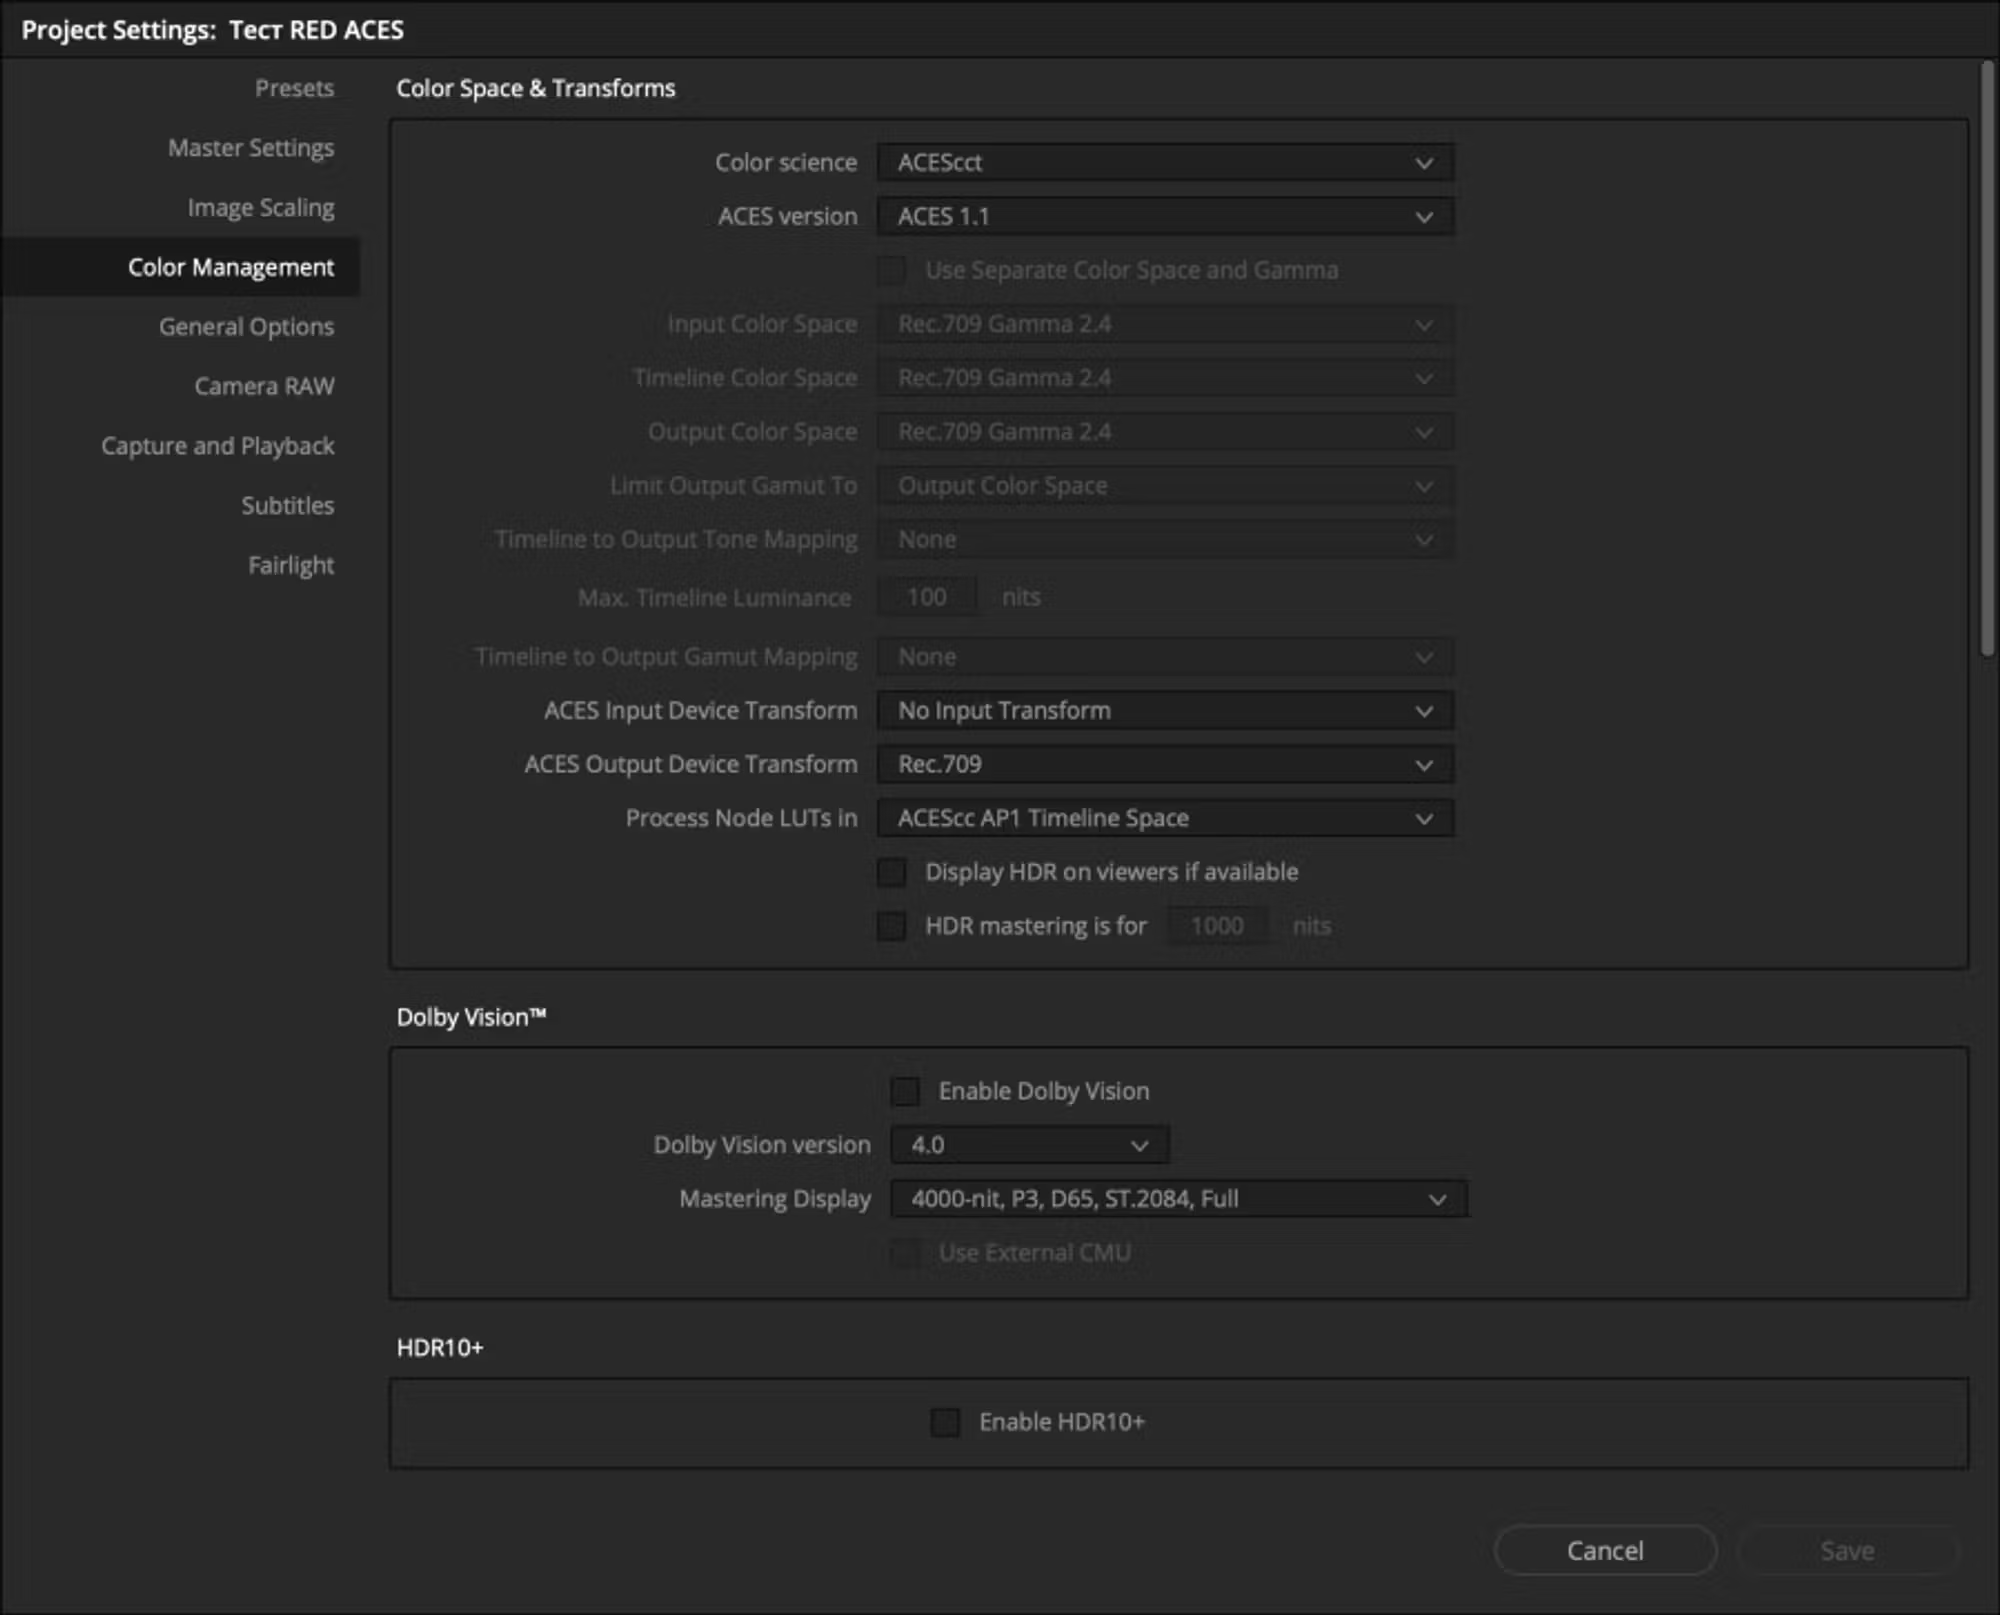
We advise you to use the most basic settings for a quick start. Later, when you go further with ACES, you can set these settings more meaningfully.
Now place your clip on the timeline. If DaVinci Resolve did not automatically detect the input file format, right-click on the clip (while in the Color tab) and set here ACES Input Transform. If this parameter isn’t visible, it means that DaVinci has already automatically detected the clip metadata.
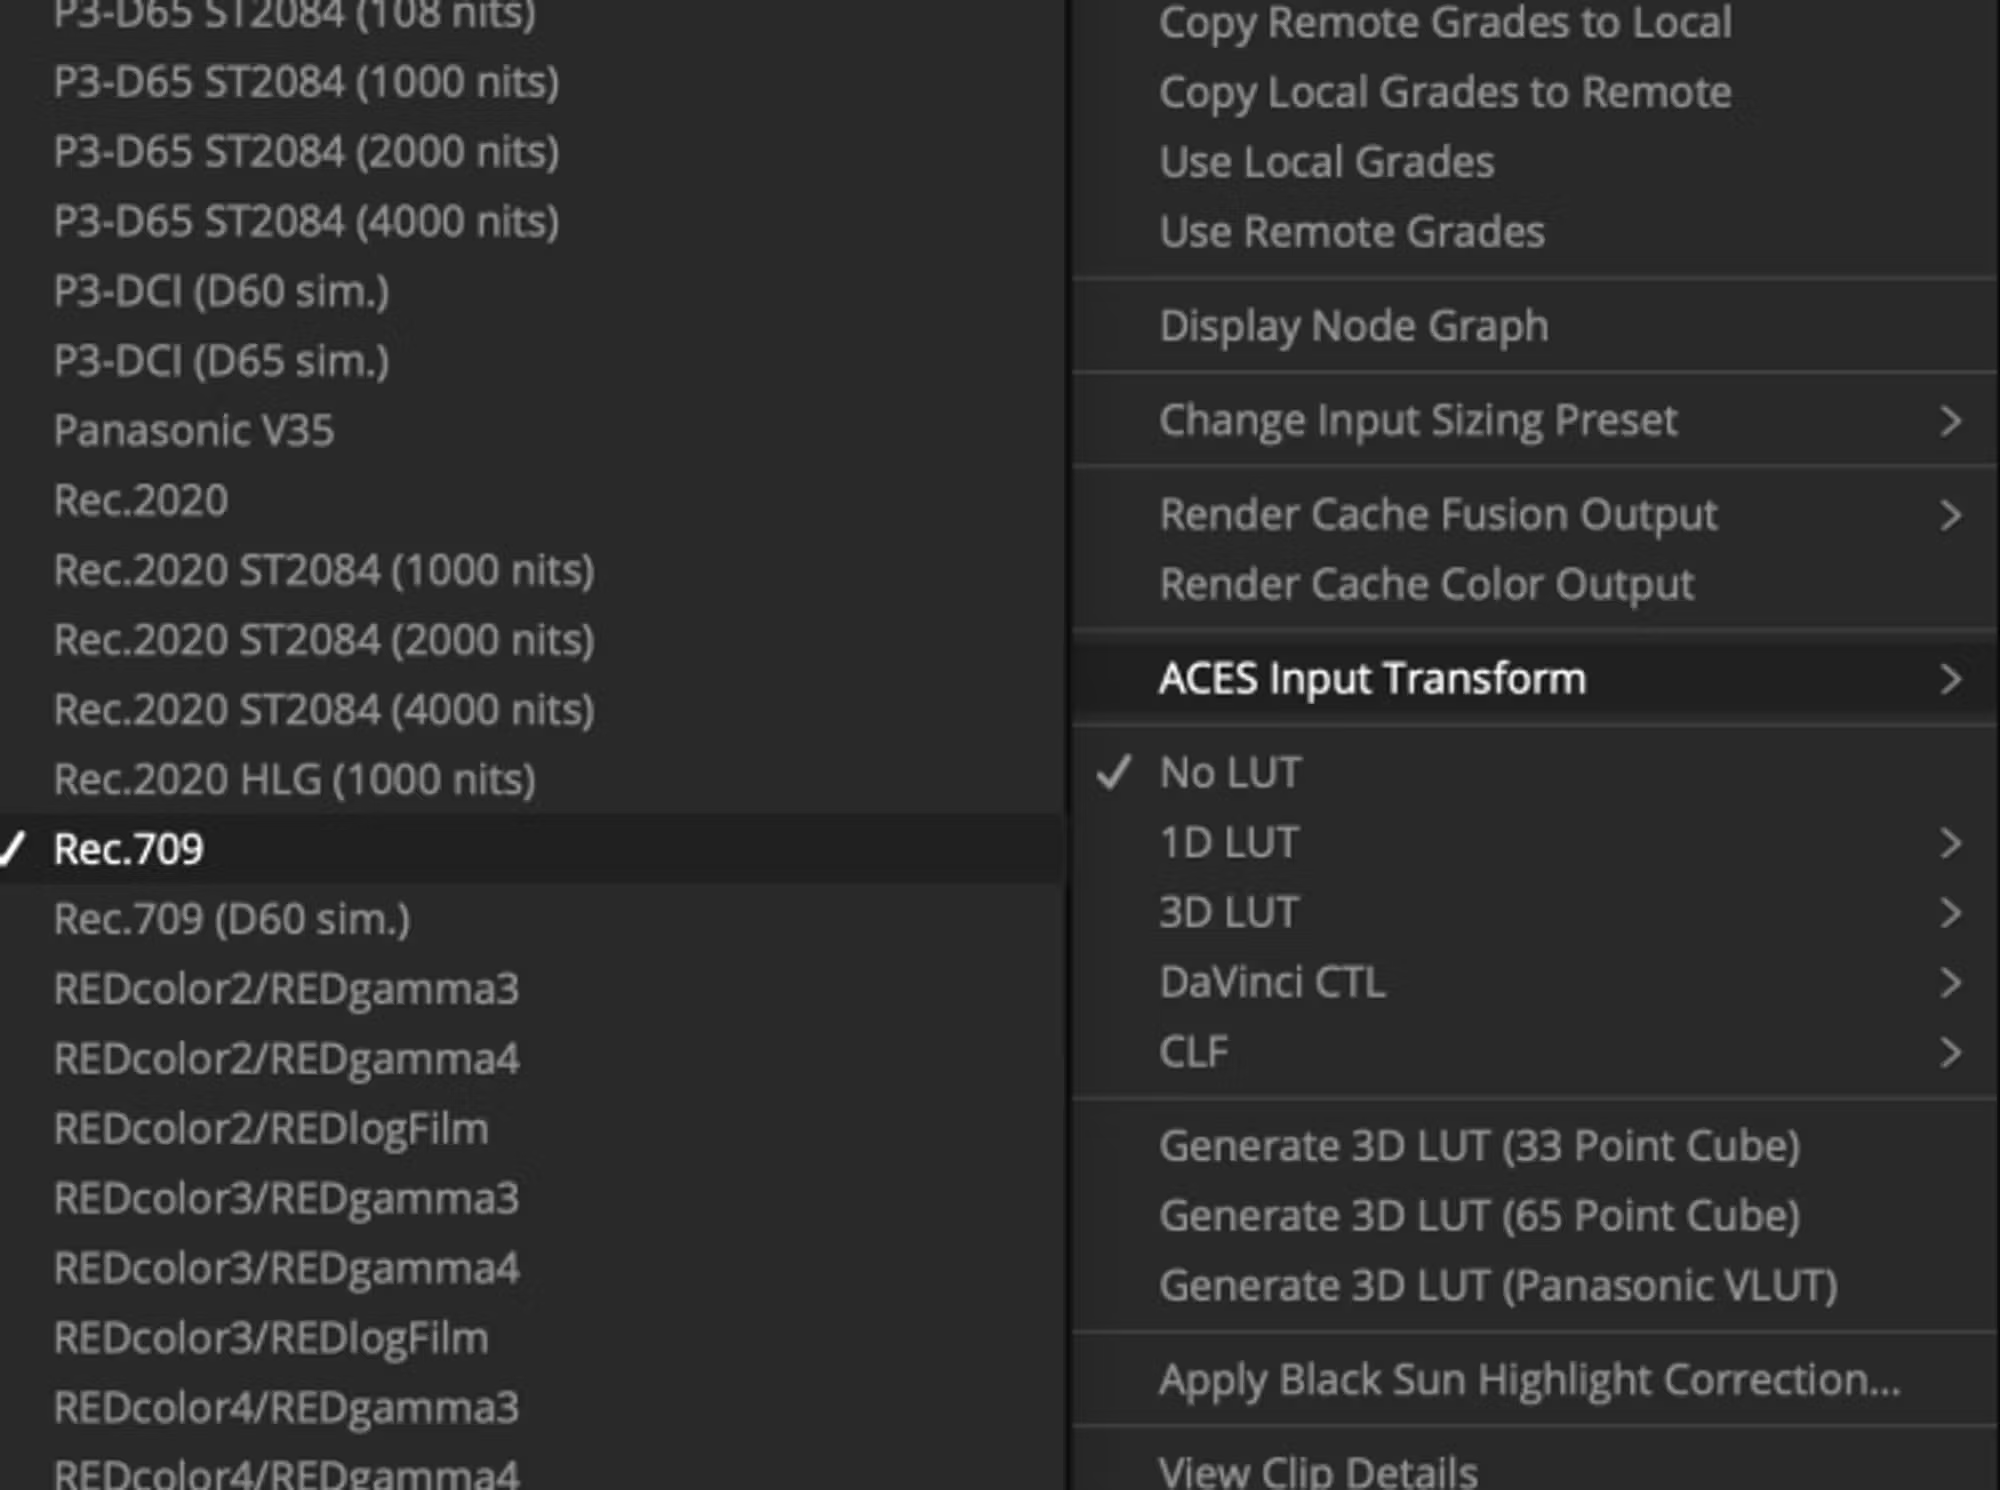
For example, Raw files from RED Dragon 6K S35 camera are automatically recognised and interpreted in ACES:
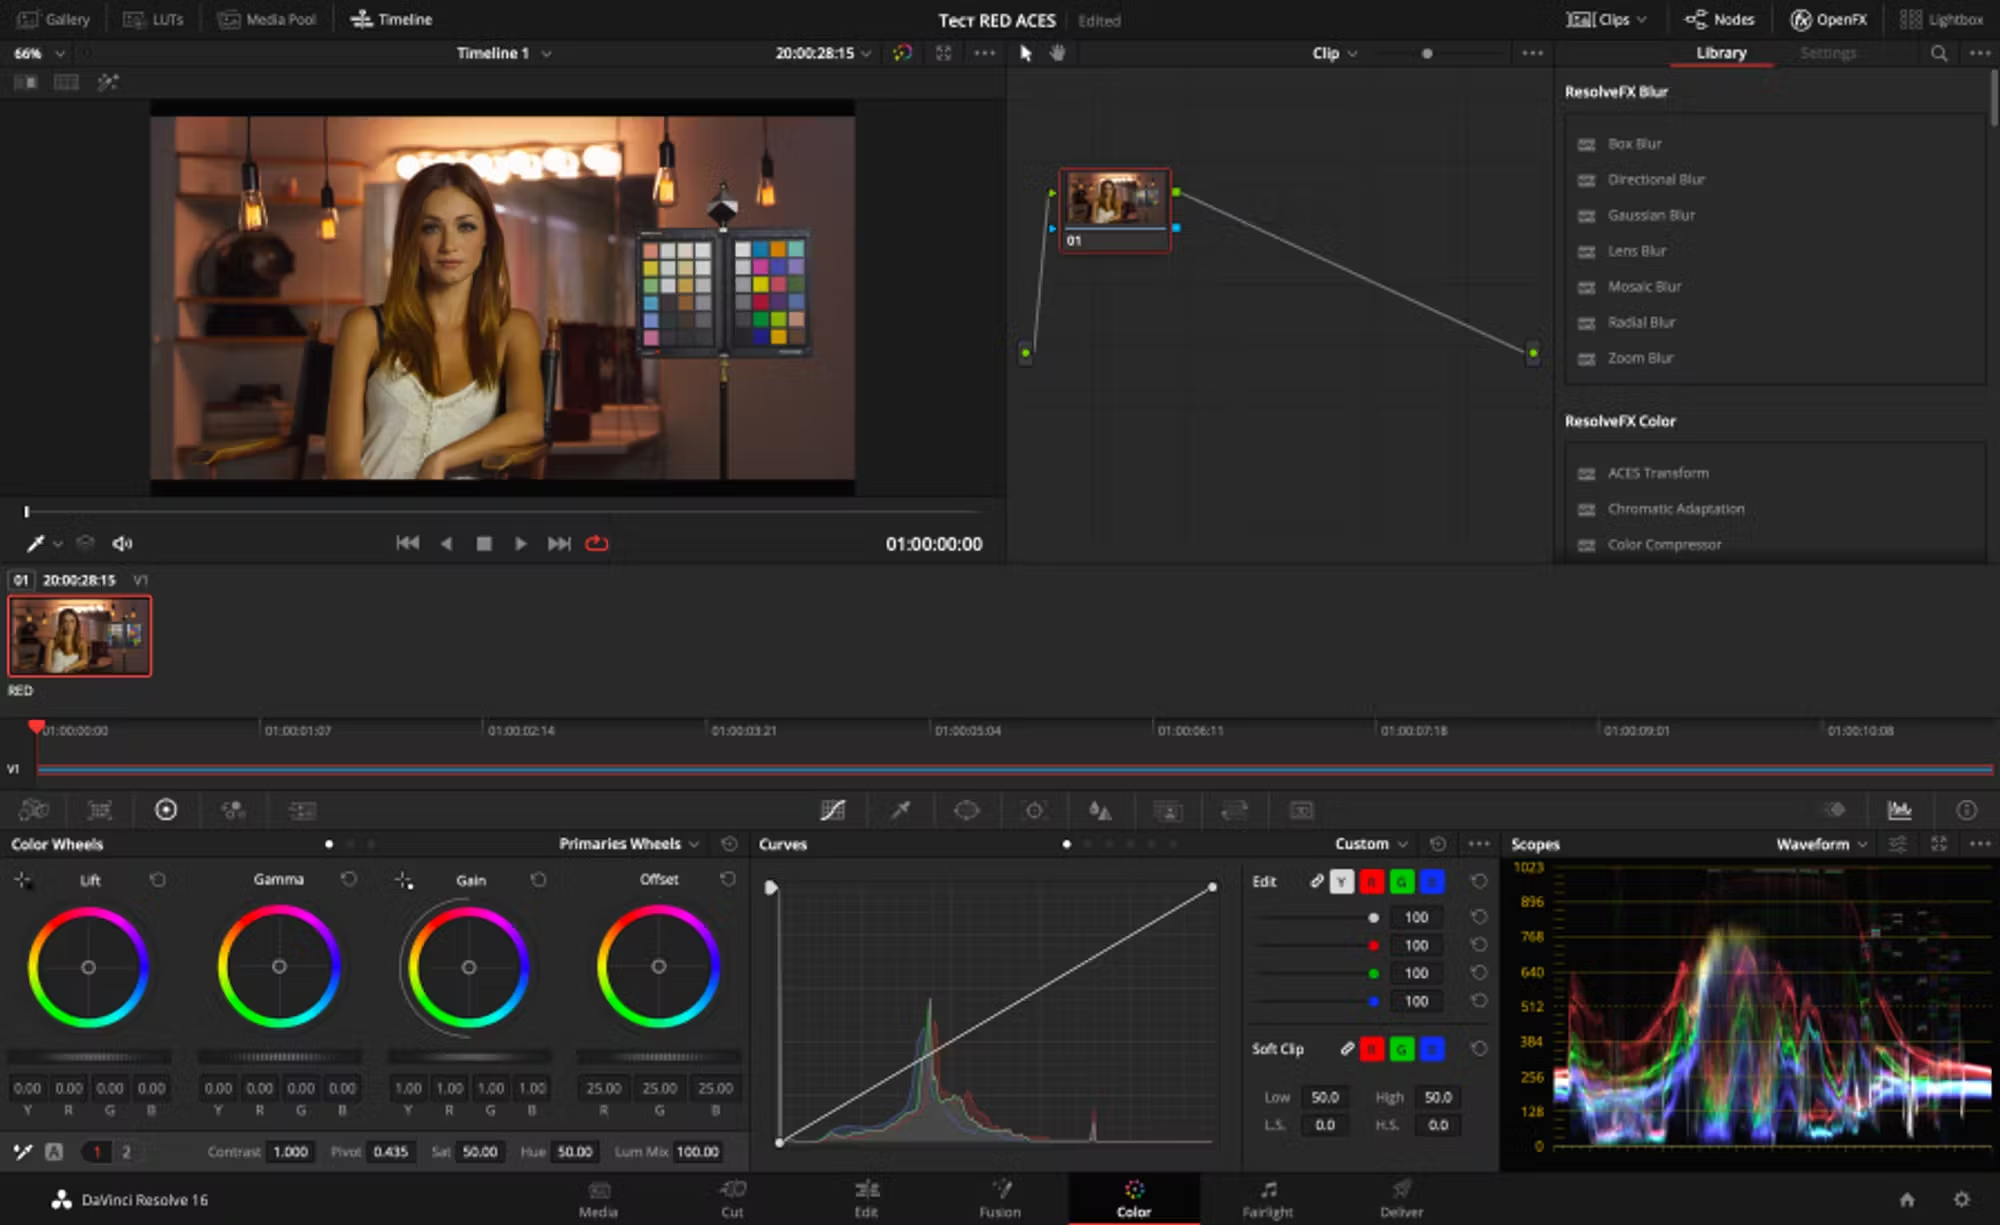
Setup is complete. Now you are ready to grade video in ACES. Export will be performed according to the project settings.
When working in ACES, be prepared for color wheels, curves and other DaVinci tools to work unfamiliar. For some colourists, this causes discomfort, while for others, it gives them more flexibility for image processing.
To use OFX plug-in Dehancer Pro, add it to the corresponding node and select ACEScct (AP1) in the Input parameter group.
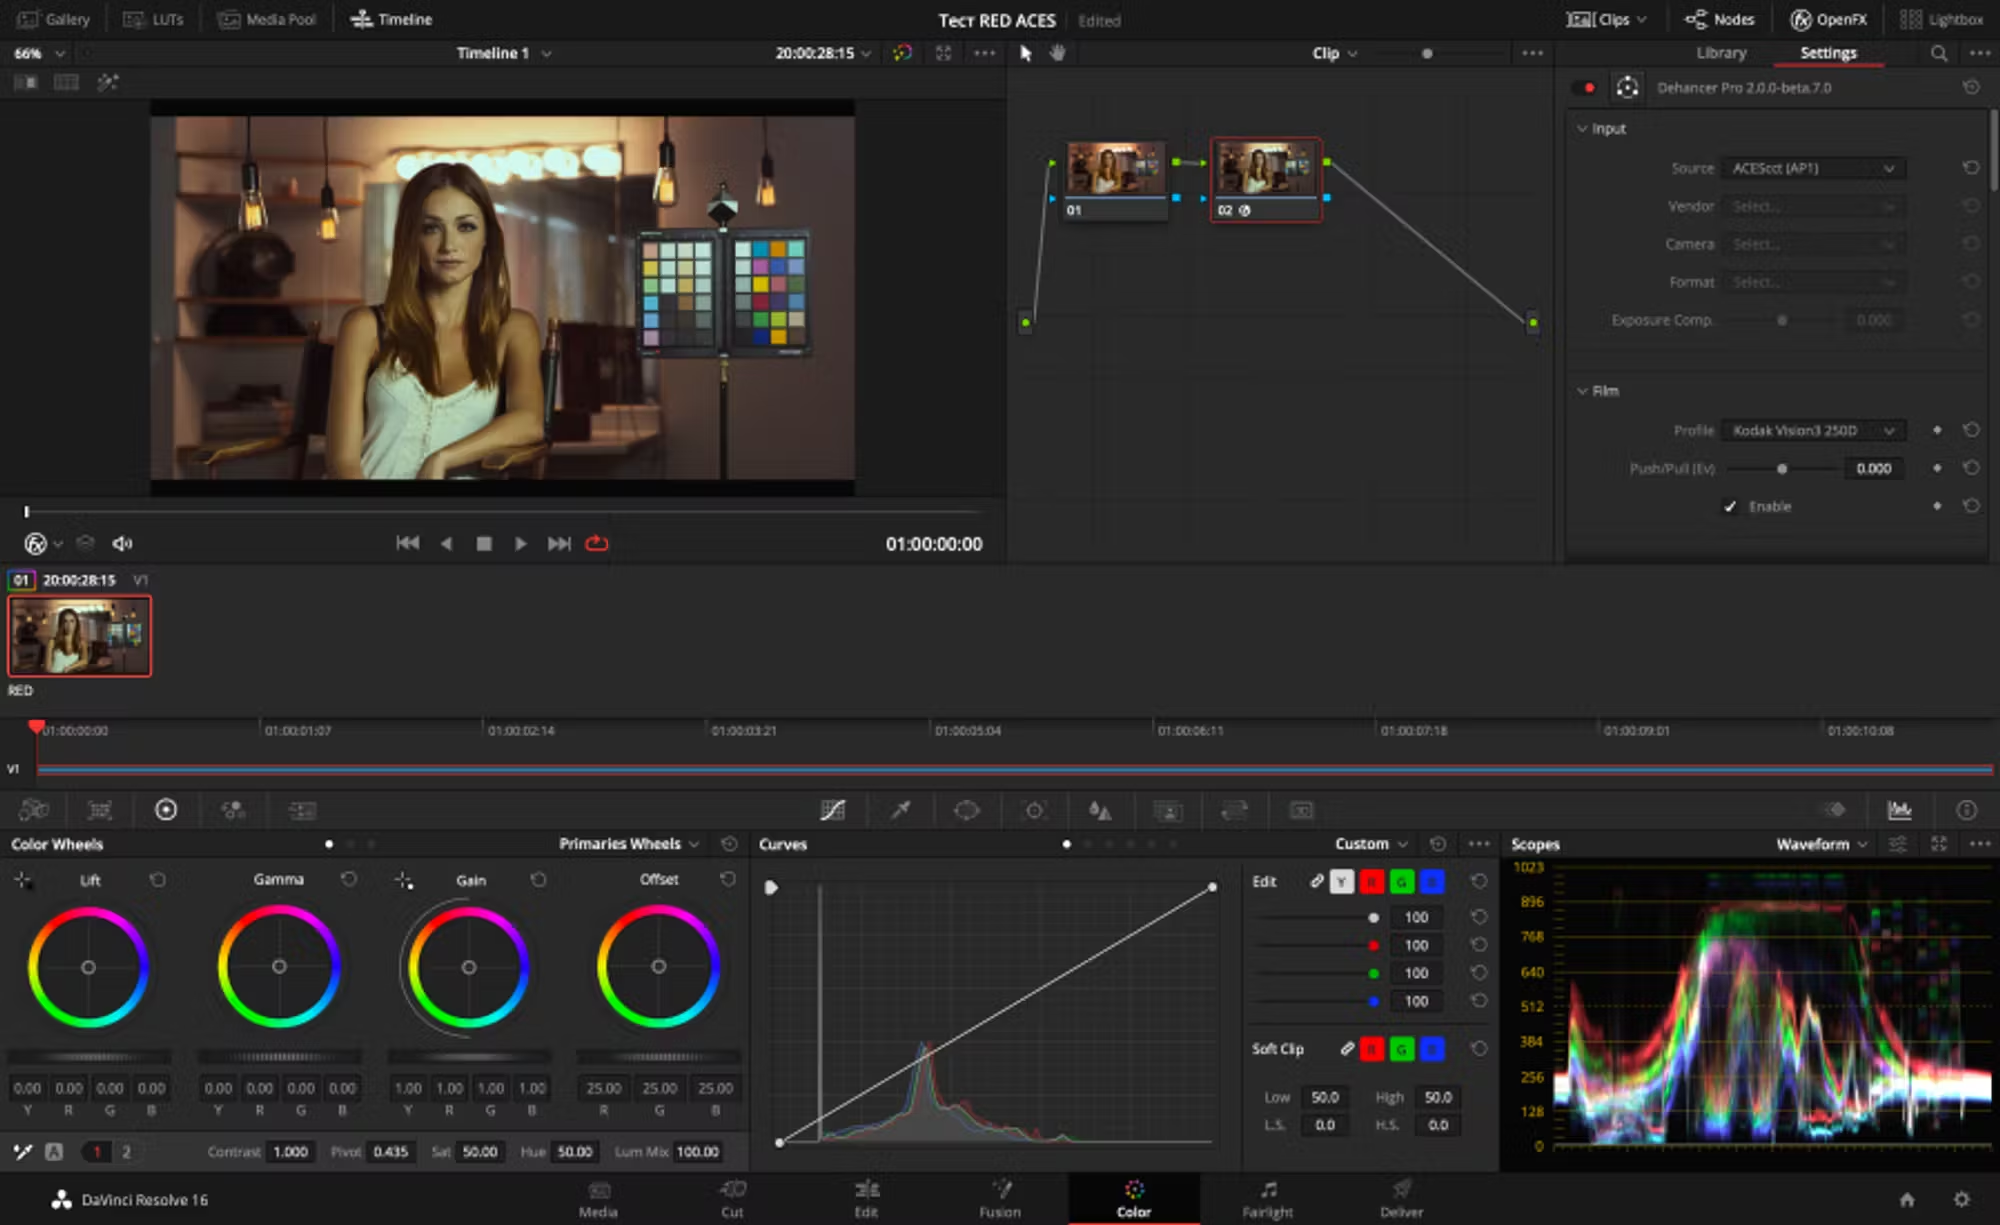
Now Dehancer works in ACES similar to the standard DaVinci color science YRGB, including film profile selection and other settings. However, there is some difference in fact – the character of different films is more pronounced, and all instruments work more smoothly and perceptually in ACES.
3.2 Rec.709 as an integral part of ACES pipeline
Despite all the advantages of using ACES as the complete workflow, some of DaVinci Resolve tools sometimes work better in Rec.709. It’s for example, qualifier, mask tracking, titles and alpha rendering, etc.
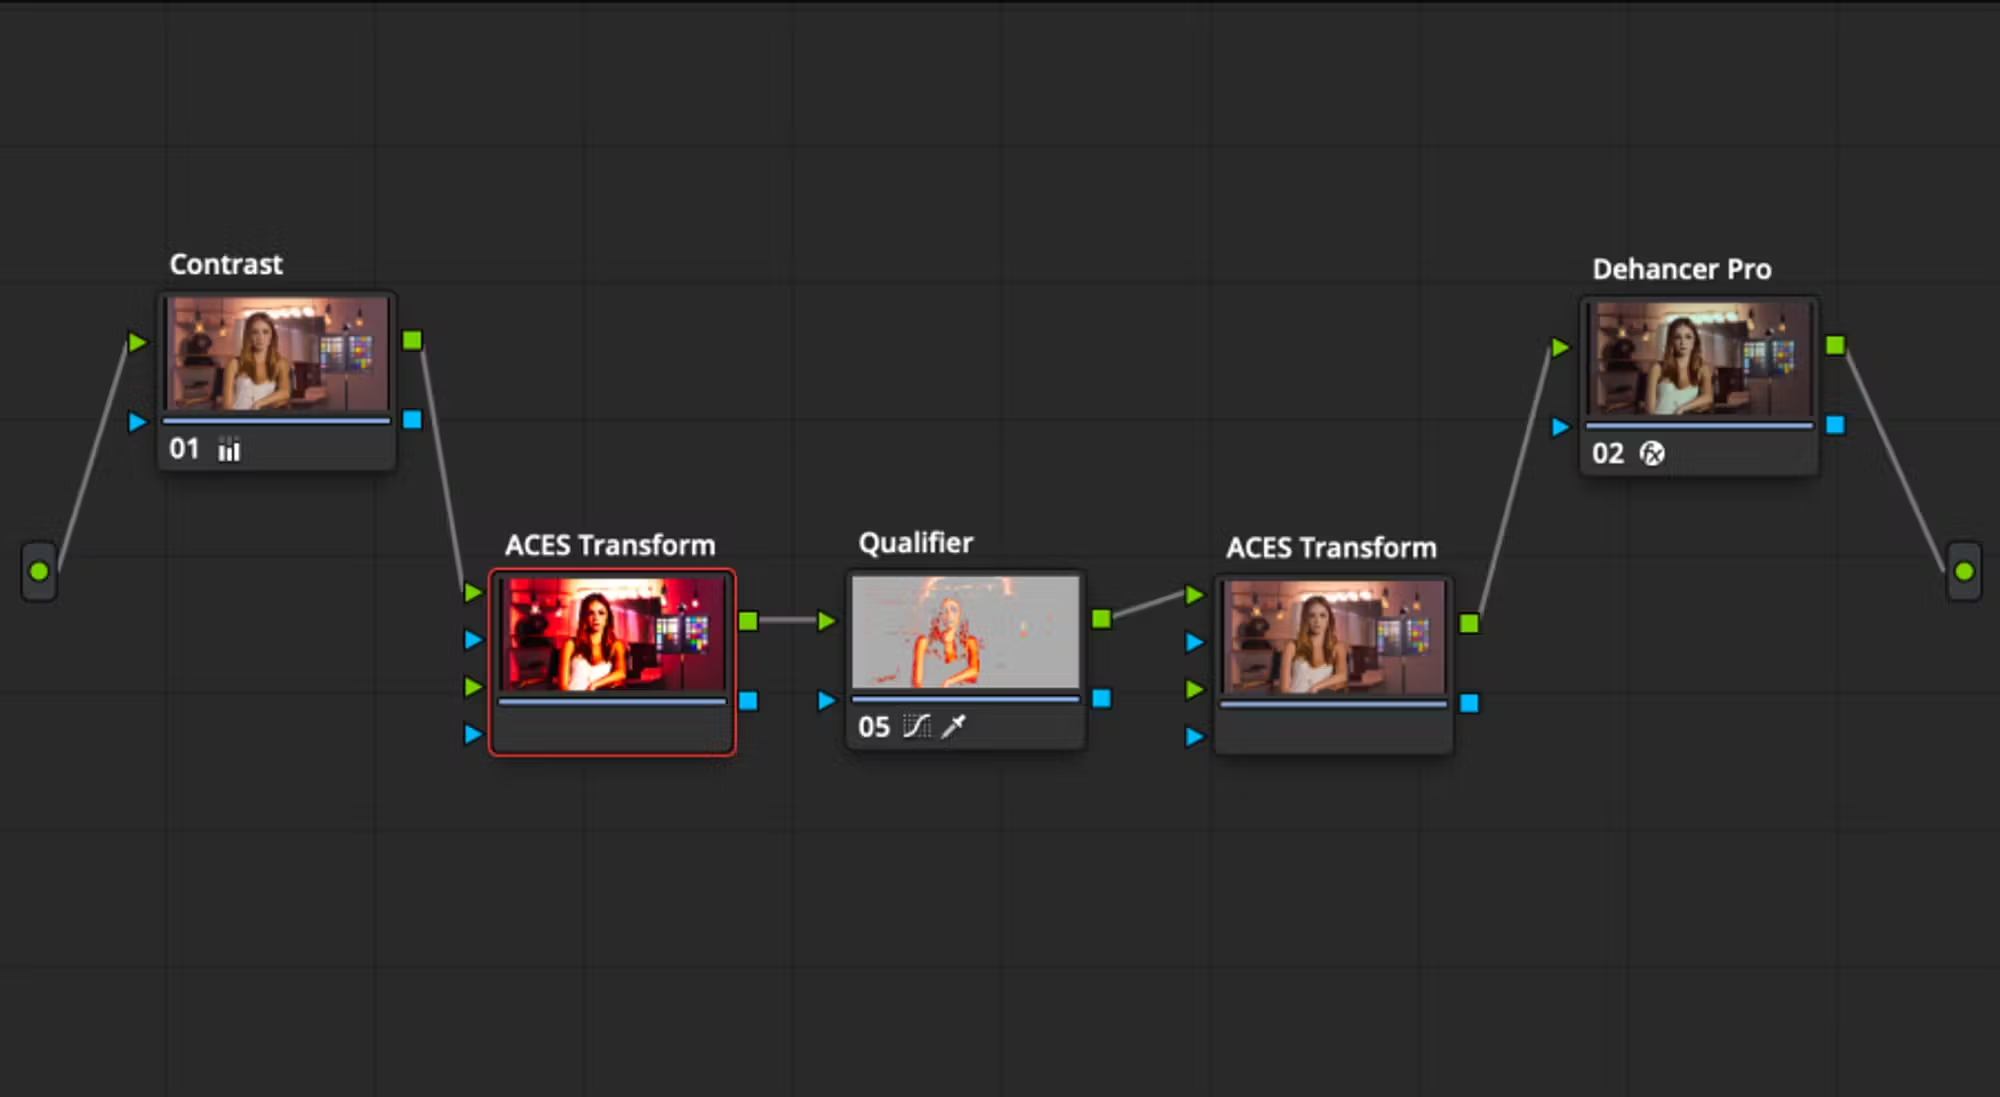
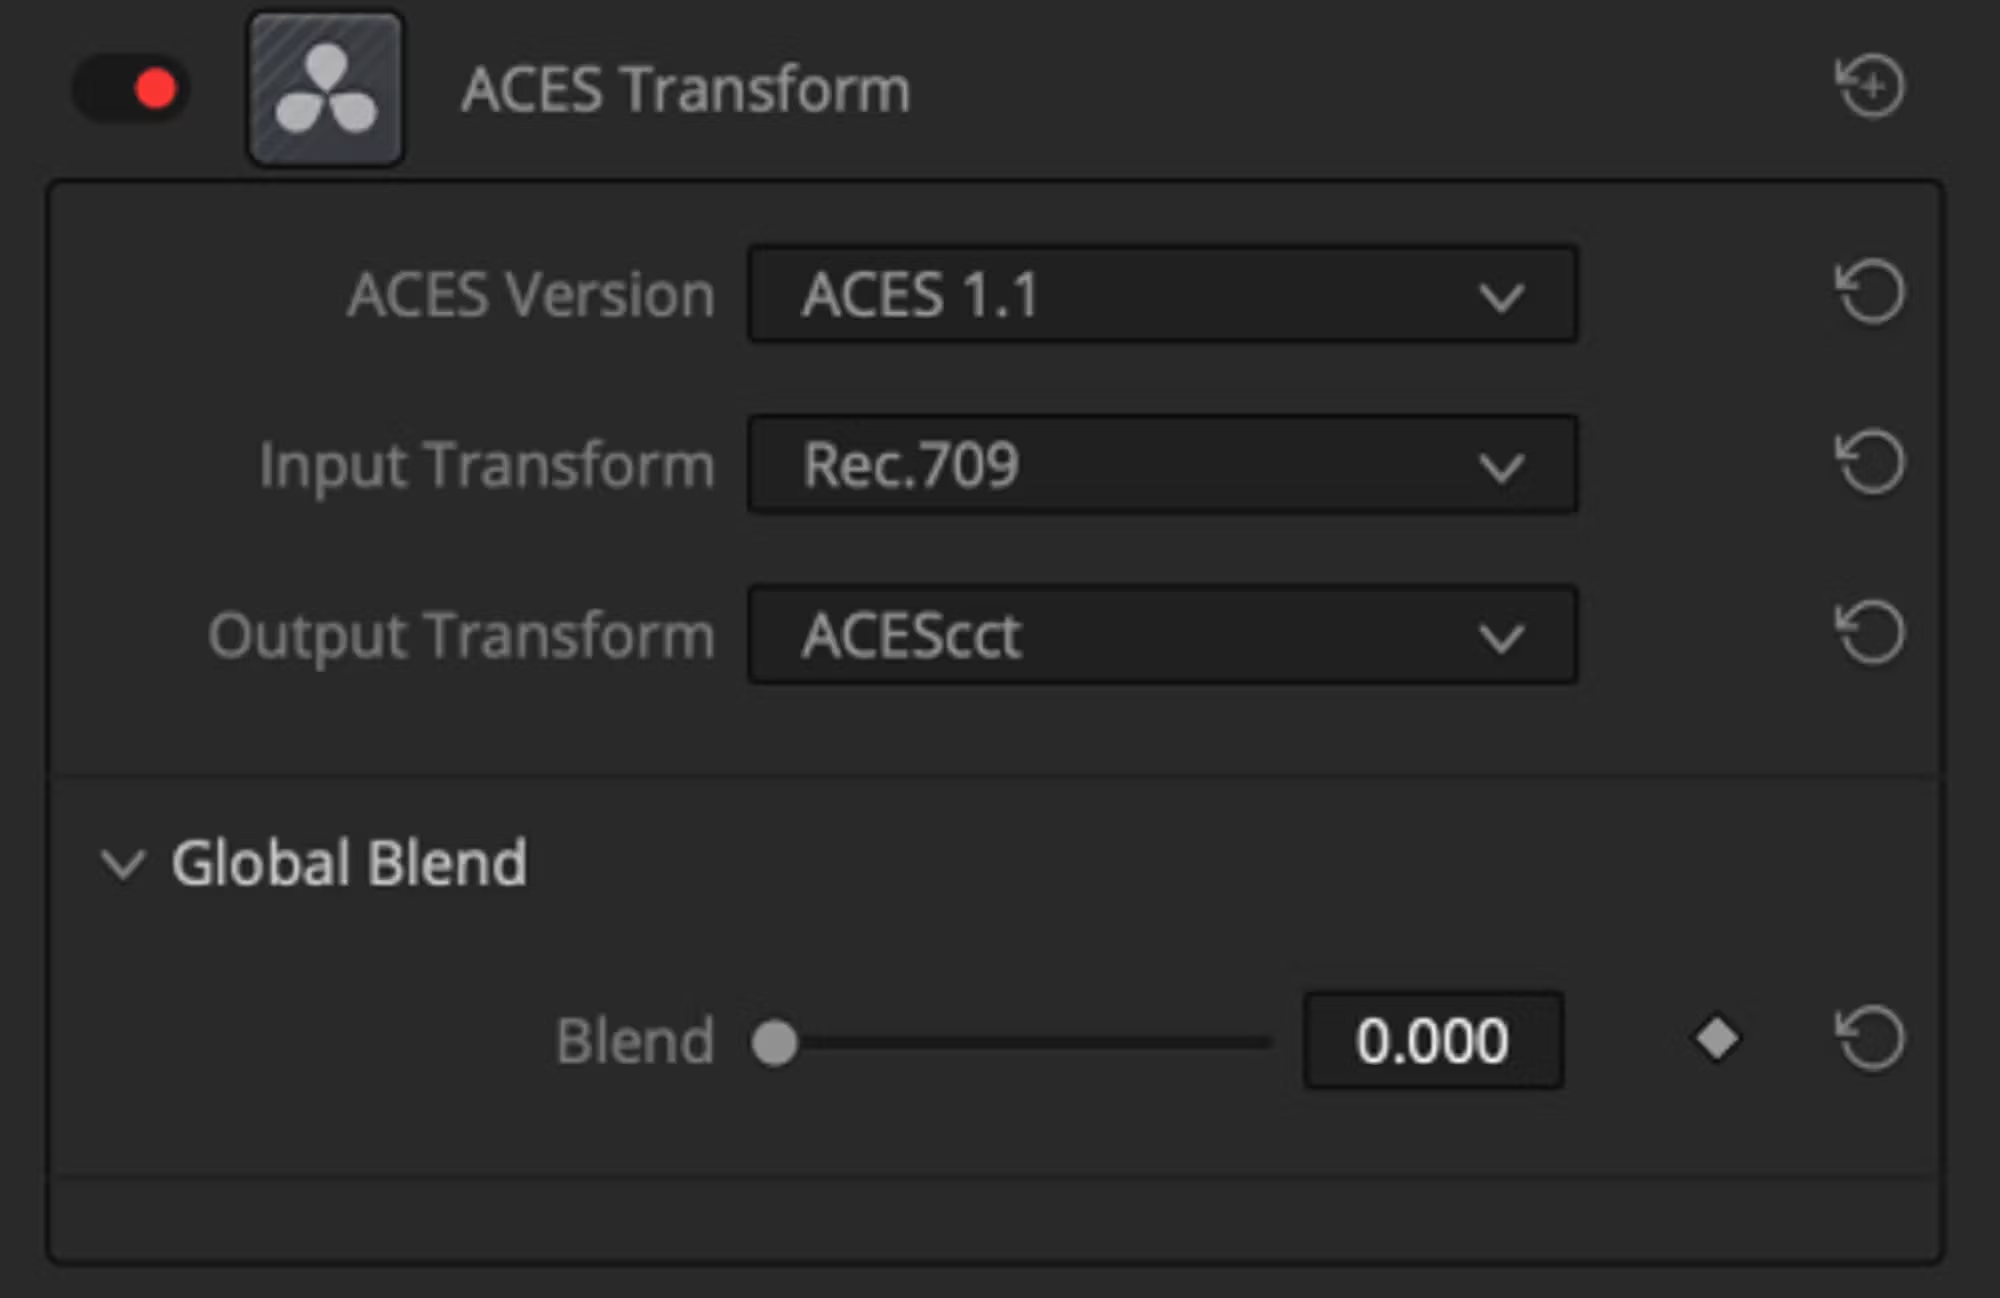
If you faced the necessity to use nodes in Rec.709, you can ‘wrap’ them with the following pair of space transformations:
ACES → Rec.709 → ACES

Please note that the dedicated ACES Transform plugin (built in DaVinci) is used here. Basic CST node is clipping any information out of the boundaries. There is no sense in using basic Color Space Transform for this task, as it will cut any source information that lies outside the target space (in this case Rec.709). ACES Transform doesn’t allow clipping, it compresses and decompresses tonal range properly.

In the given example, the Contrast node works in ACES, the Qualifier node is in Rec. 709, the Dehancer Pro node is back in ACES.
3.3 ACES as an integral part of DaVinci YRGB pipeline
If your Pipeline is based on DaVinci YRGB main color science with timeline in Rec.709, but occasionally you need specific ACES functionality, you can use the inversed transformation:
Rec.709 → ACES → Rec.709
Project settings in this case may be looking like this:
Node chain example with partial ACES pipeline:

In this case Face Mask node works in DaVinci YRGB / Rec.709 space, while Dehancer Pro node benefits from ACES advanced math.
4. Basic ACES setup:
- Set your Project Color Management parameters for ACEScct color science.
- Place your clip on the timeline. If DaVinci Resolve did not automatically detect the input file format of the clip, right-click on the source in Media Bin and set the ACES Input Transform. If this parameter isn’t visible, it means that DaVinci has already automatically detected the clip metadata (this basically happens with RAW files).
- Add the Dehancer Pro OFX plug-in node and select ACEScct (AP1) in the Input parameter group. Now you are ready to grade video in ACES. Export will be performed according to the Project Settings.
💡 Although all corrections work smoother and are more perceptual in ACES, some of the effects may behave in an unusual manner (such as the Halation and Bloom masks, etc). This pipeline has a lot of specifics that you'll have to get used to.