
Film Emulation & Compositing Tutorial with Dehancer (by Media Division)
Using DaVinci Resolve, Adobe After Effects, Photoshop, and Dehancer, we’ll modify and enhance scenes from The Silence of the Lambs to achieve a professional cinematic look. You’ll learn how to integrate green screen footage, match lighting, and apply film emulation for an authentic aesthetic. Whether you're a beginner or an experienced filmmaker, this guide will help you refine your workflow and create visually stunning results. Let’s get started!
Step 1: Preparing the Wide-Angle Talkie Setup
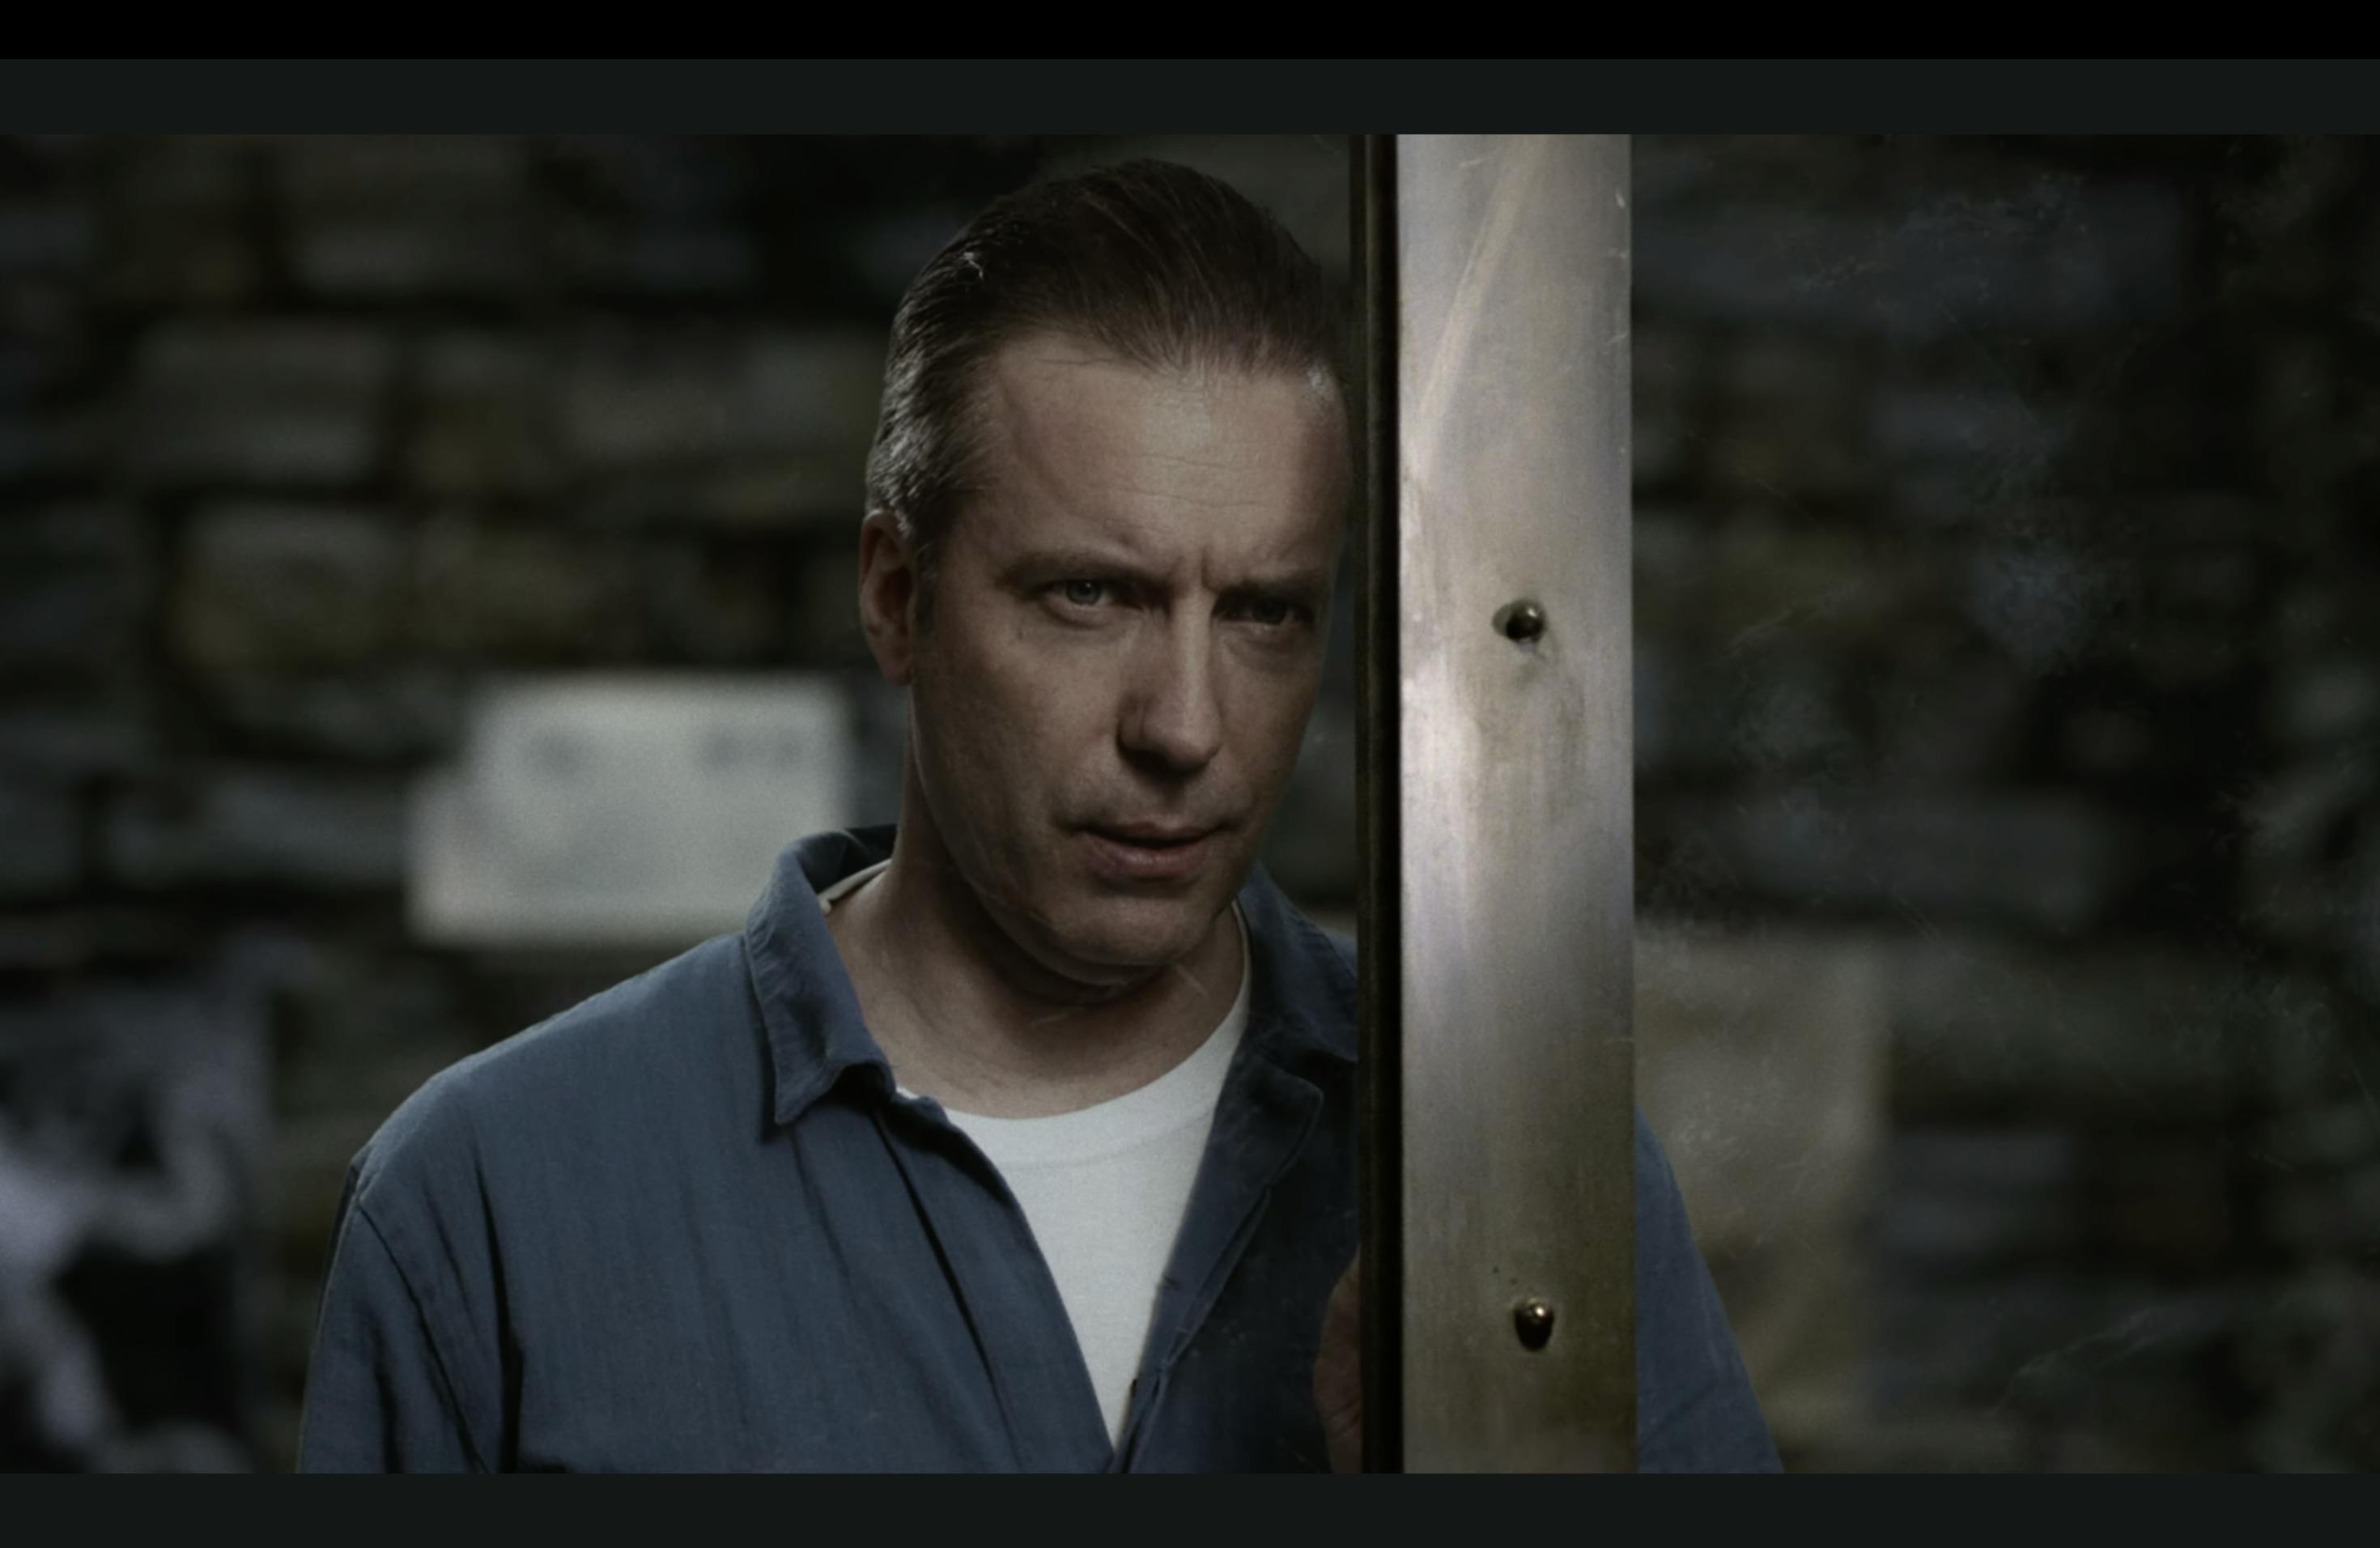
Let's start with the simpler one, the wide-angle talkie setup. We are going to use this original scene from the movie, which has the benefit that you have different lighting situations that you can use for different scenes.
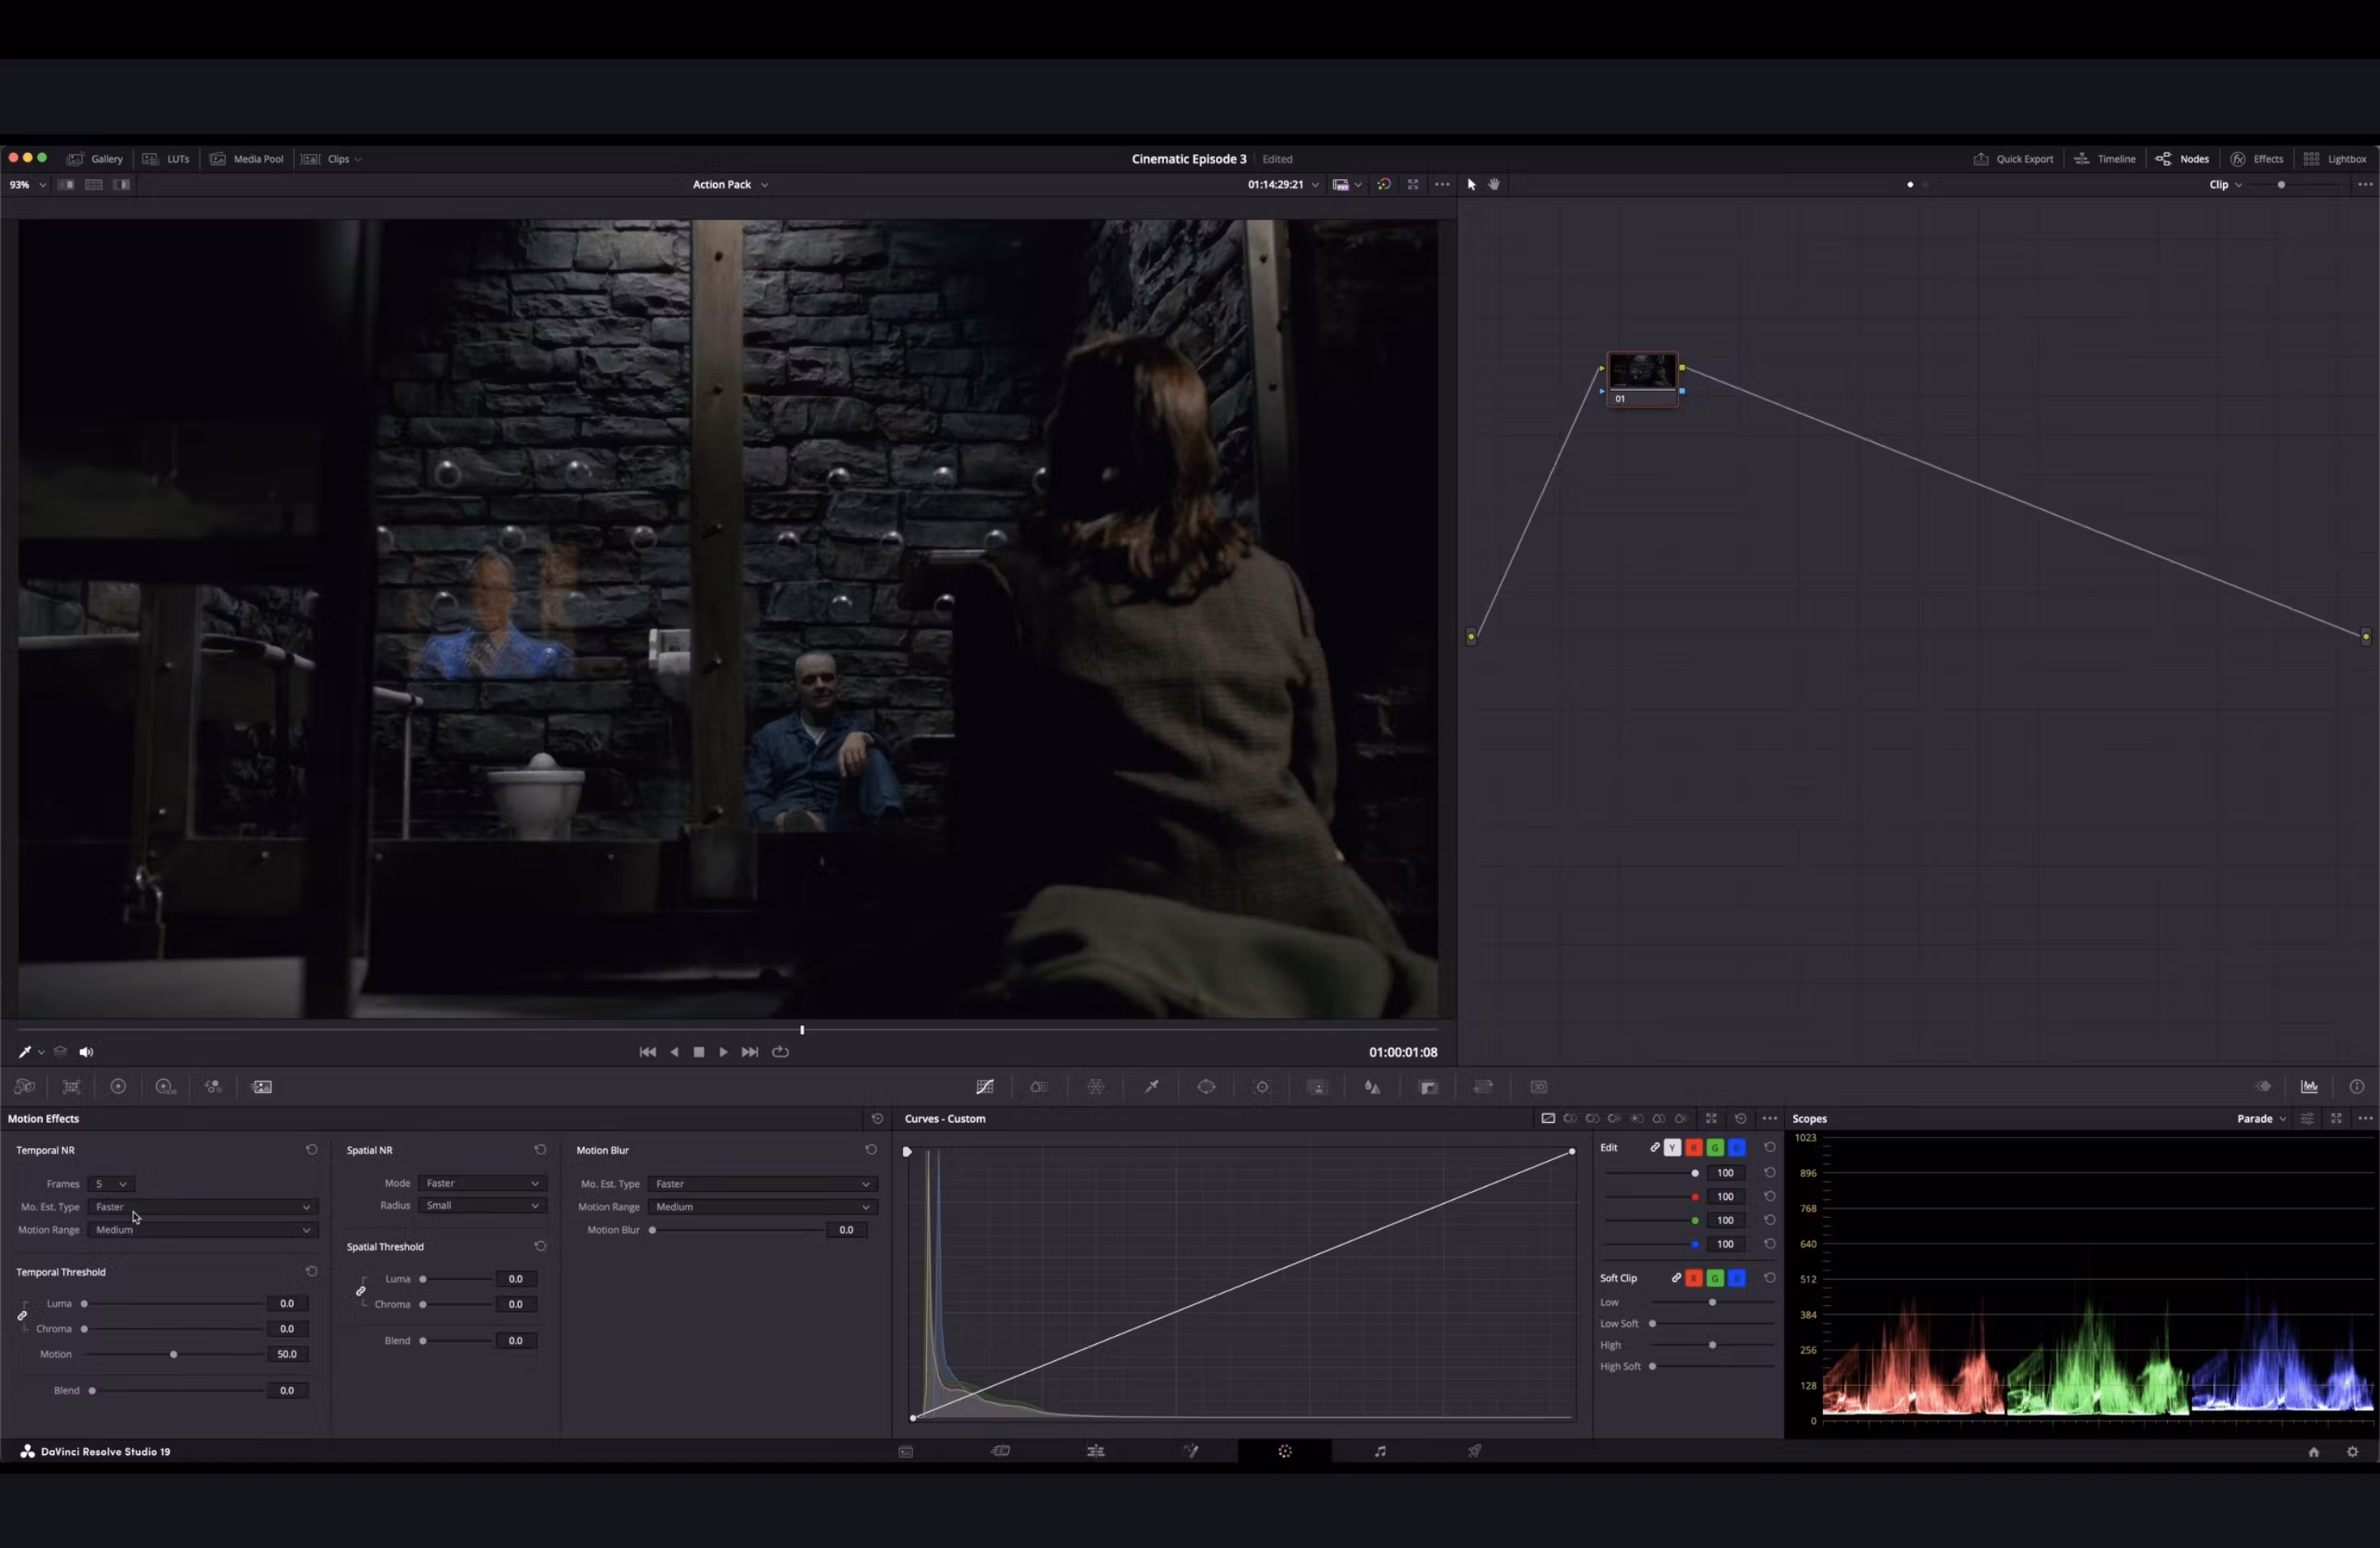
- Take the original scene and reduce grain in Resolve using temporal noise reduction.
- Export a frame as a PNG file and import it into Photoshop.
- Use generator fill to edit out Lector and Starling, replacing the covered elements using conventional stamping and extensions.
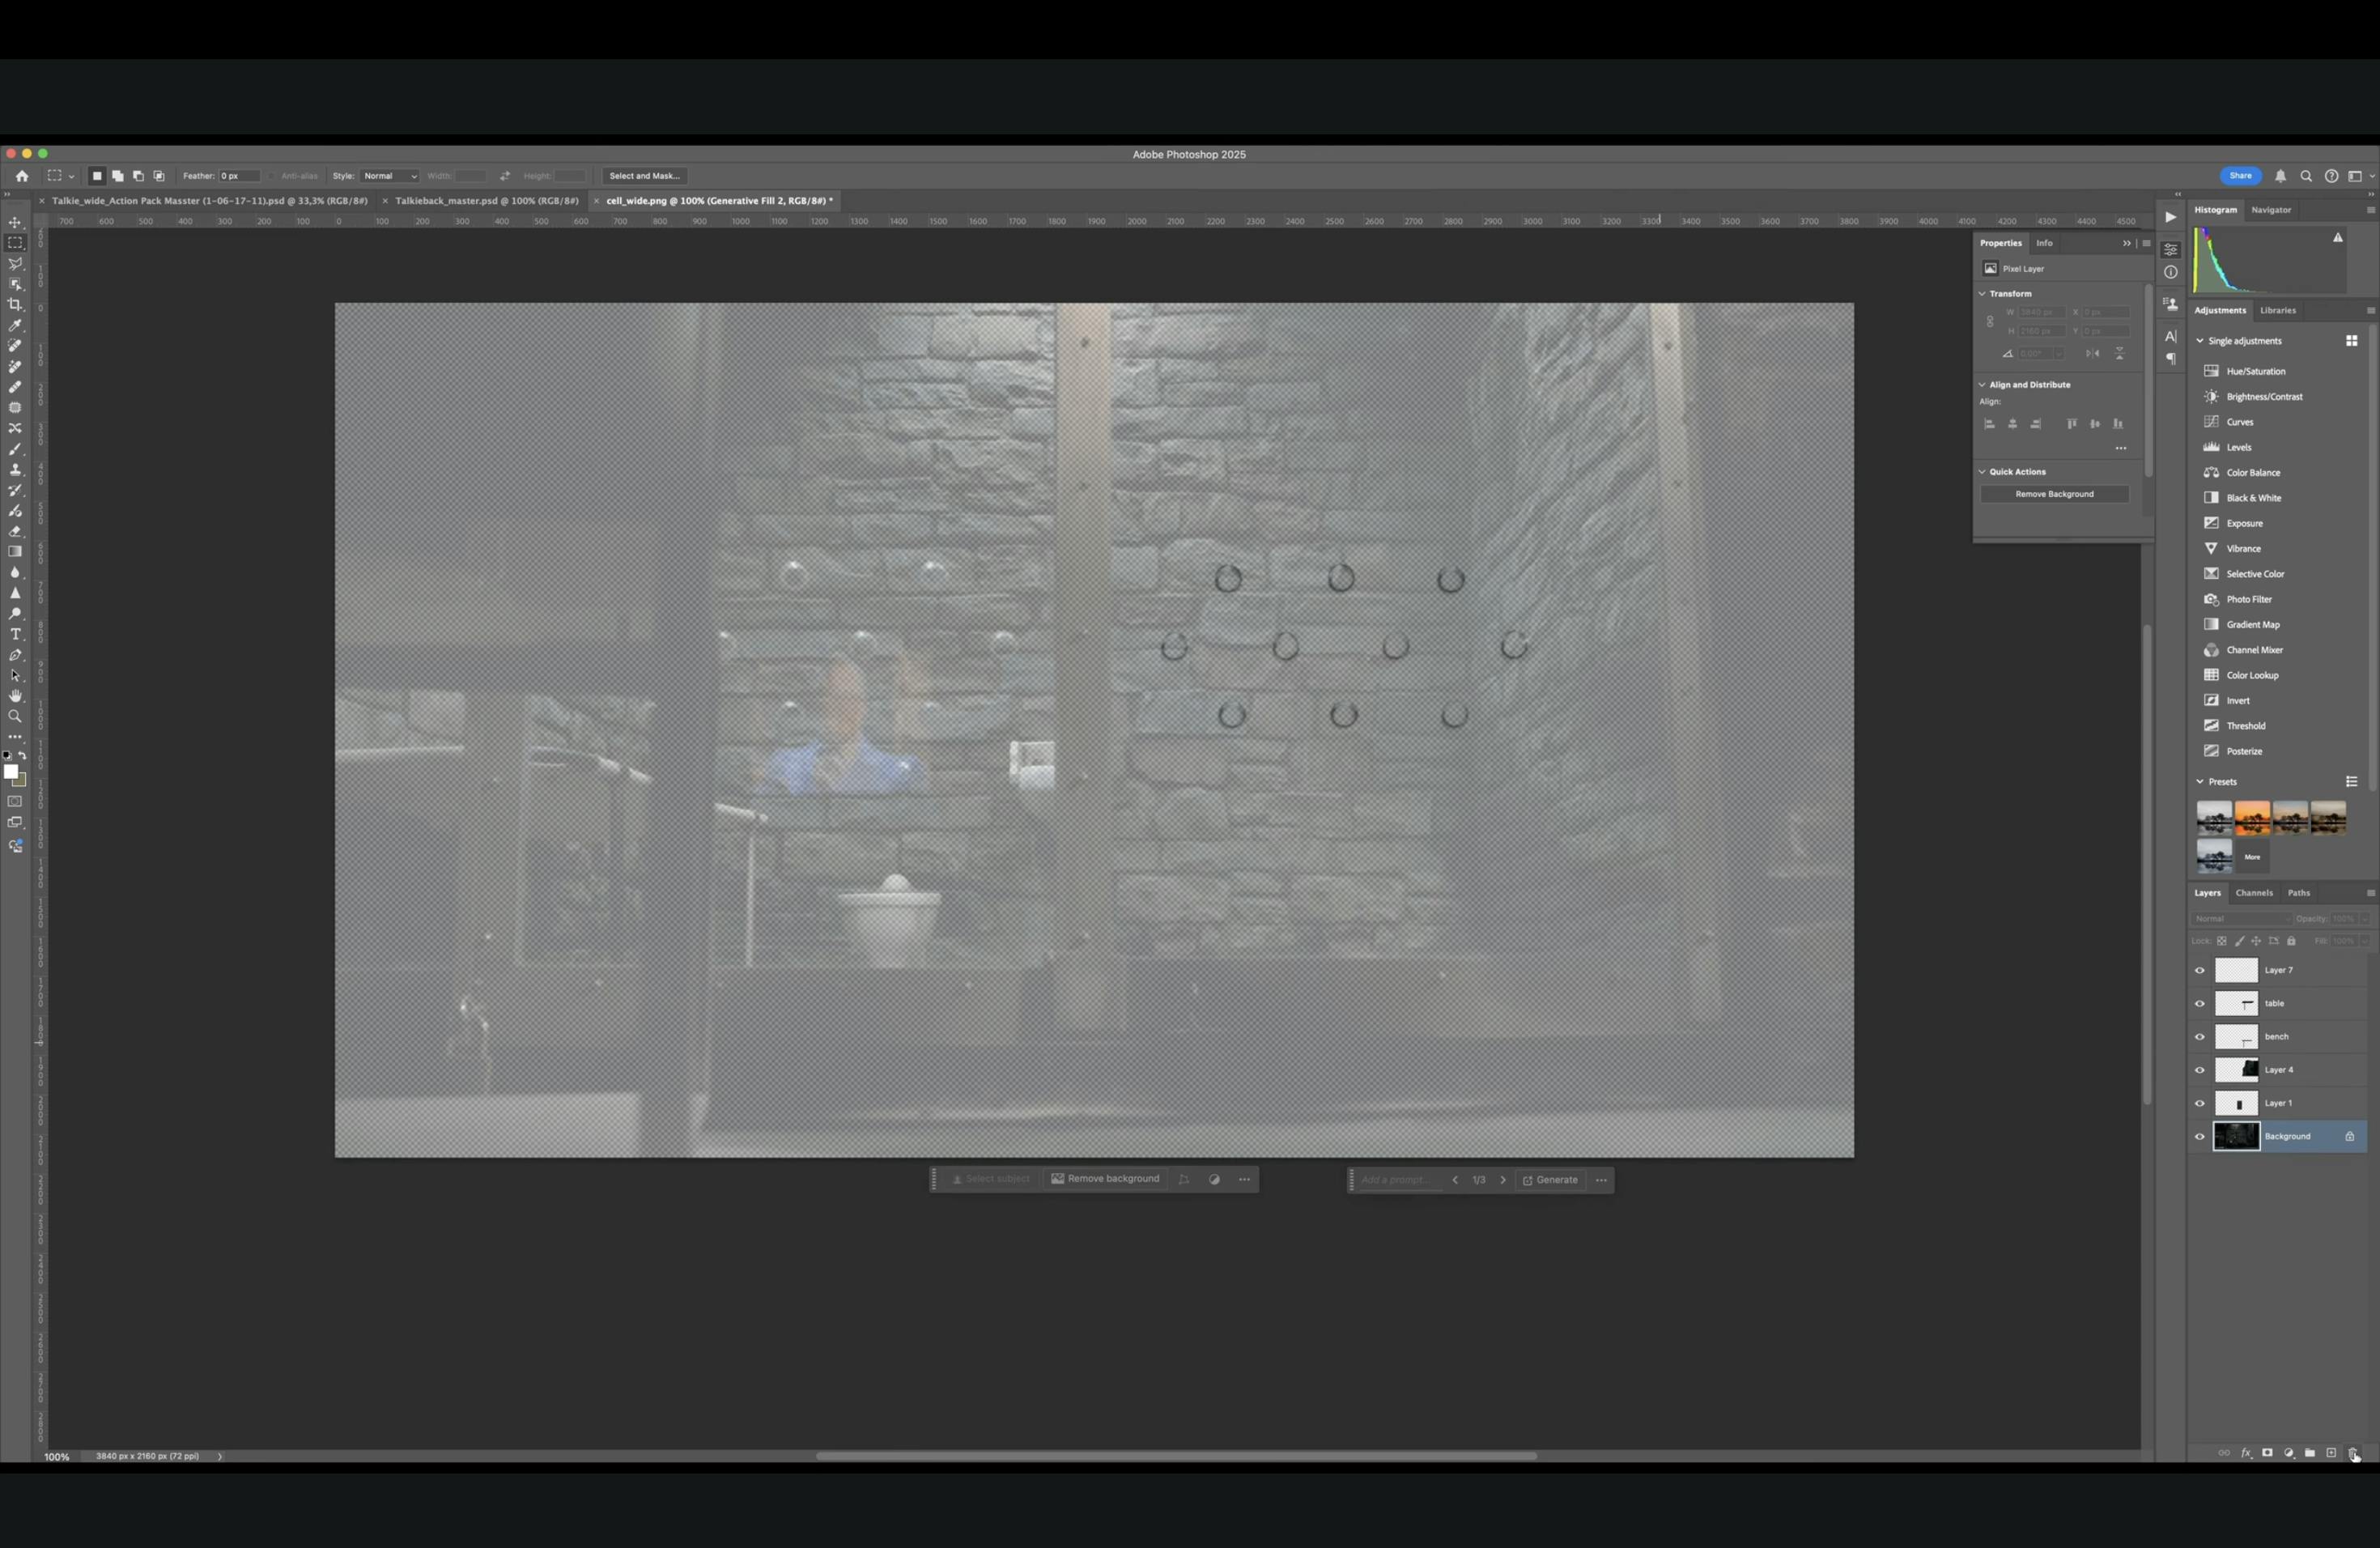
Step 2: Editing the Scene in Photoshop
- Remove air holes and TV reflection.
- Export the whole scene without the air holes as a PNG.
- Export air holes, bench, and table separately with an alpha channel to maintain transparency.
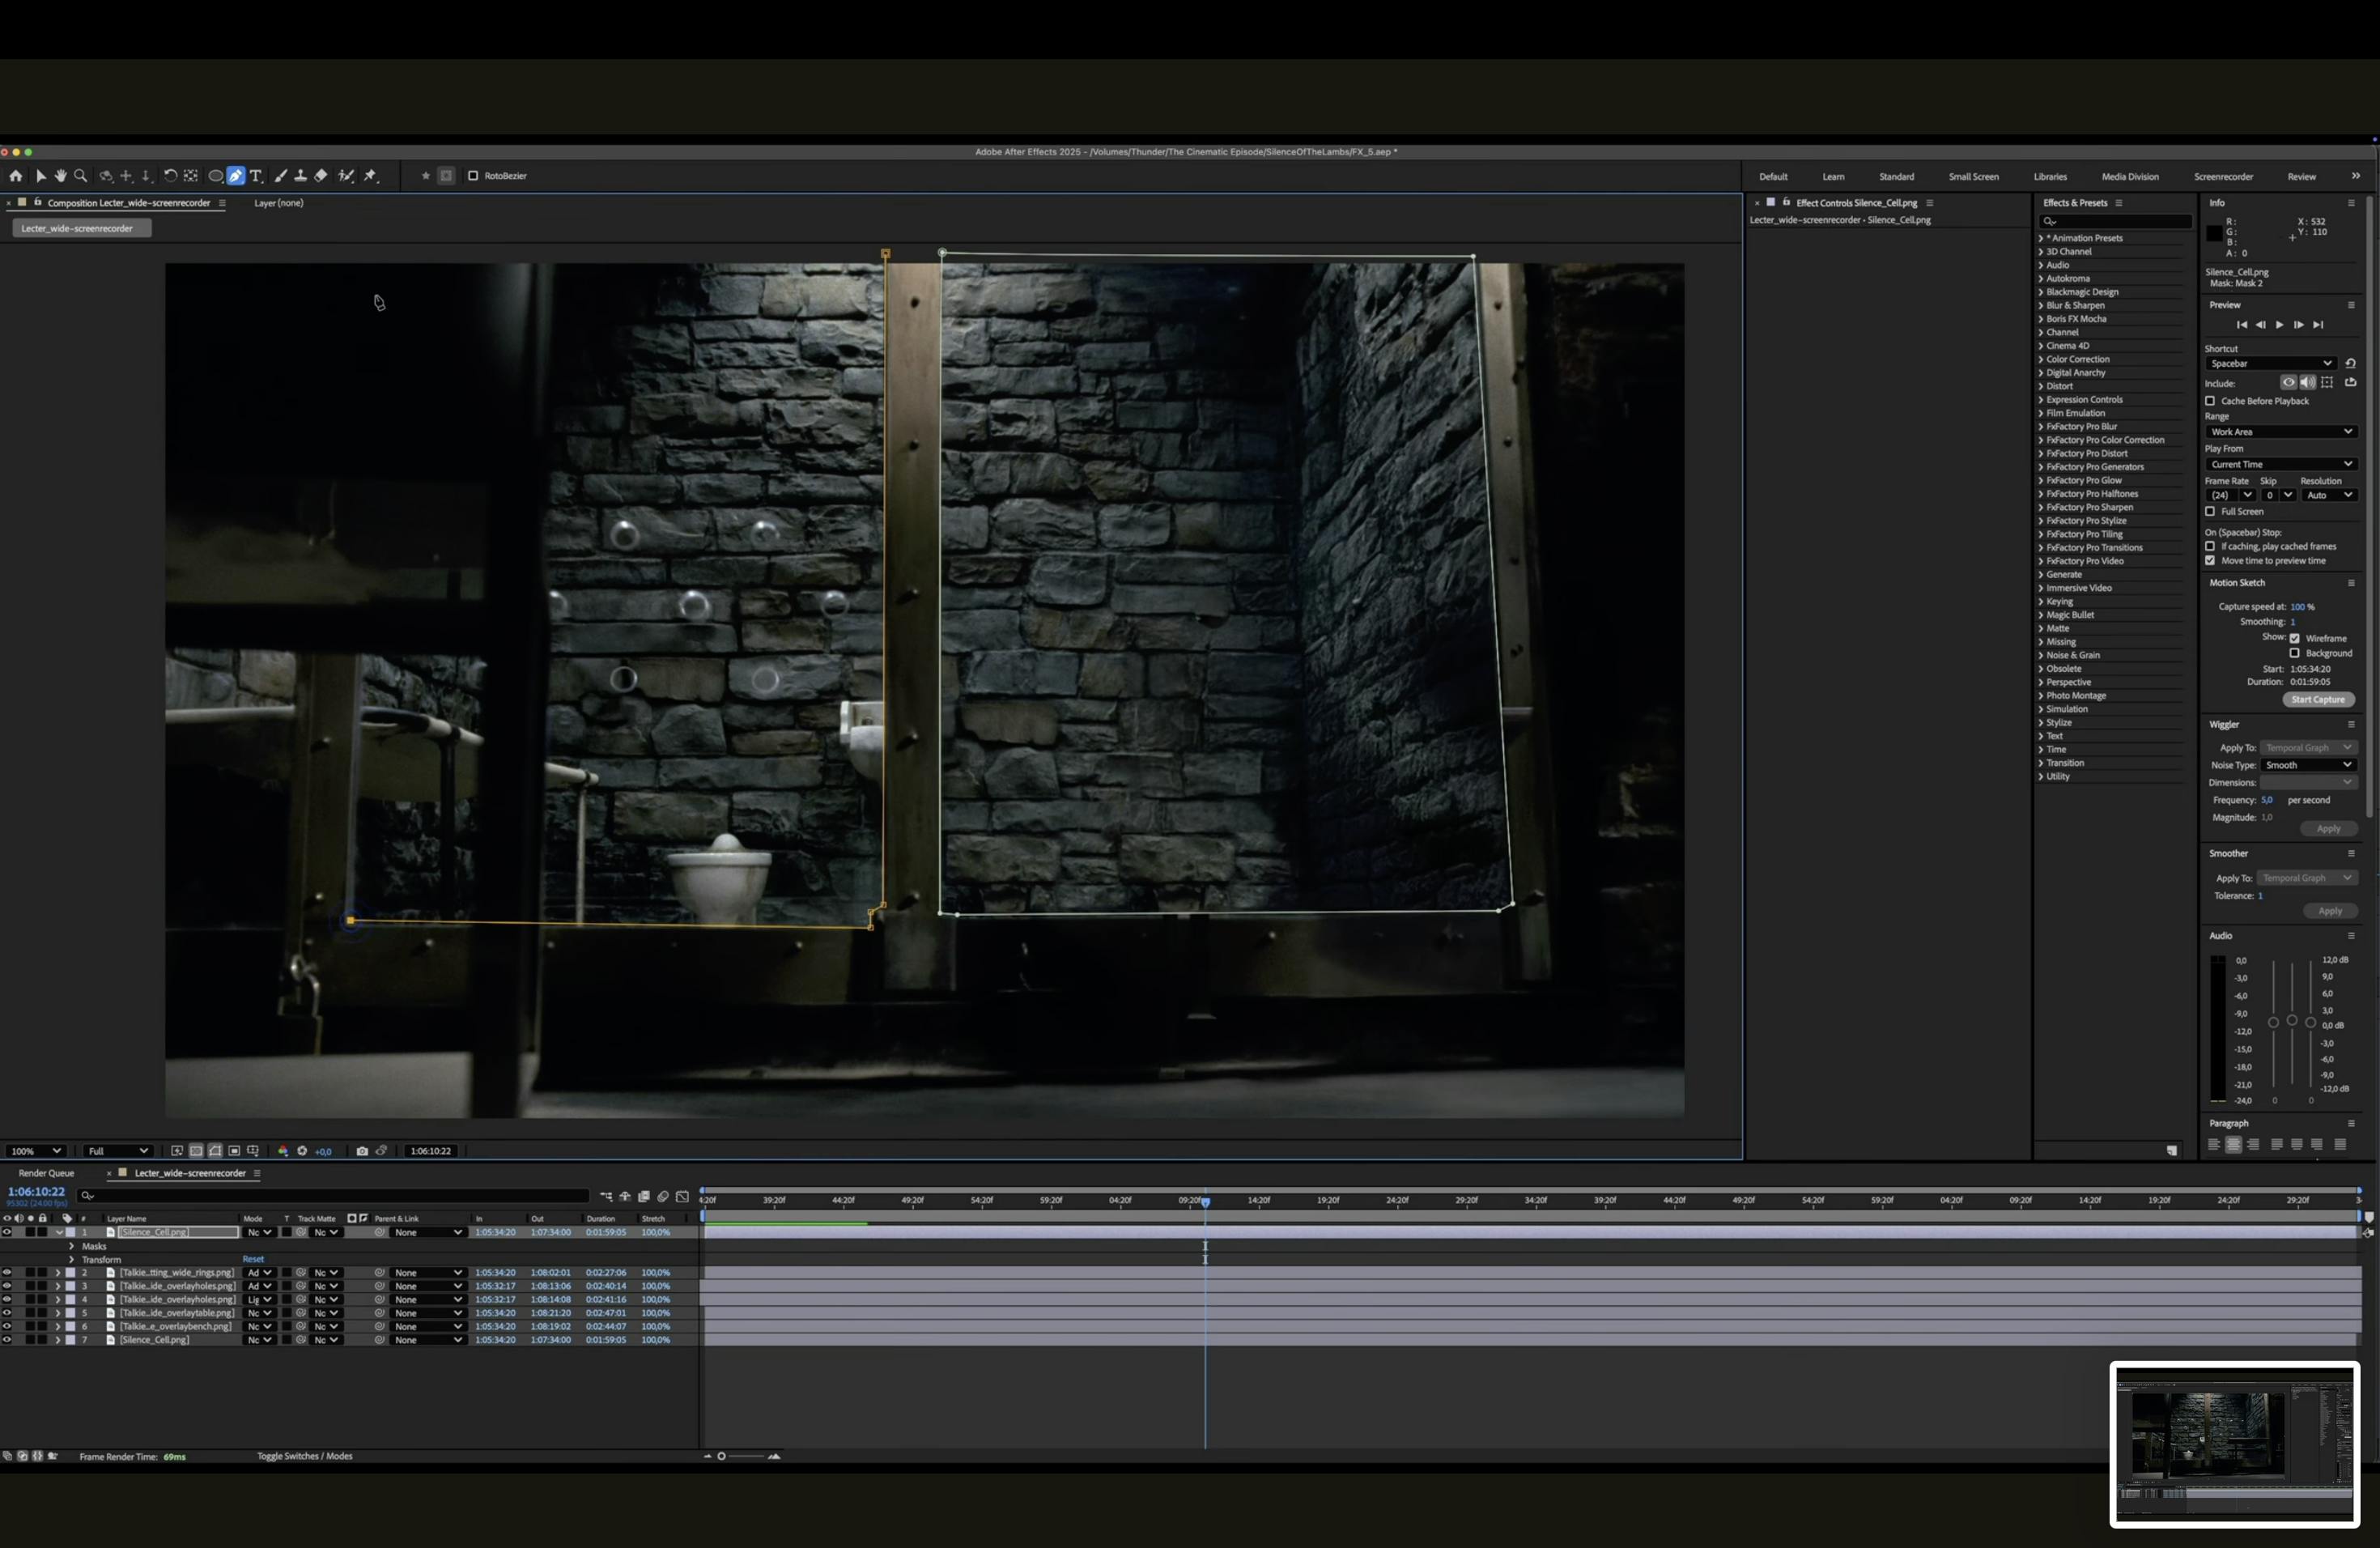
Step 3: Compositing in After Effects
- Import PNGs into After Effects.
- Duplicate the backdrop and place it in the foreground.
- Mask out the window and TV set, feathering the masks to match object blurriness.
- Build a new TV reflection by mirroring the composition, adding a distorted video, and masking holes to fit non-reflective areas.
- Replace the video in the action pack comp by dropping your own footage.
Step 4: Shooting the Inserted Character (Lecter Replacement)
- Choose and prepare the costume.
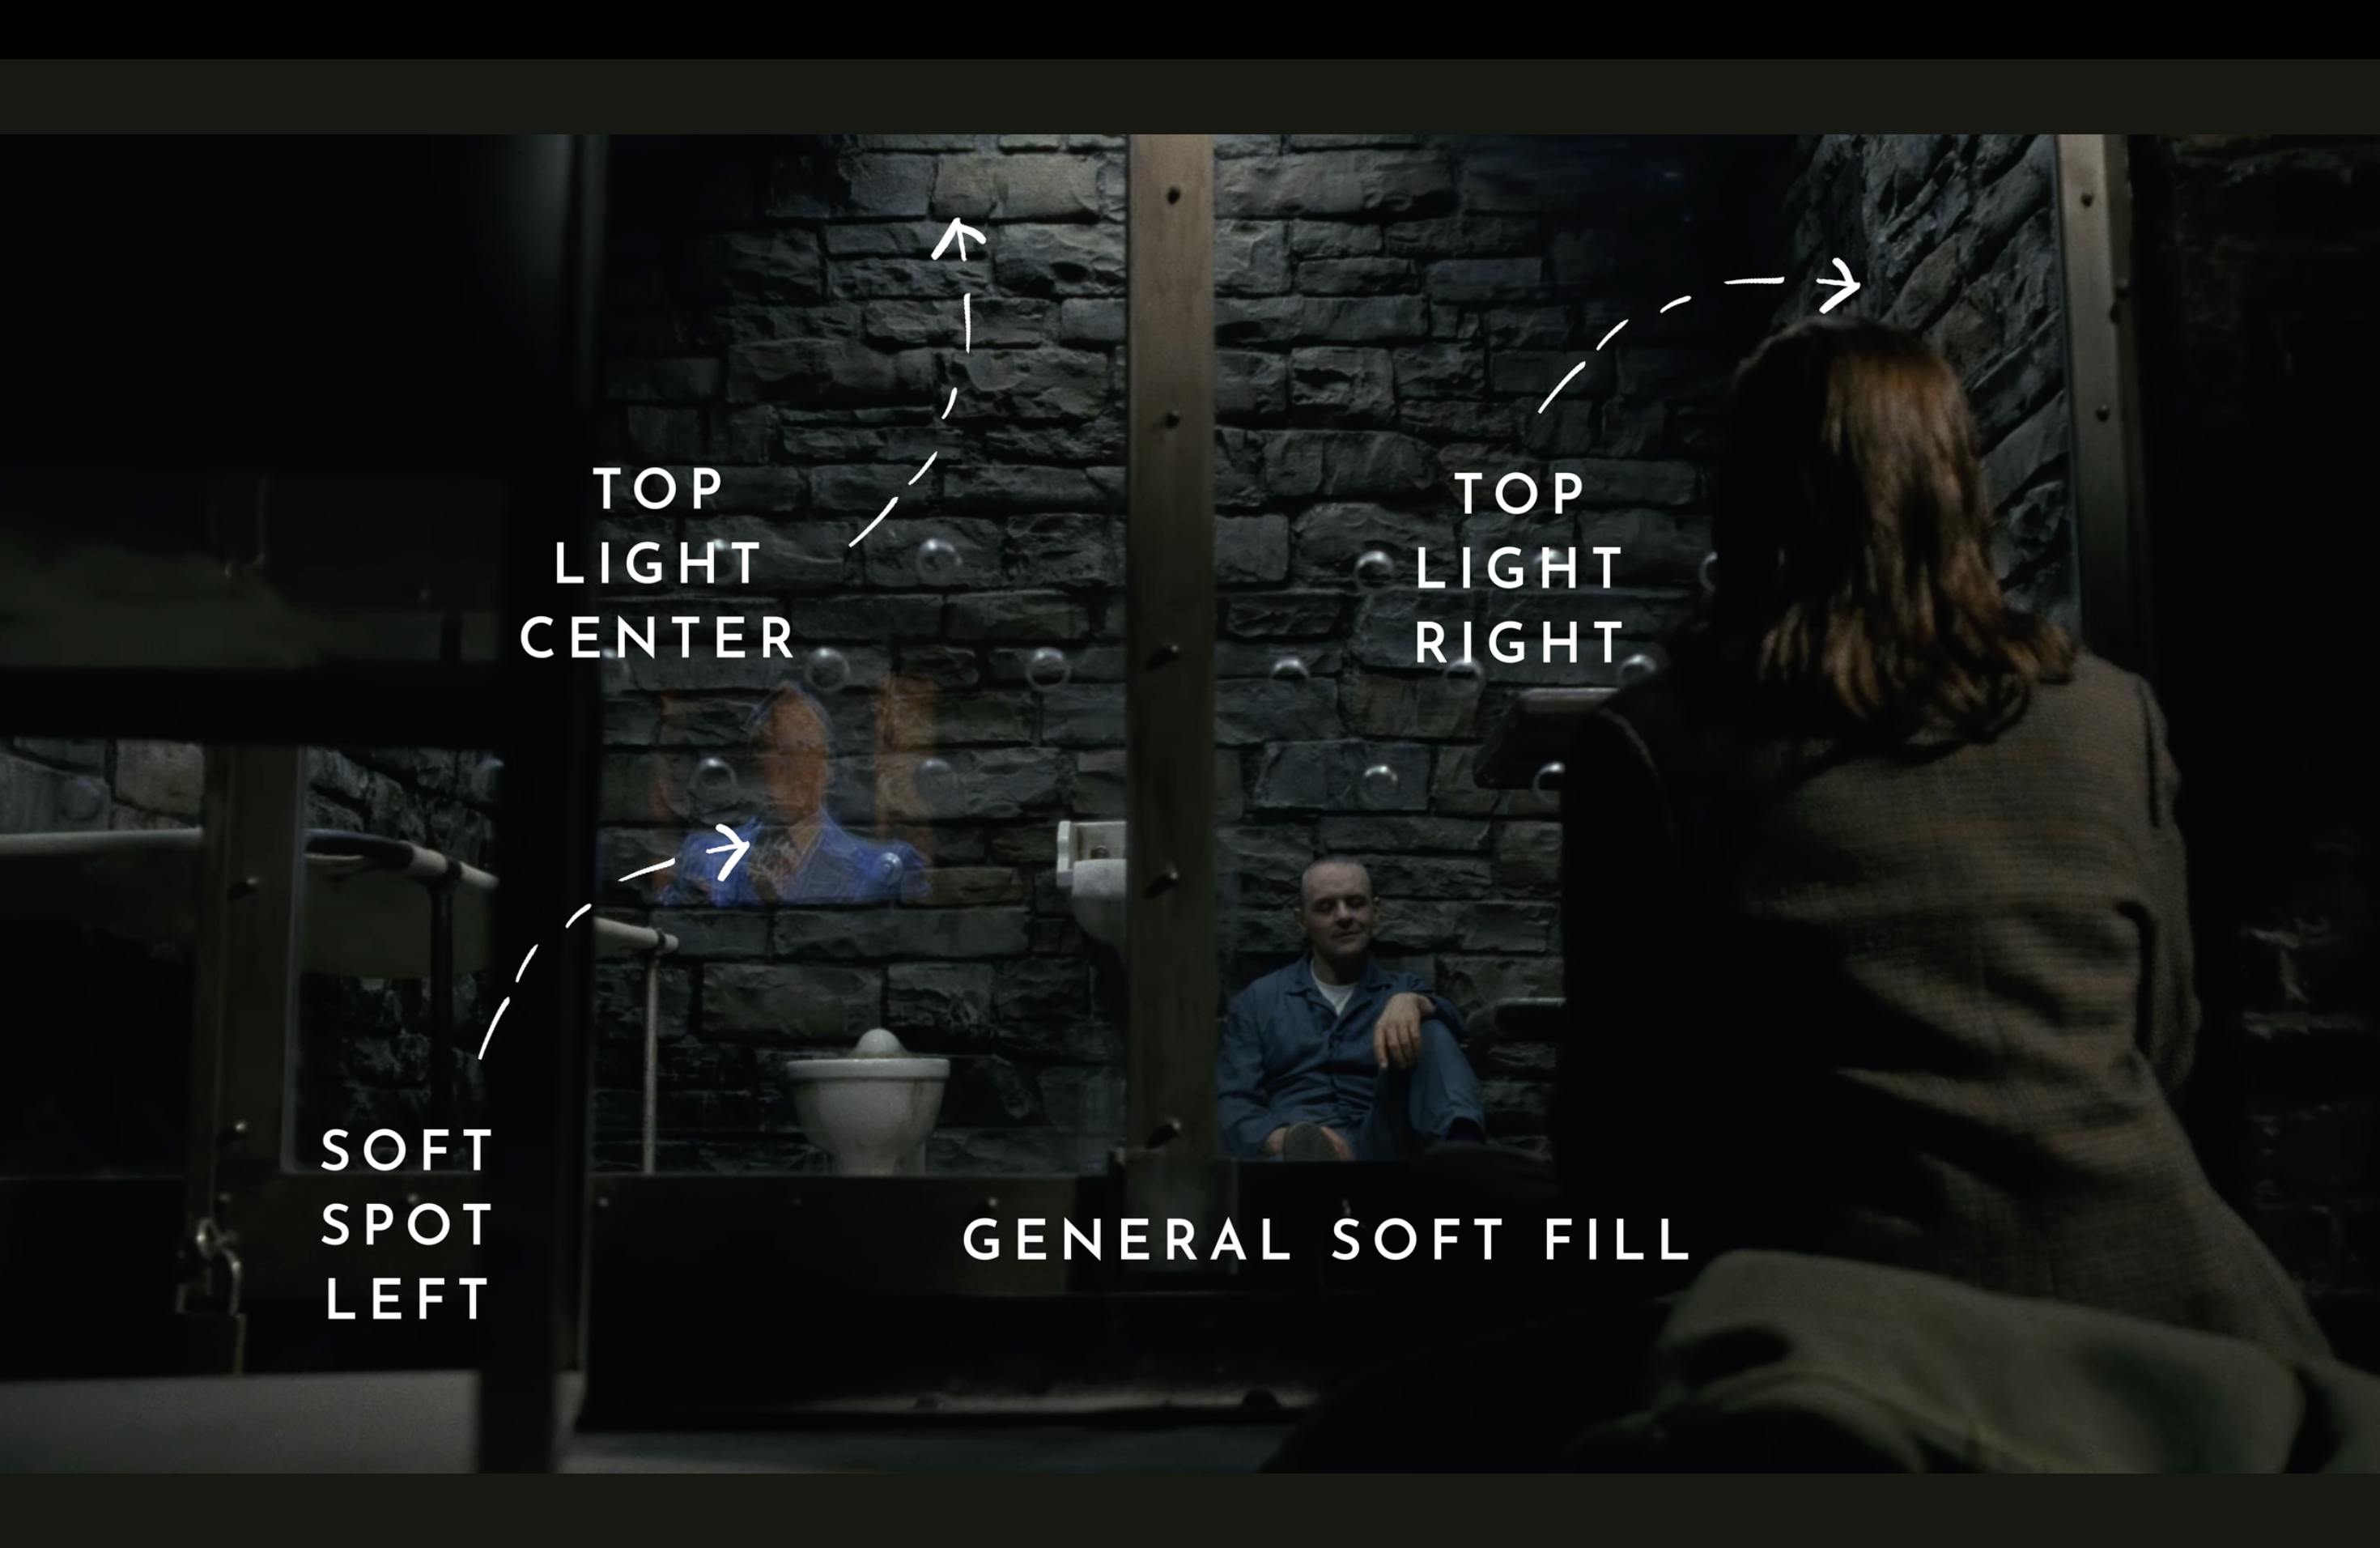
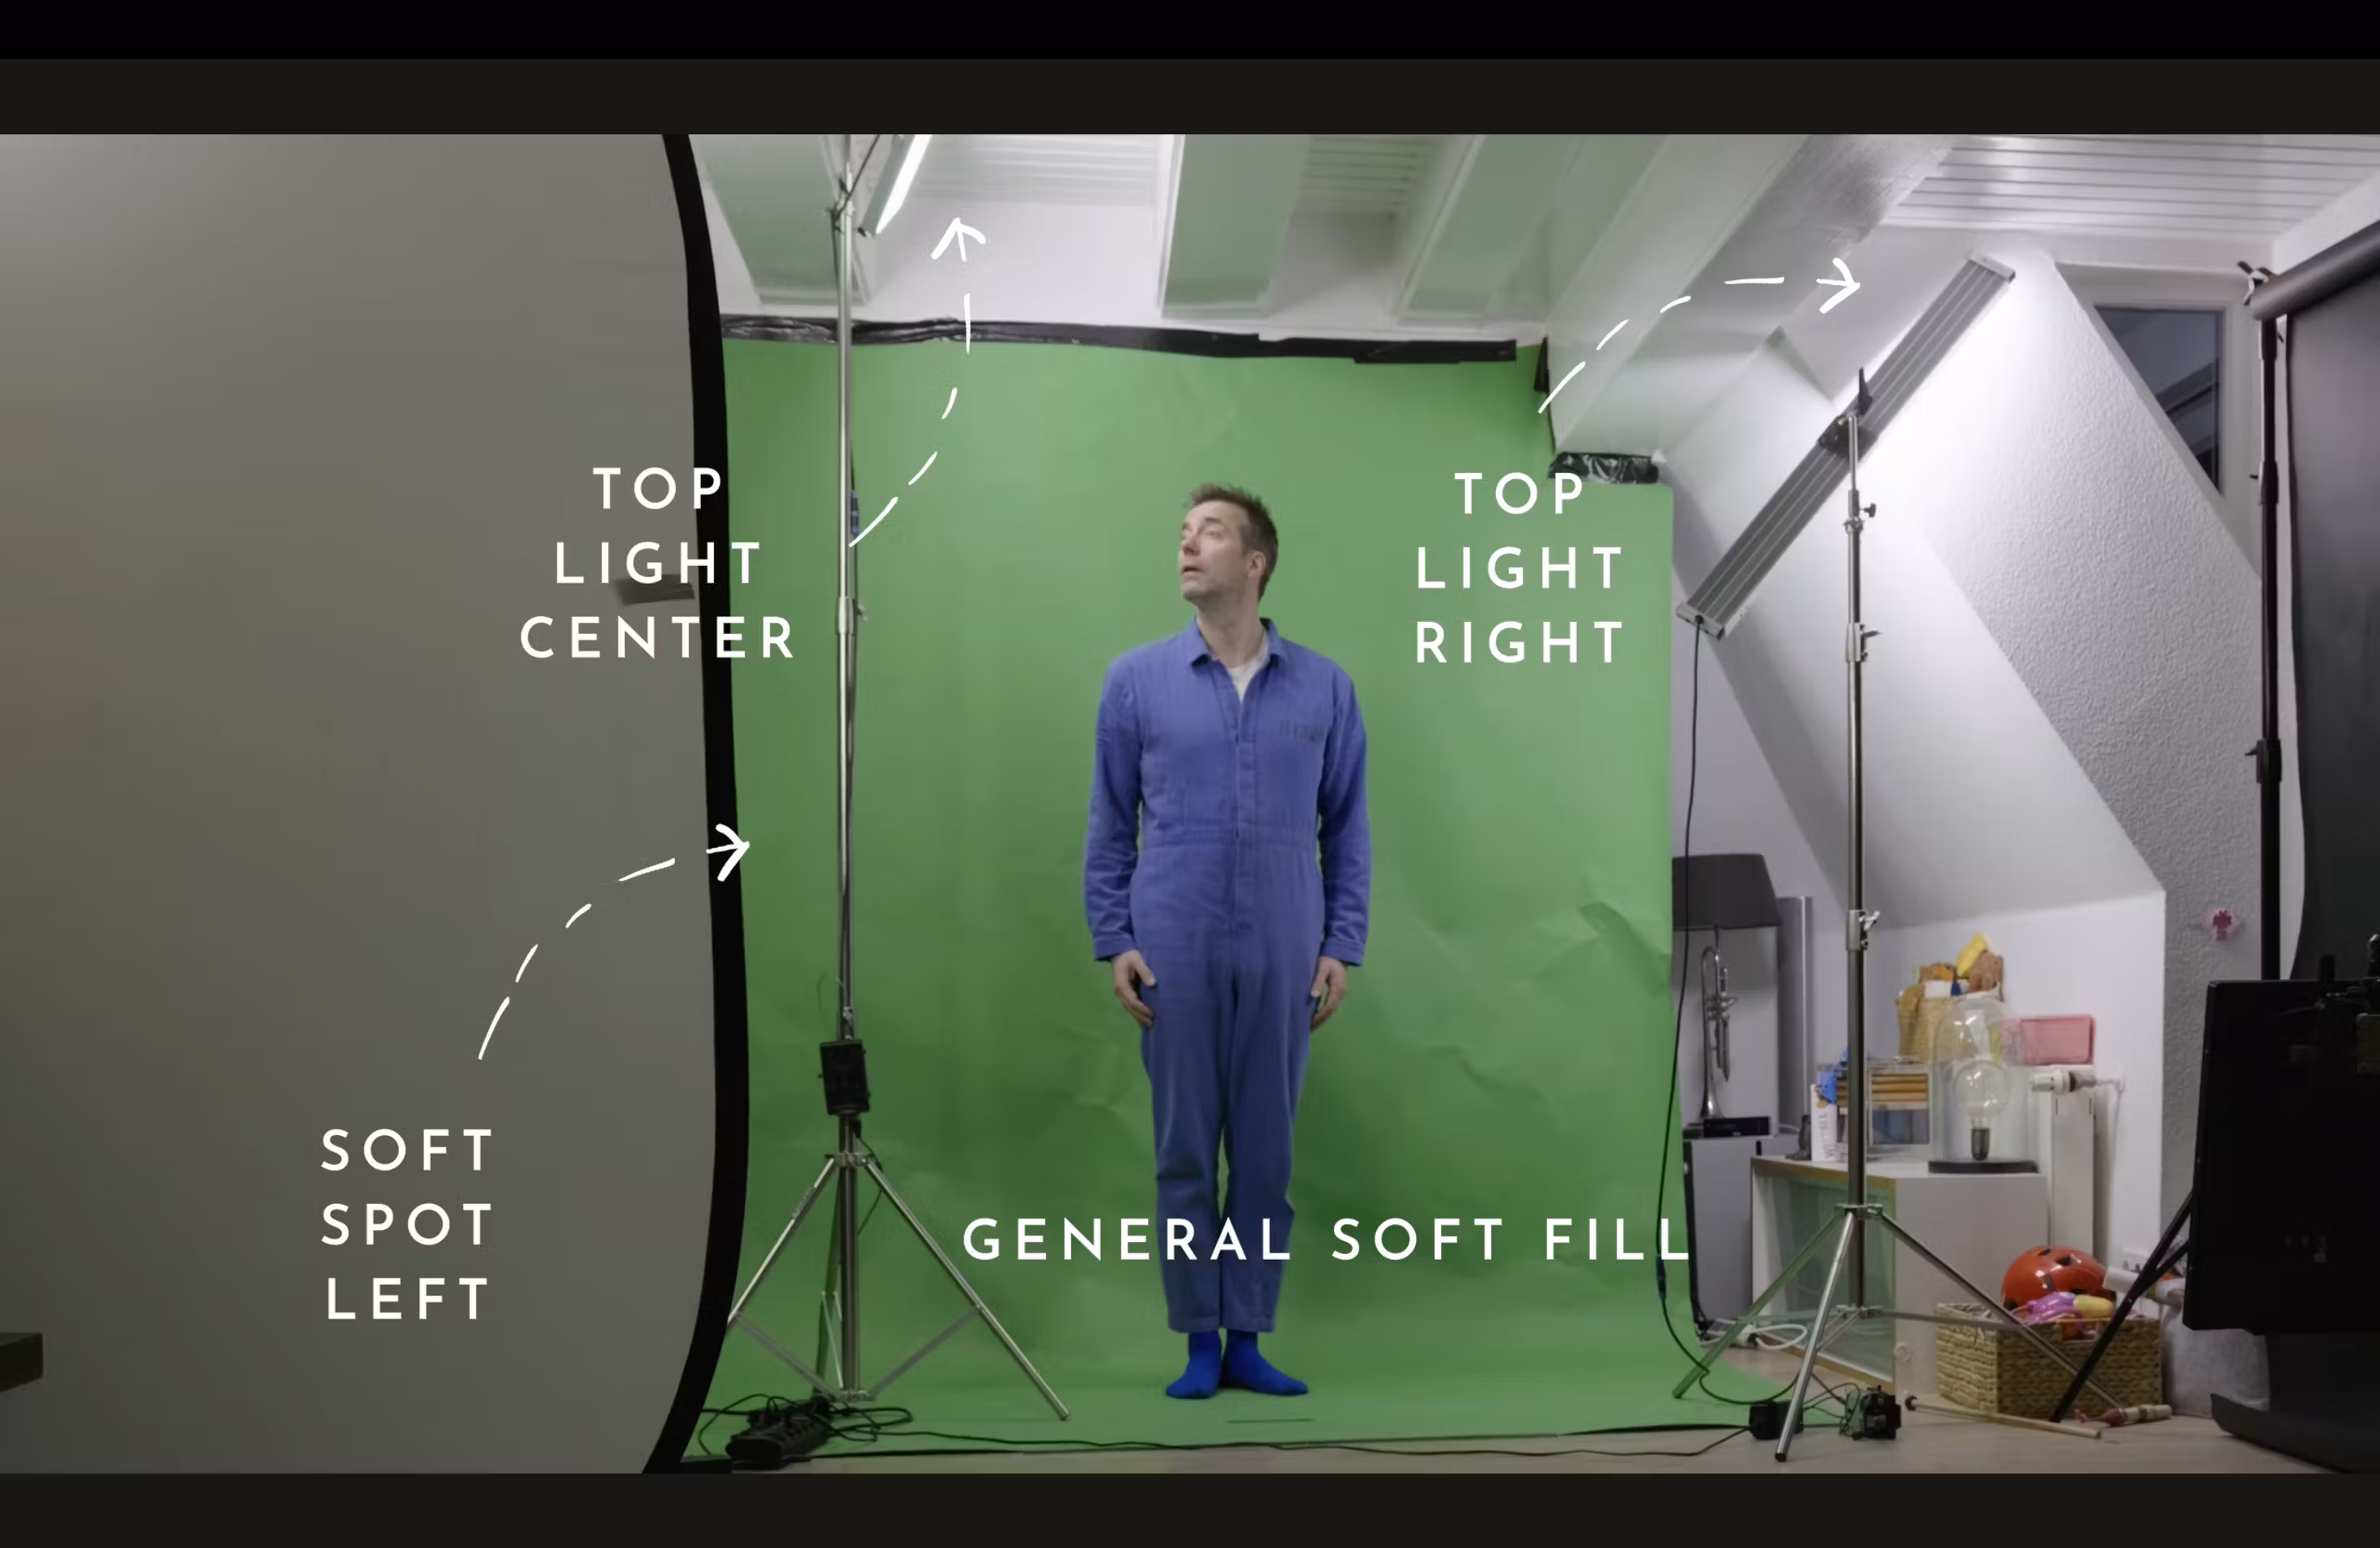
- Match the lighting with the original scene by using a top light on the right, a soft spot on the left, another top light in the center, and a general soft fill.
- Replicate the lighting with available equipment using narrow LED panels for top lighting, a small flexible panel for the left soft spot, and a large diffusion for fill.
- Ensure the green screen is evenly illuminated.
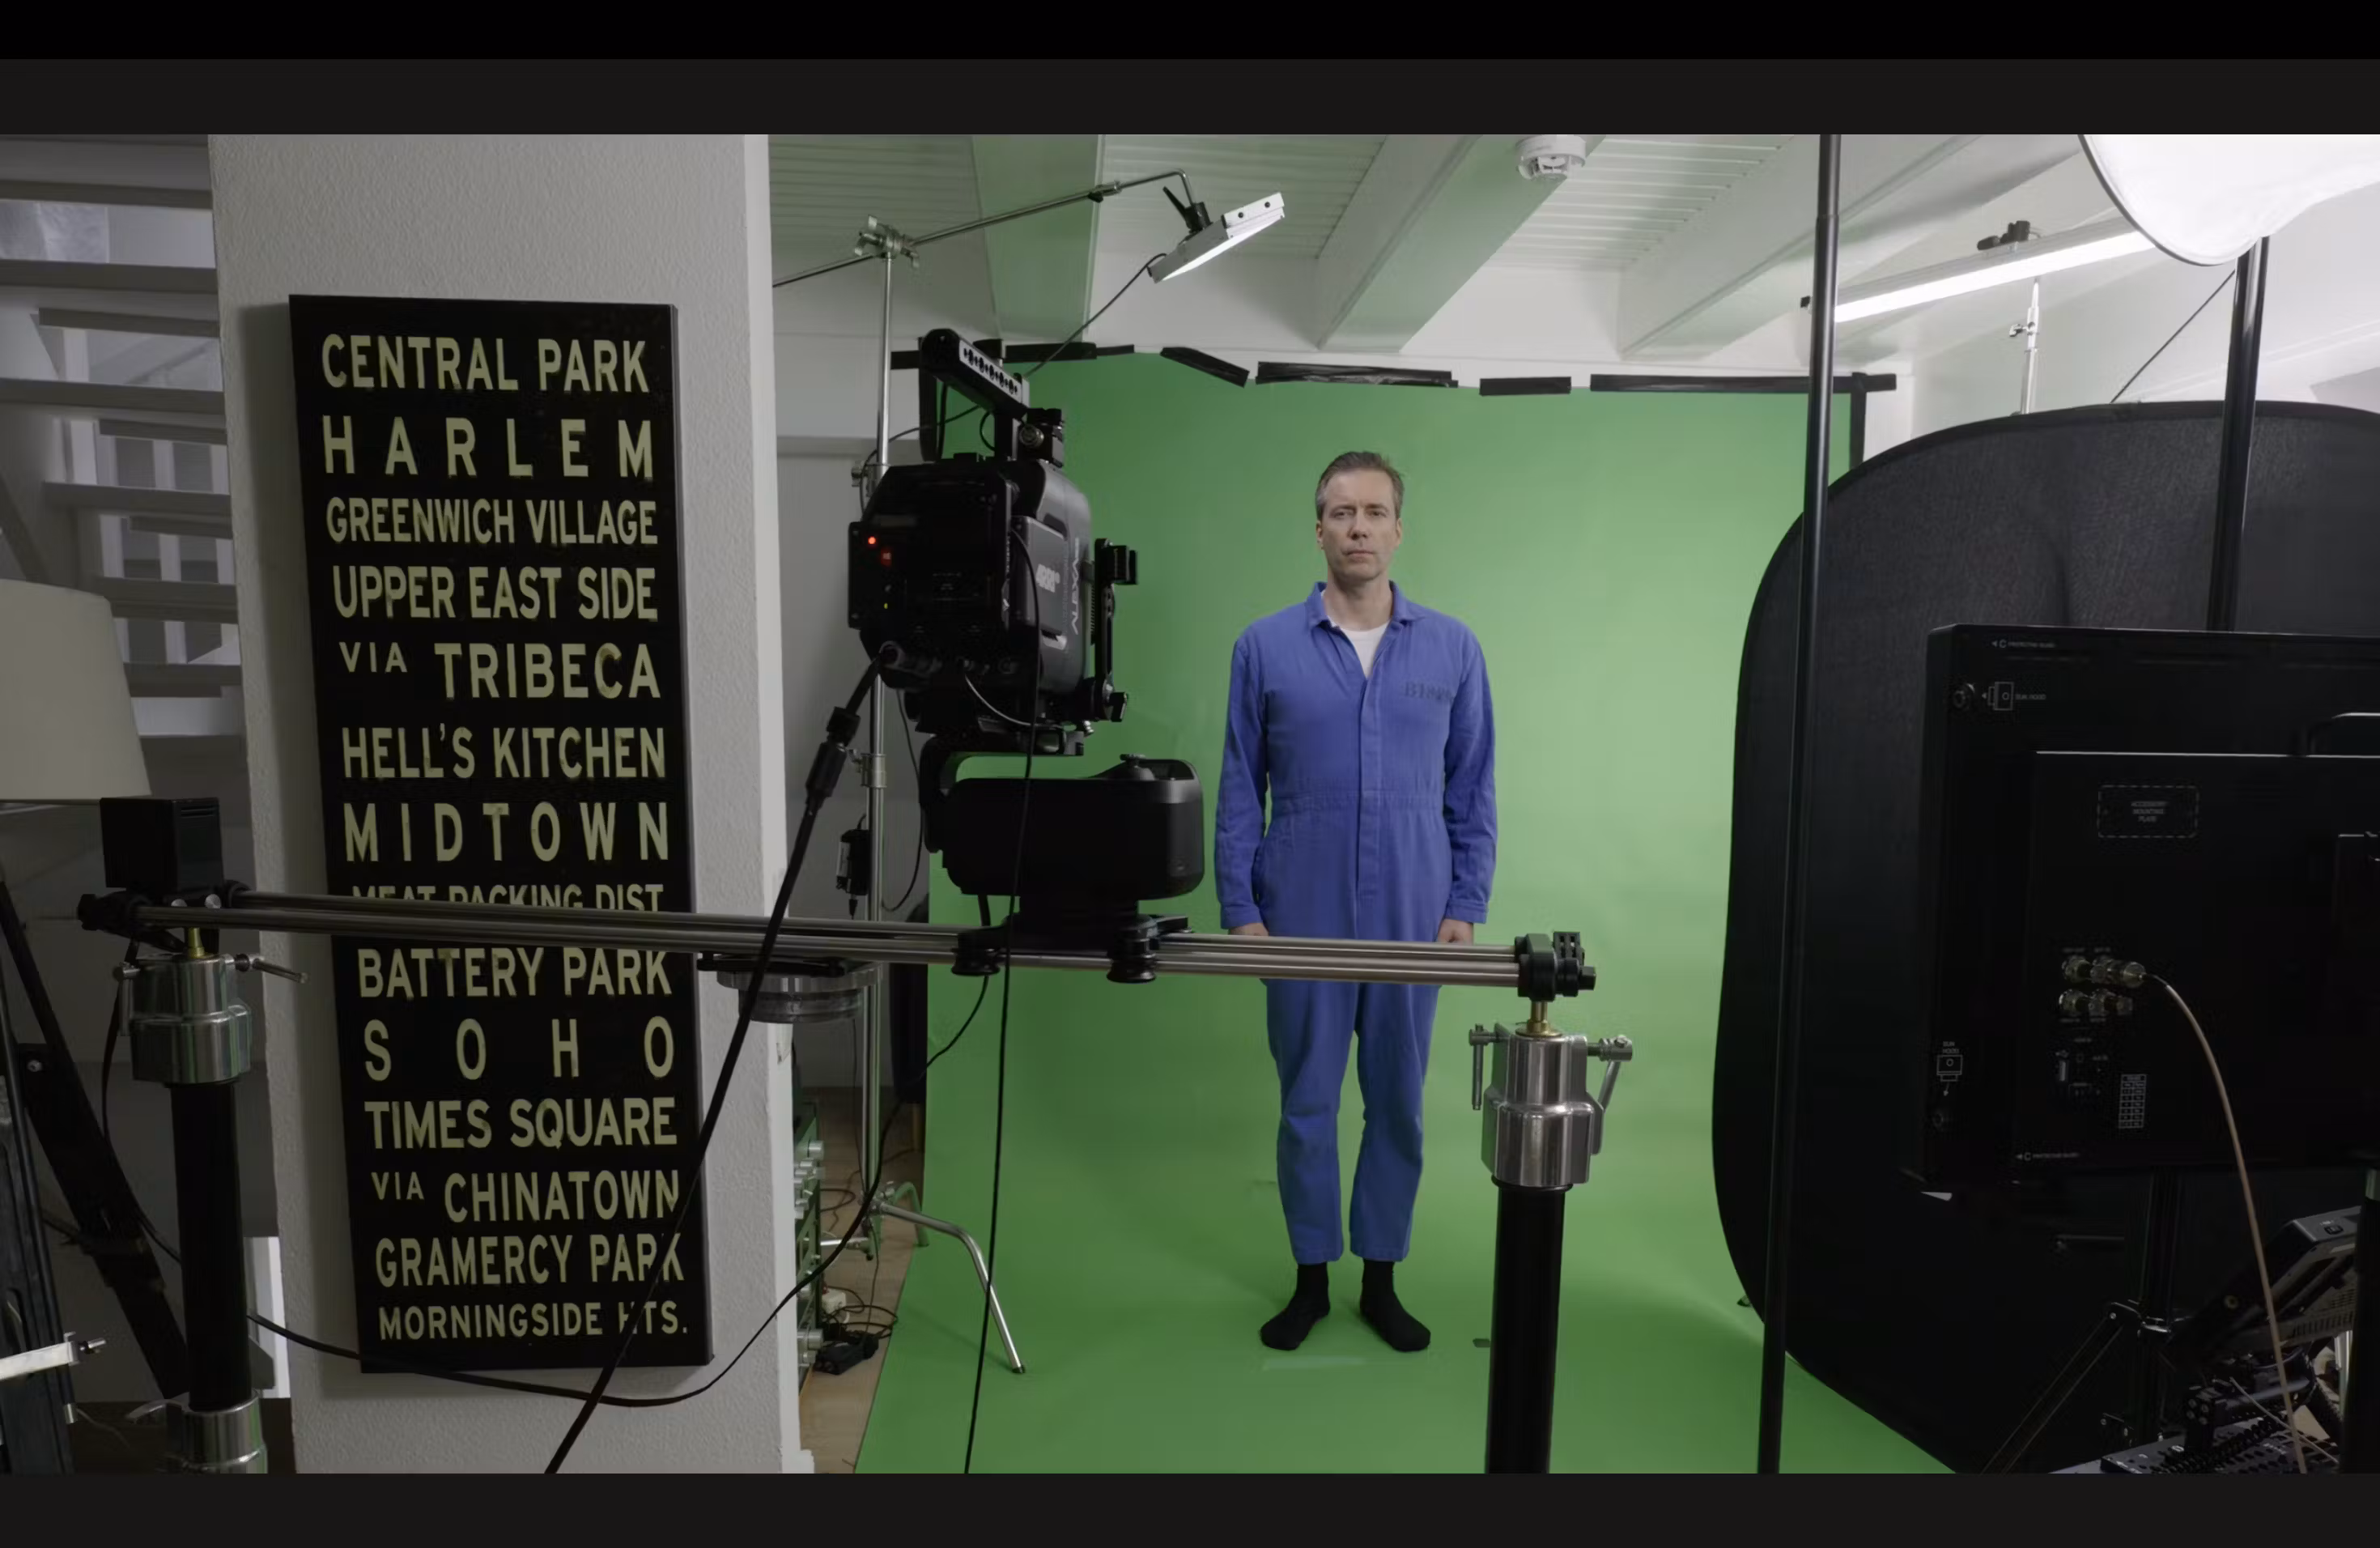
Step 5: Setting Up the Green Screen and Camera Positioning
- Use a paper-based green screen taped to the roof.
- Position the camera at the same angle, height, and distance as the original scene.
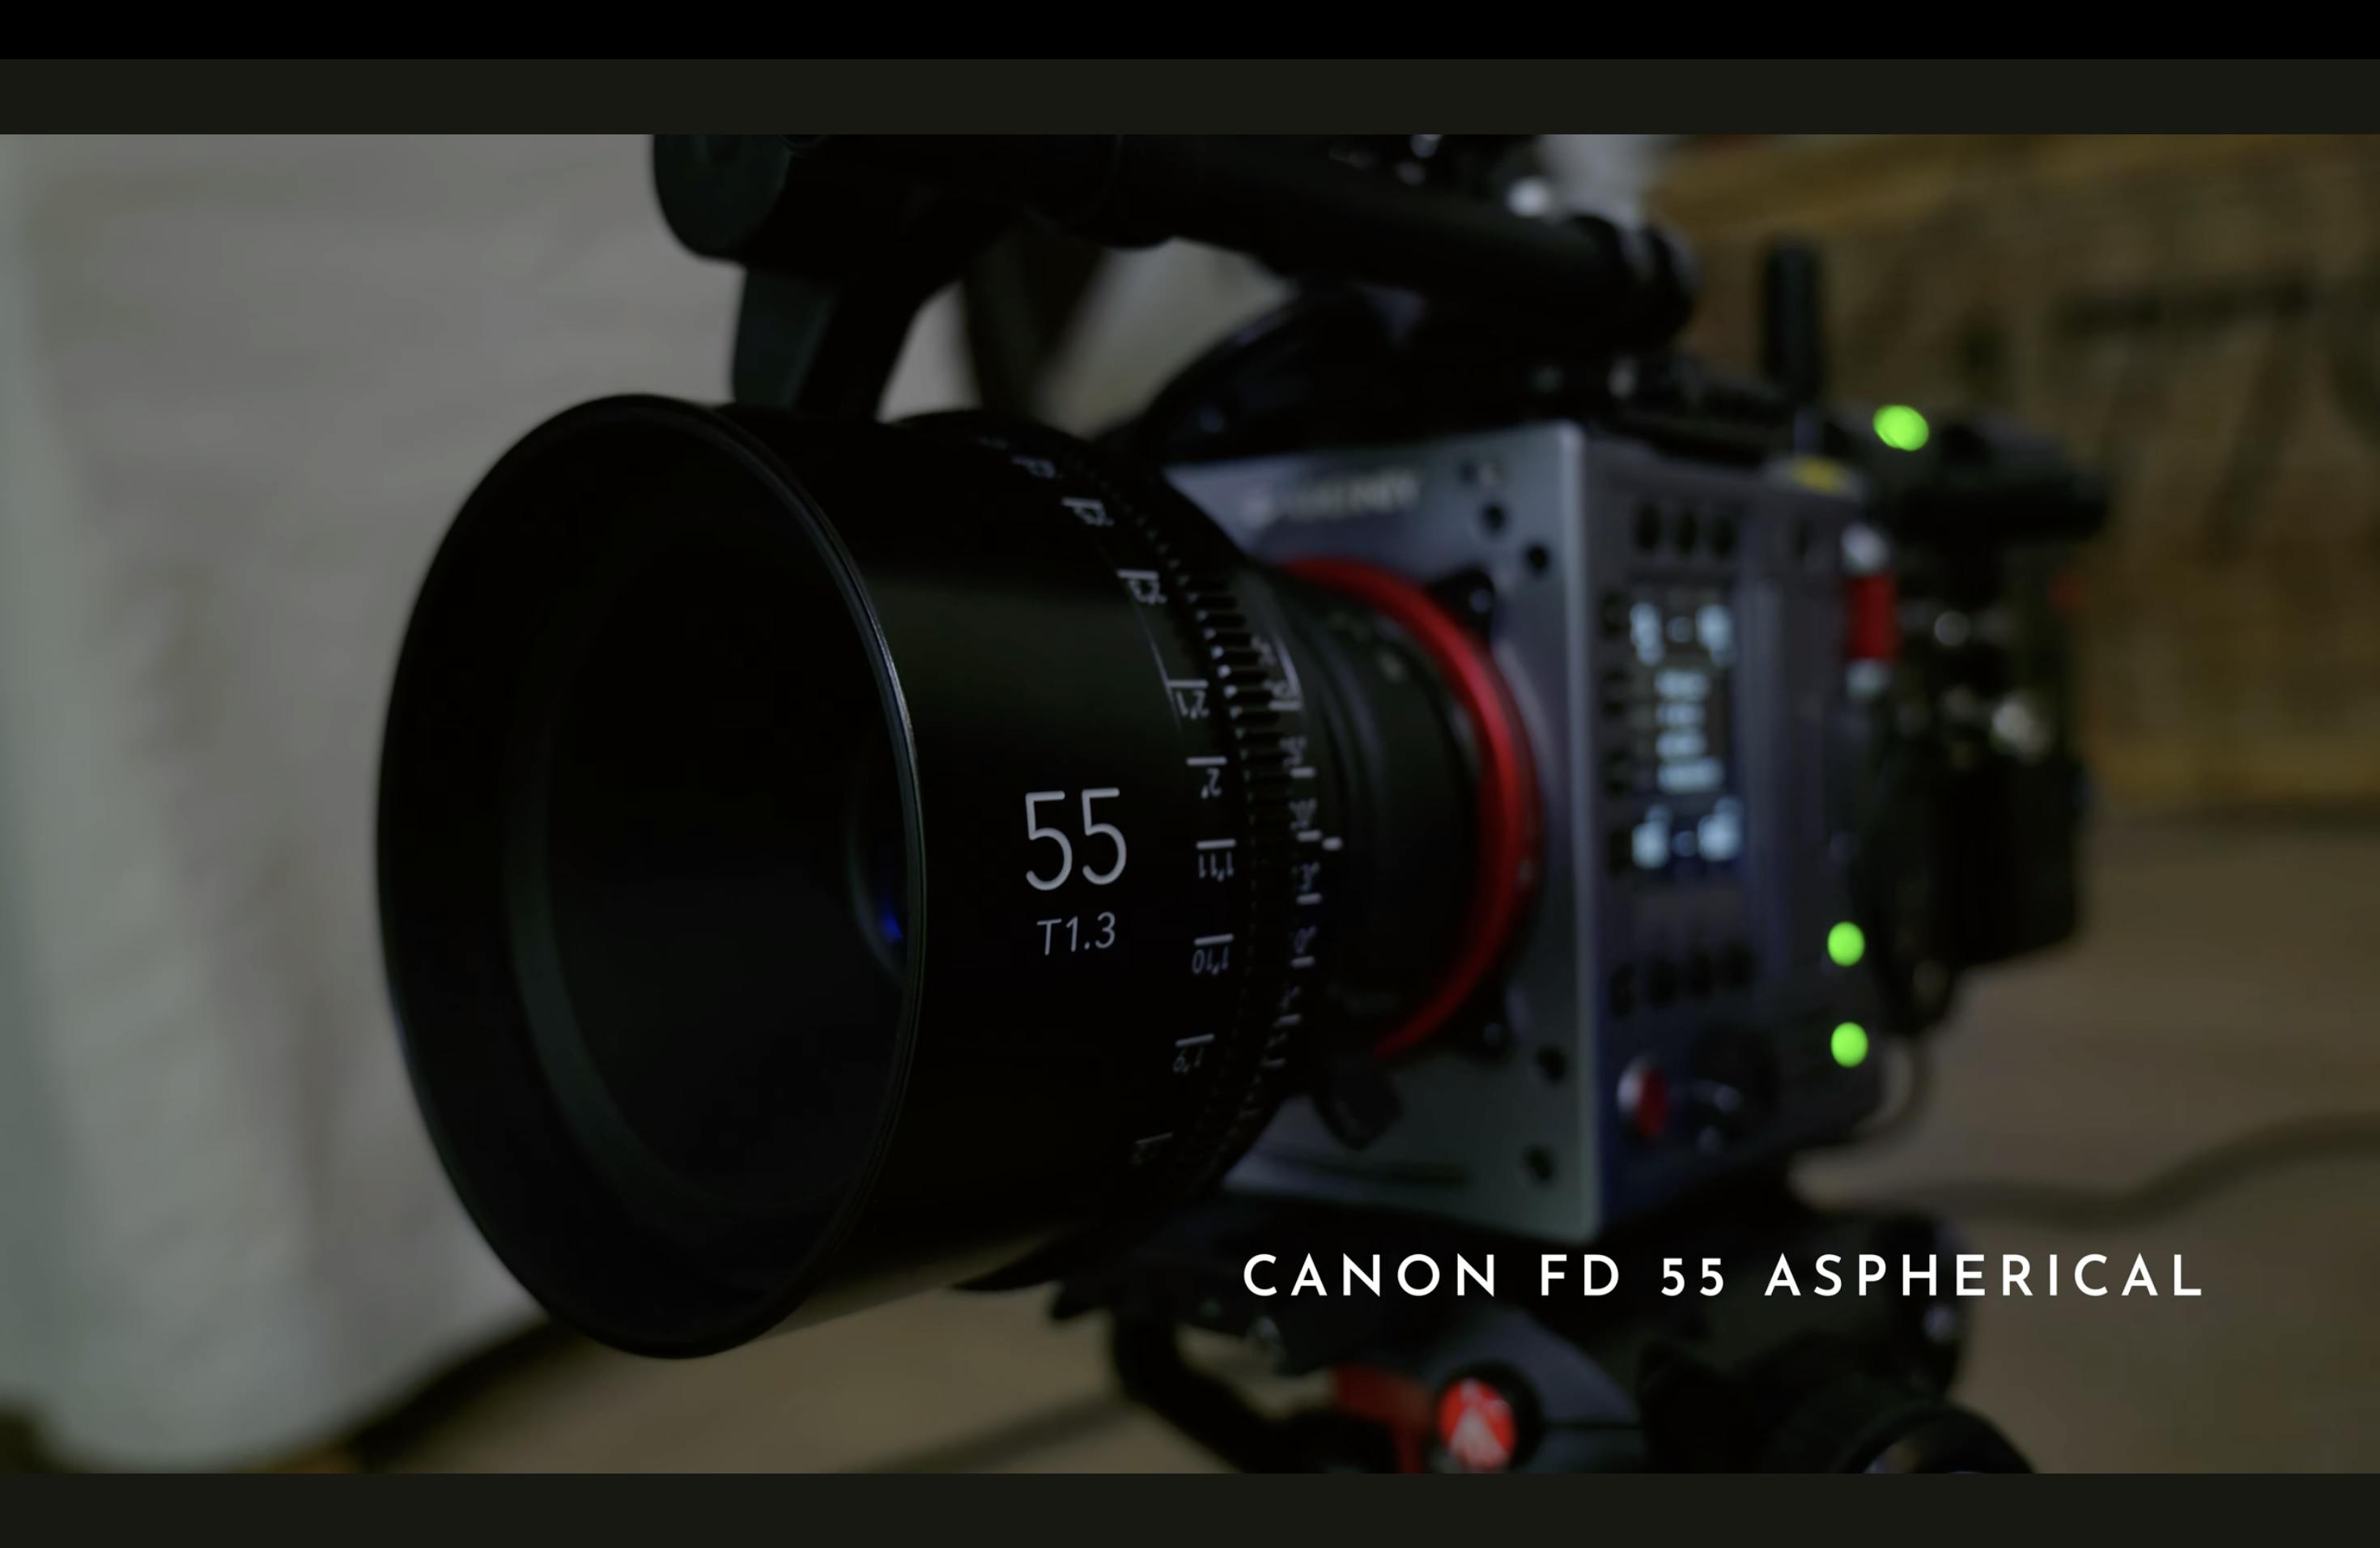
- Ensure perspective consistency by choosing a focal length that matches the framing and allows movement, as focal length and sensor format do not matter; for this setup, use a Canon FD 55 mm lens on a full-frame camera.
Step 6: Final Preparations for Filming
- Record all talkie shots on the Kinefinity Marvel.
- Since Lecter remains static, set the focus once and leave it.
- Record in Log and use 4:4:4 color sampling for better keying.
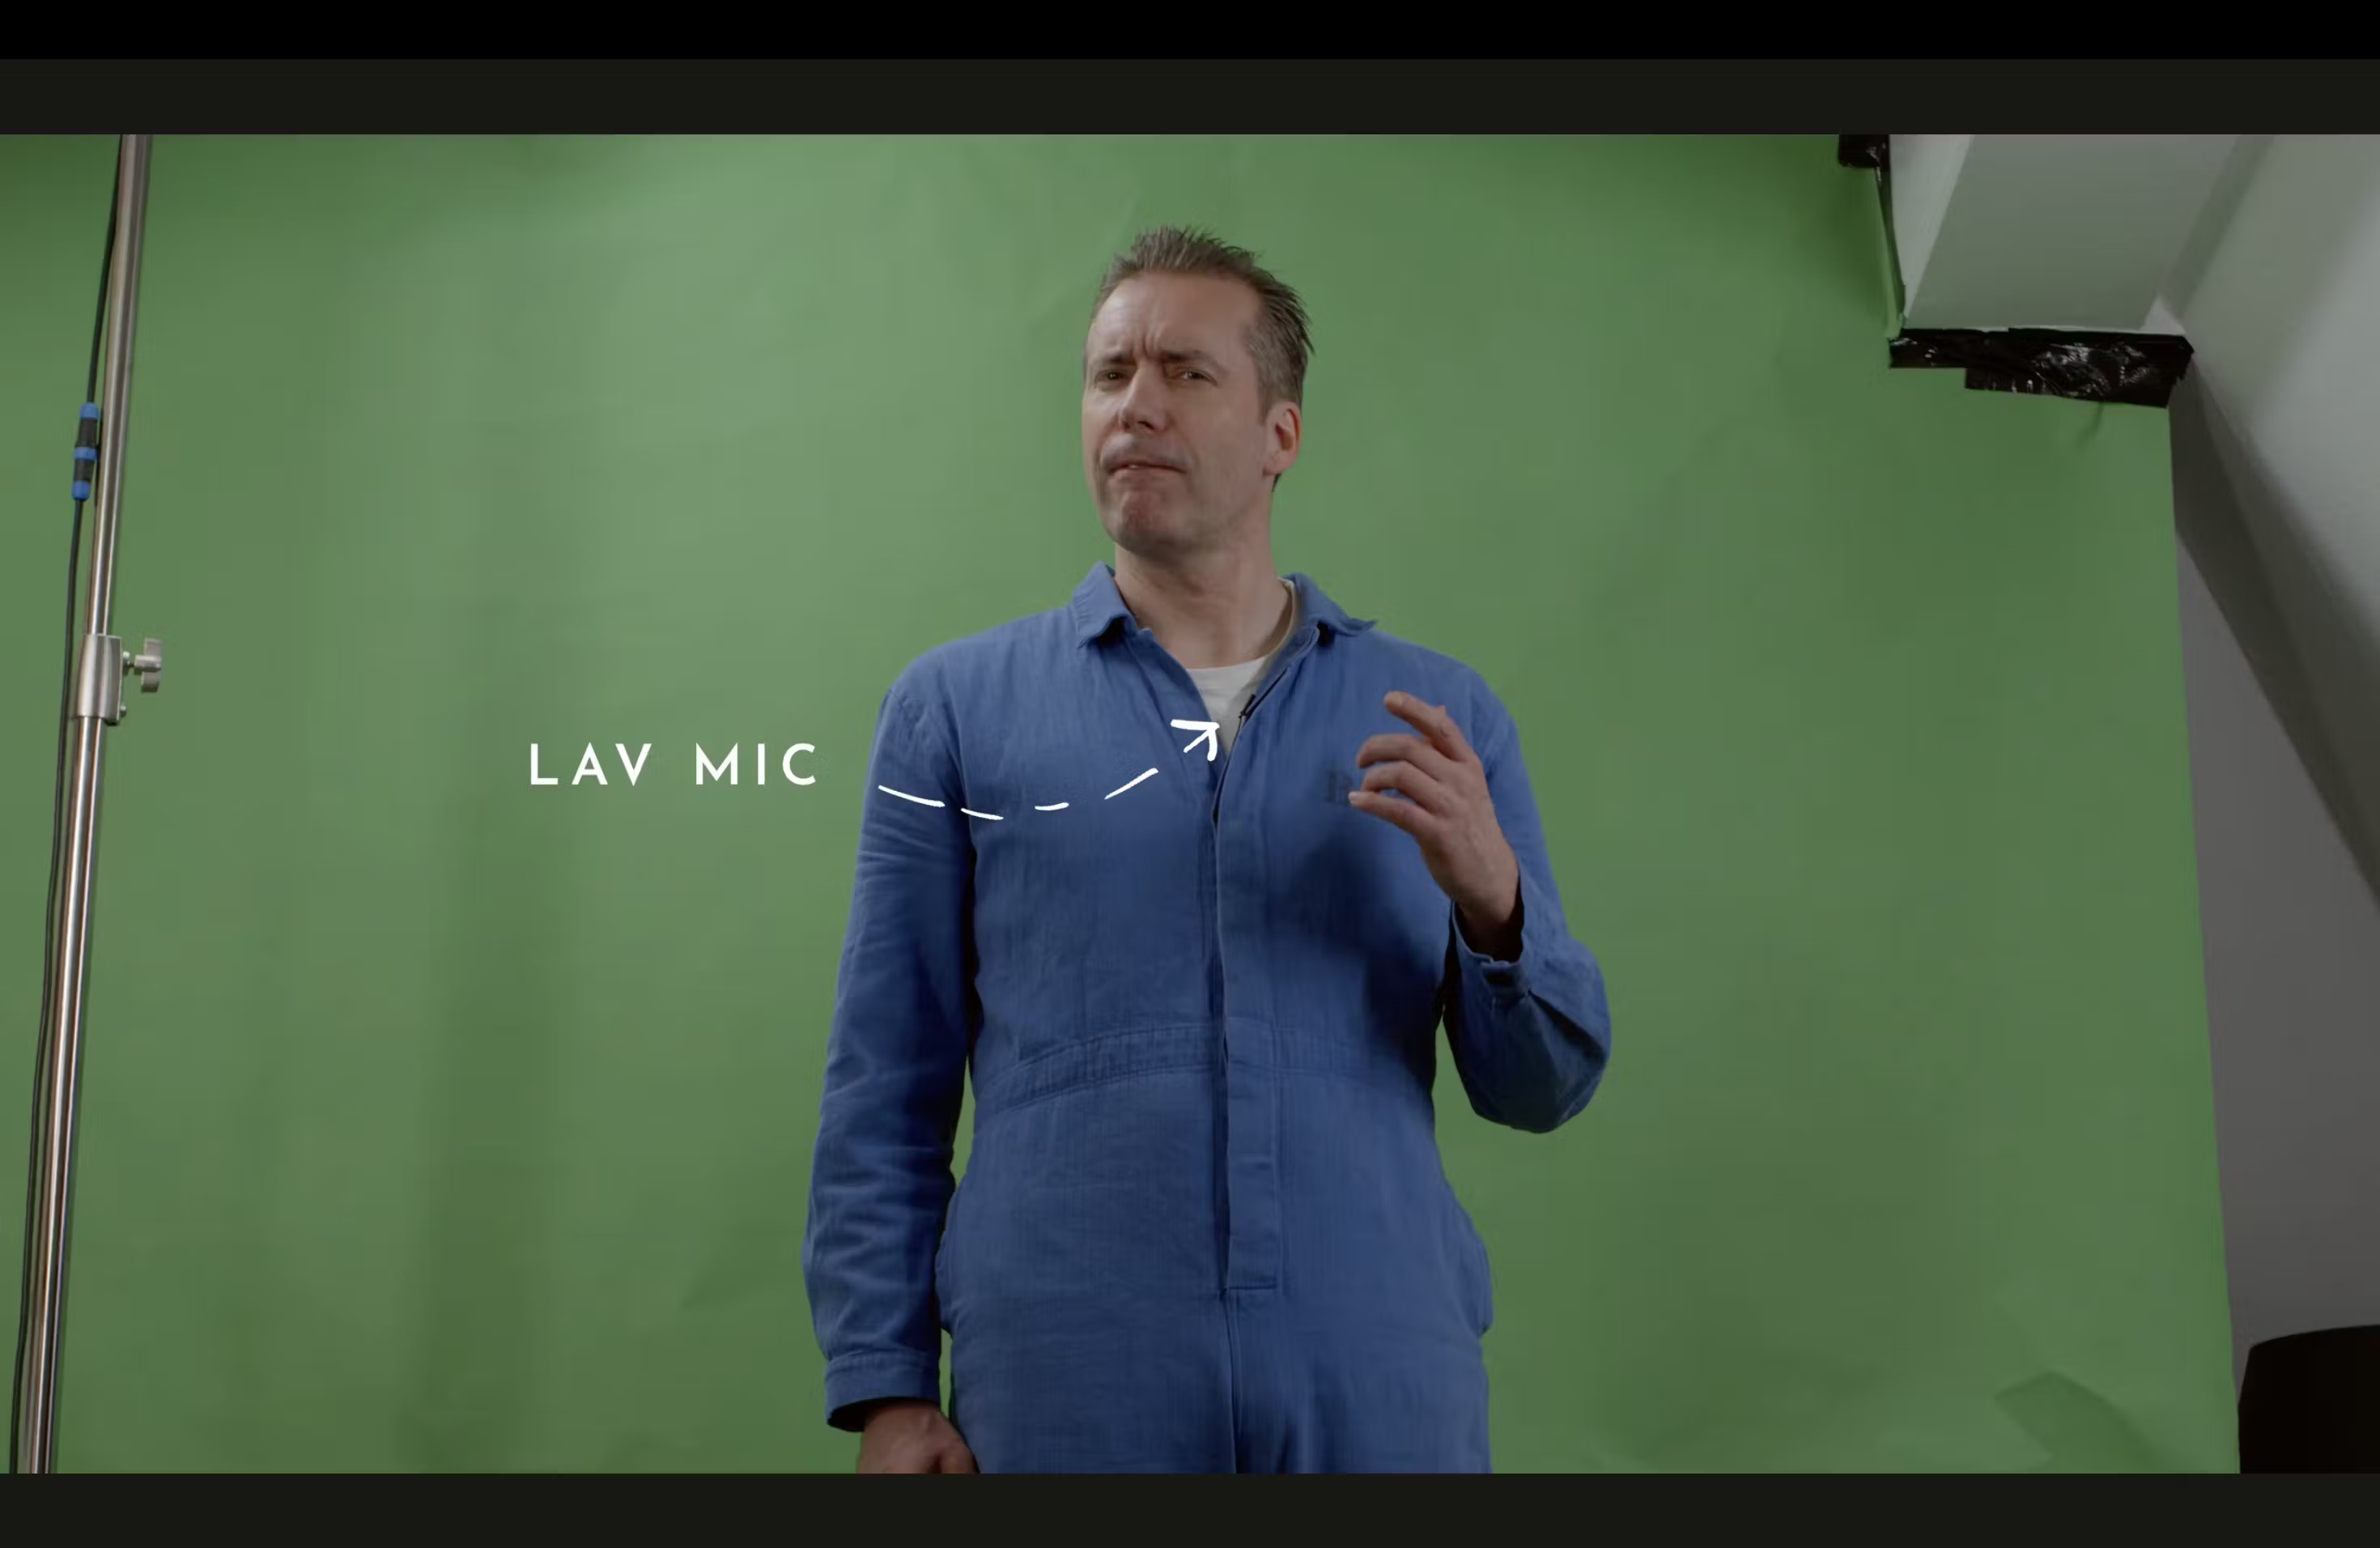
- Hide a small lav mic inside the prison jumpsuit for clear audio.
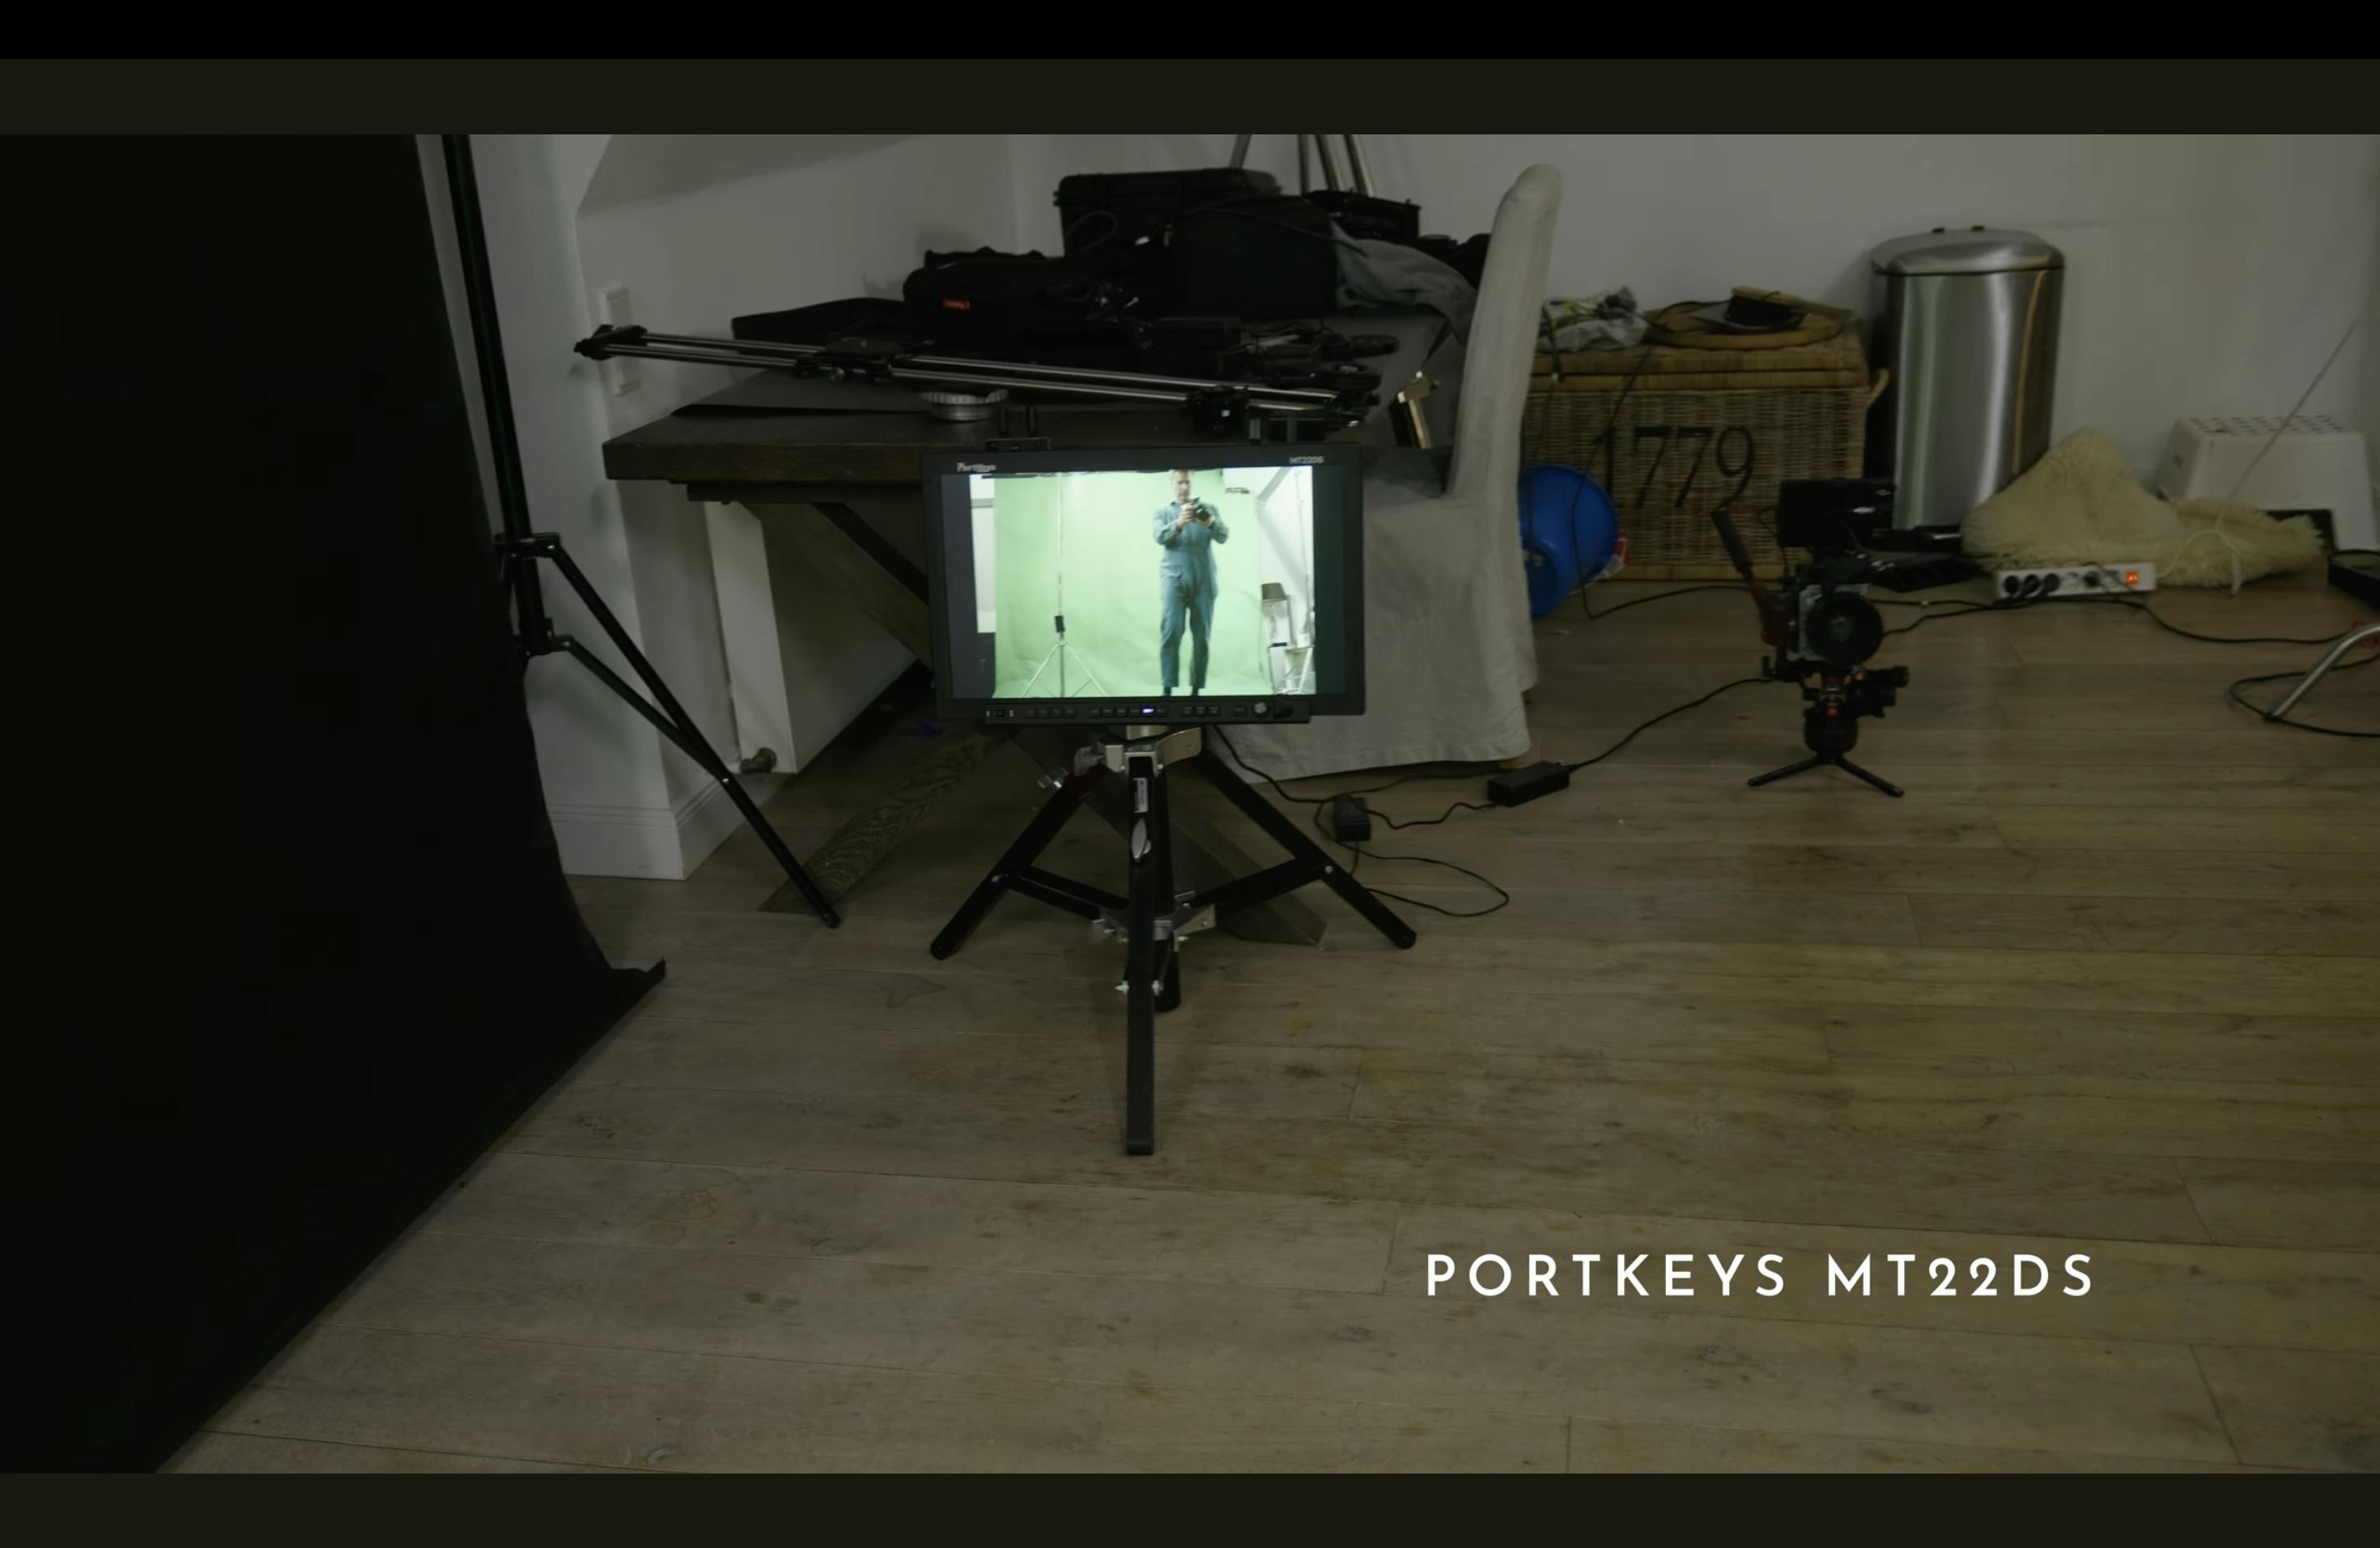
Step 7: Maintaining Eye Line and Monitoring
- Look into the lens when Starling is not in the room to maintain eye line.
- Use a large monitor (e.g., PortKeys MT 22DS) to check framing from a distance.
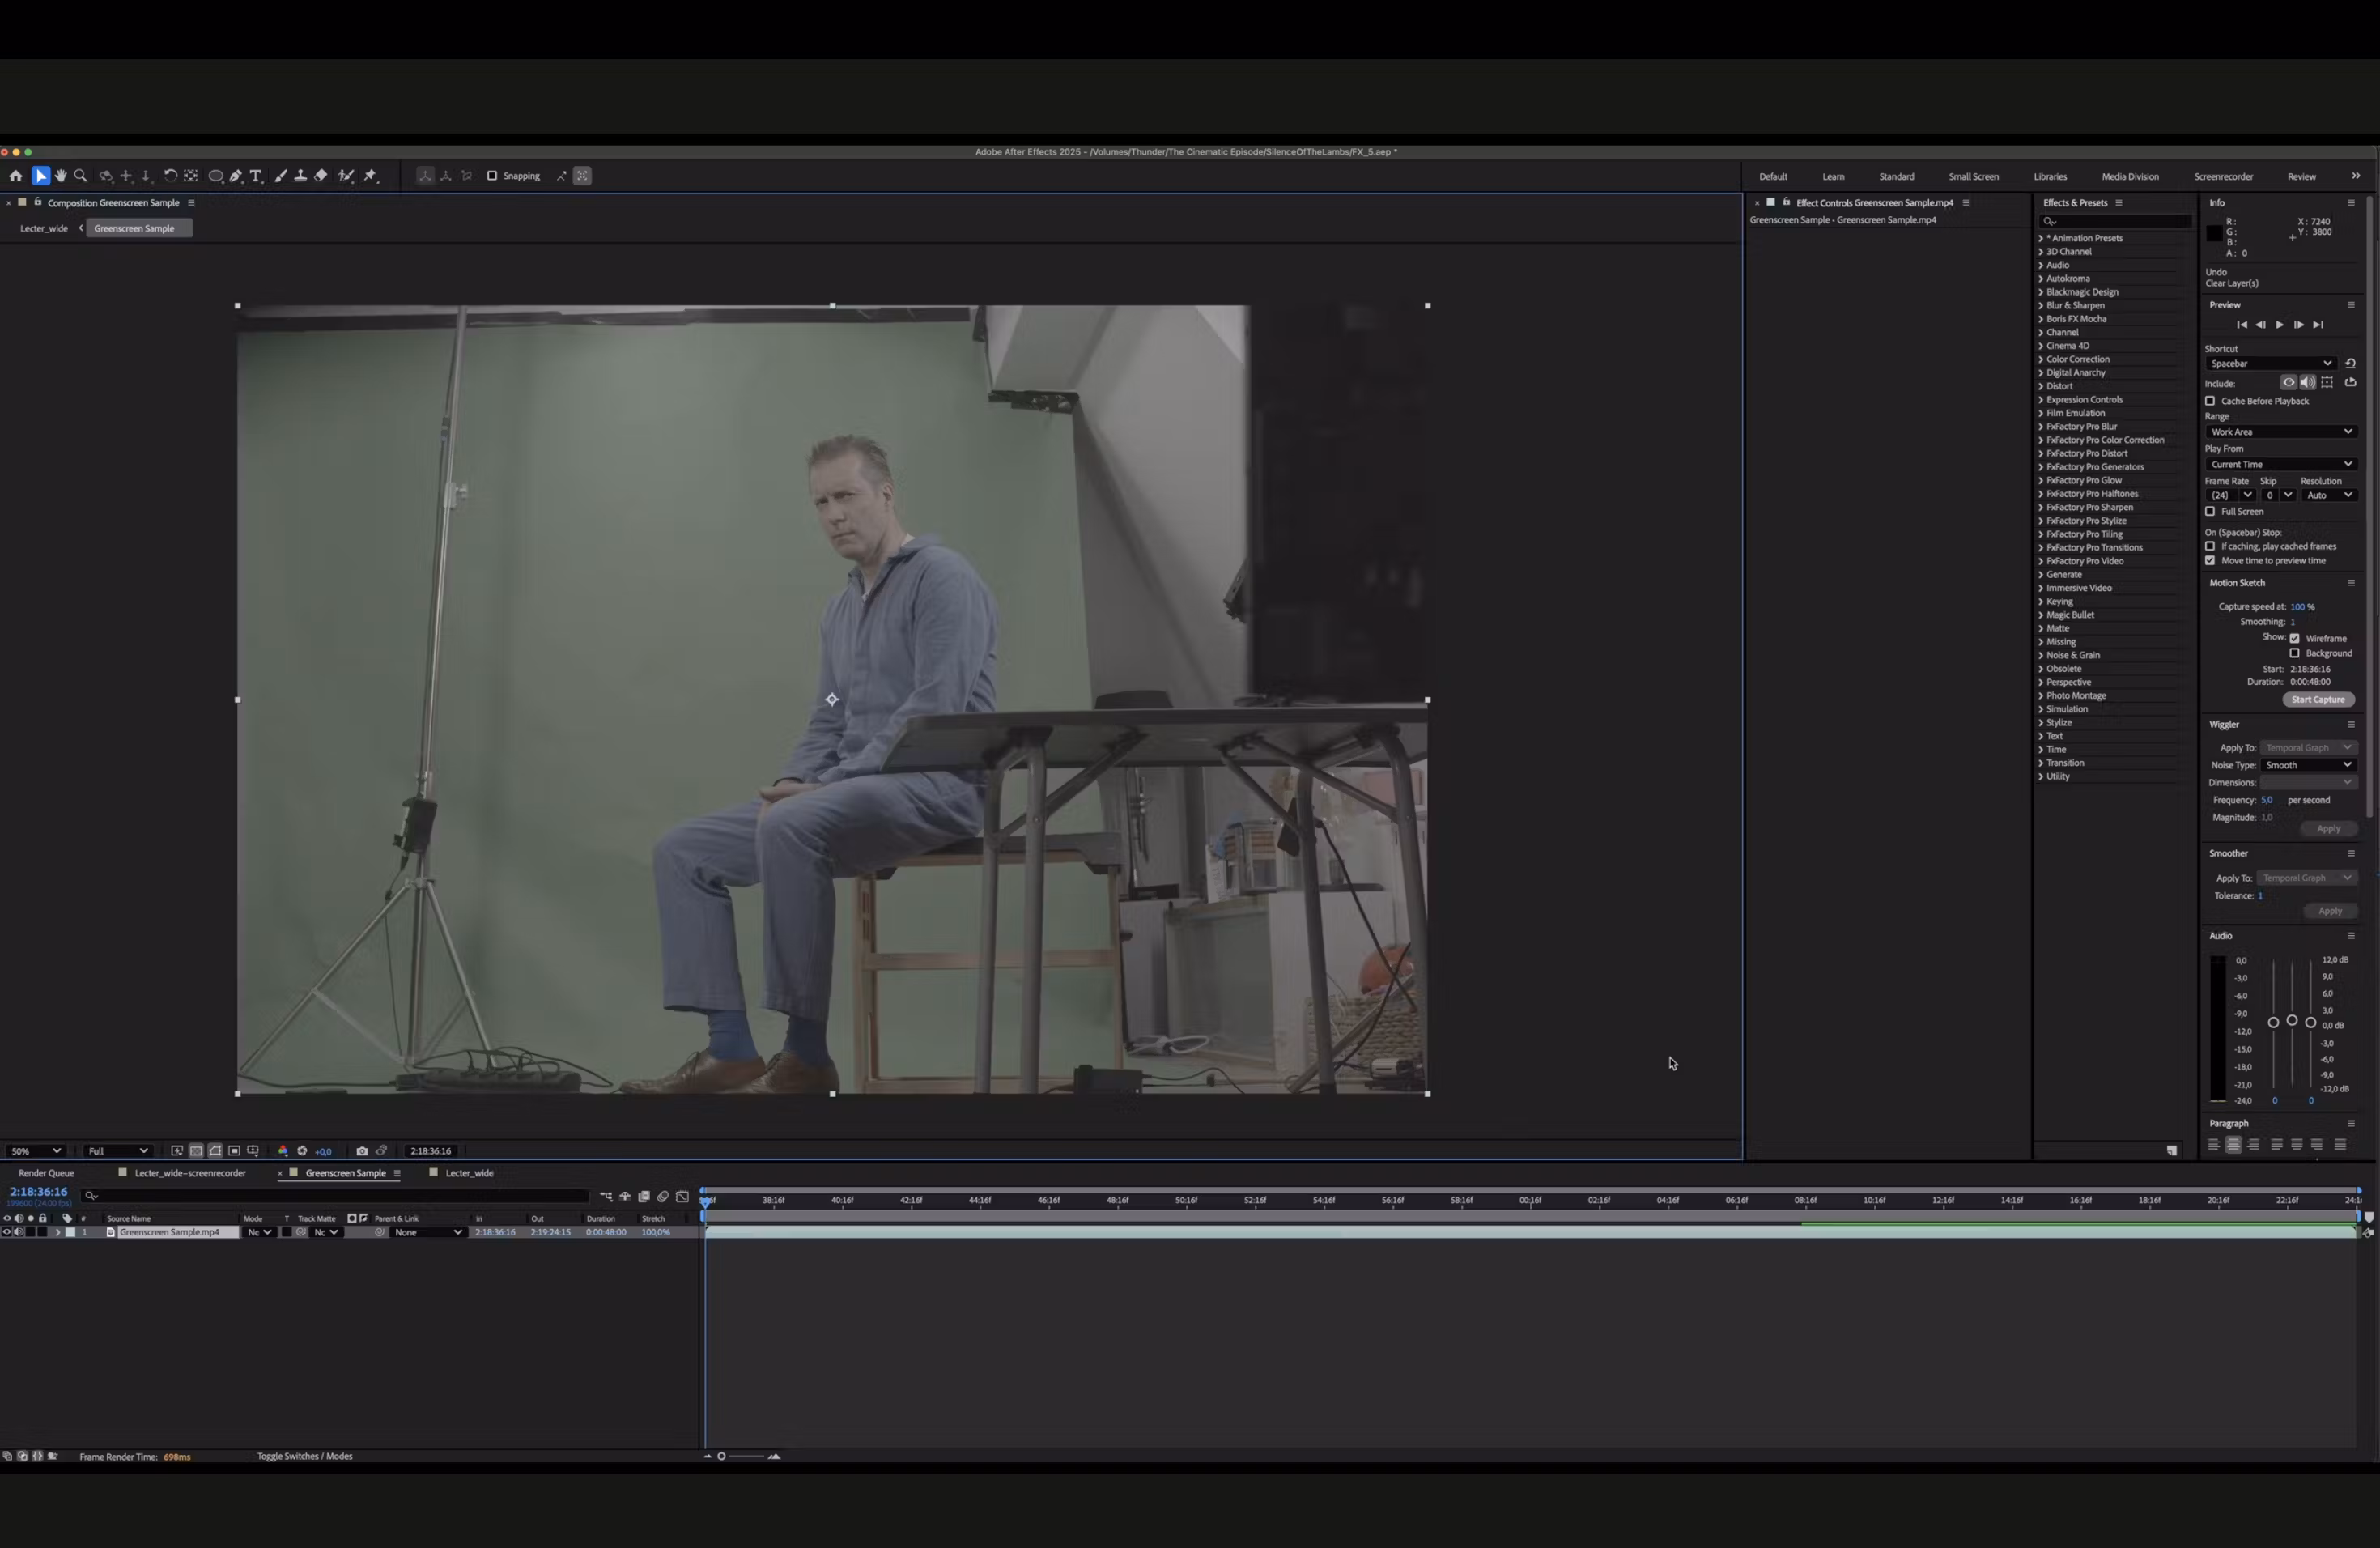
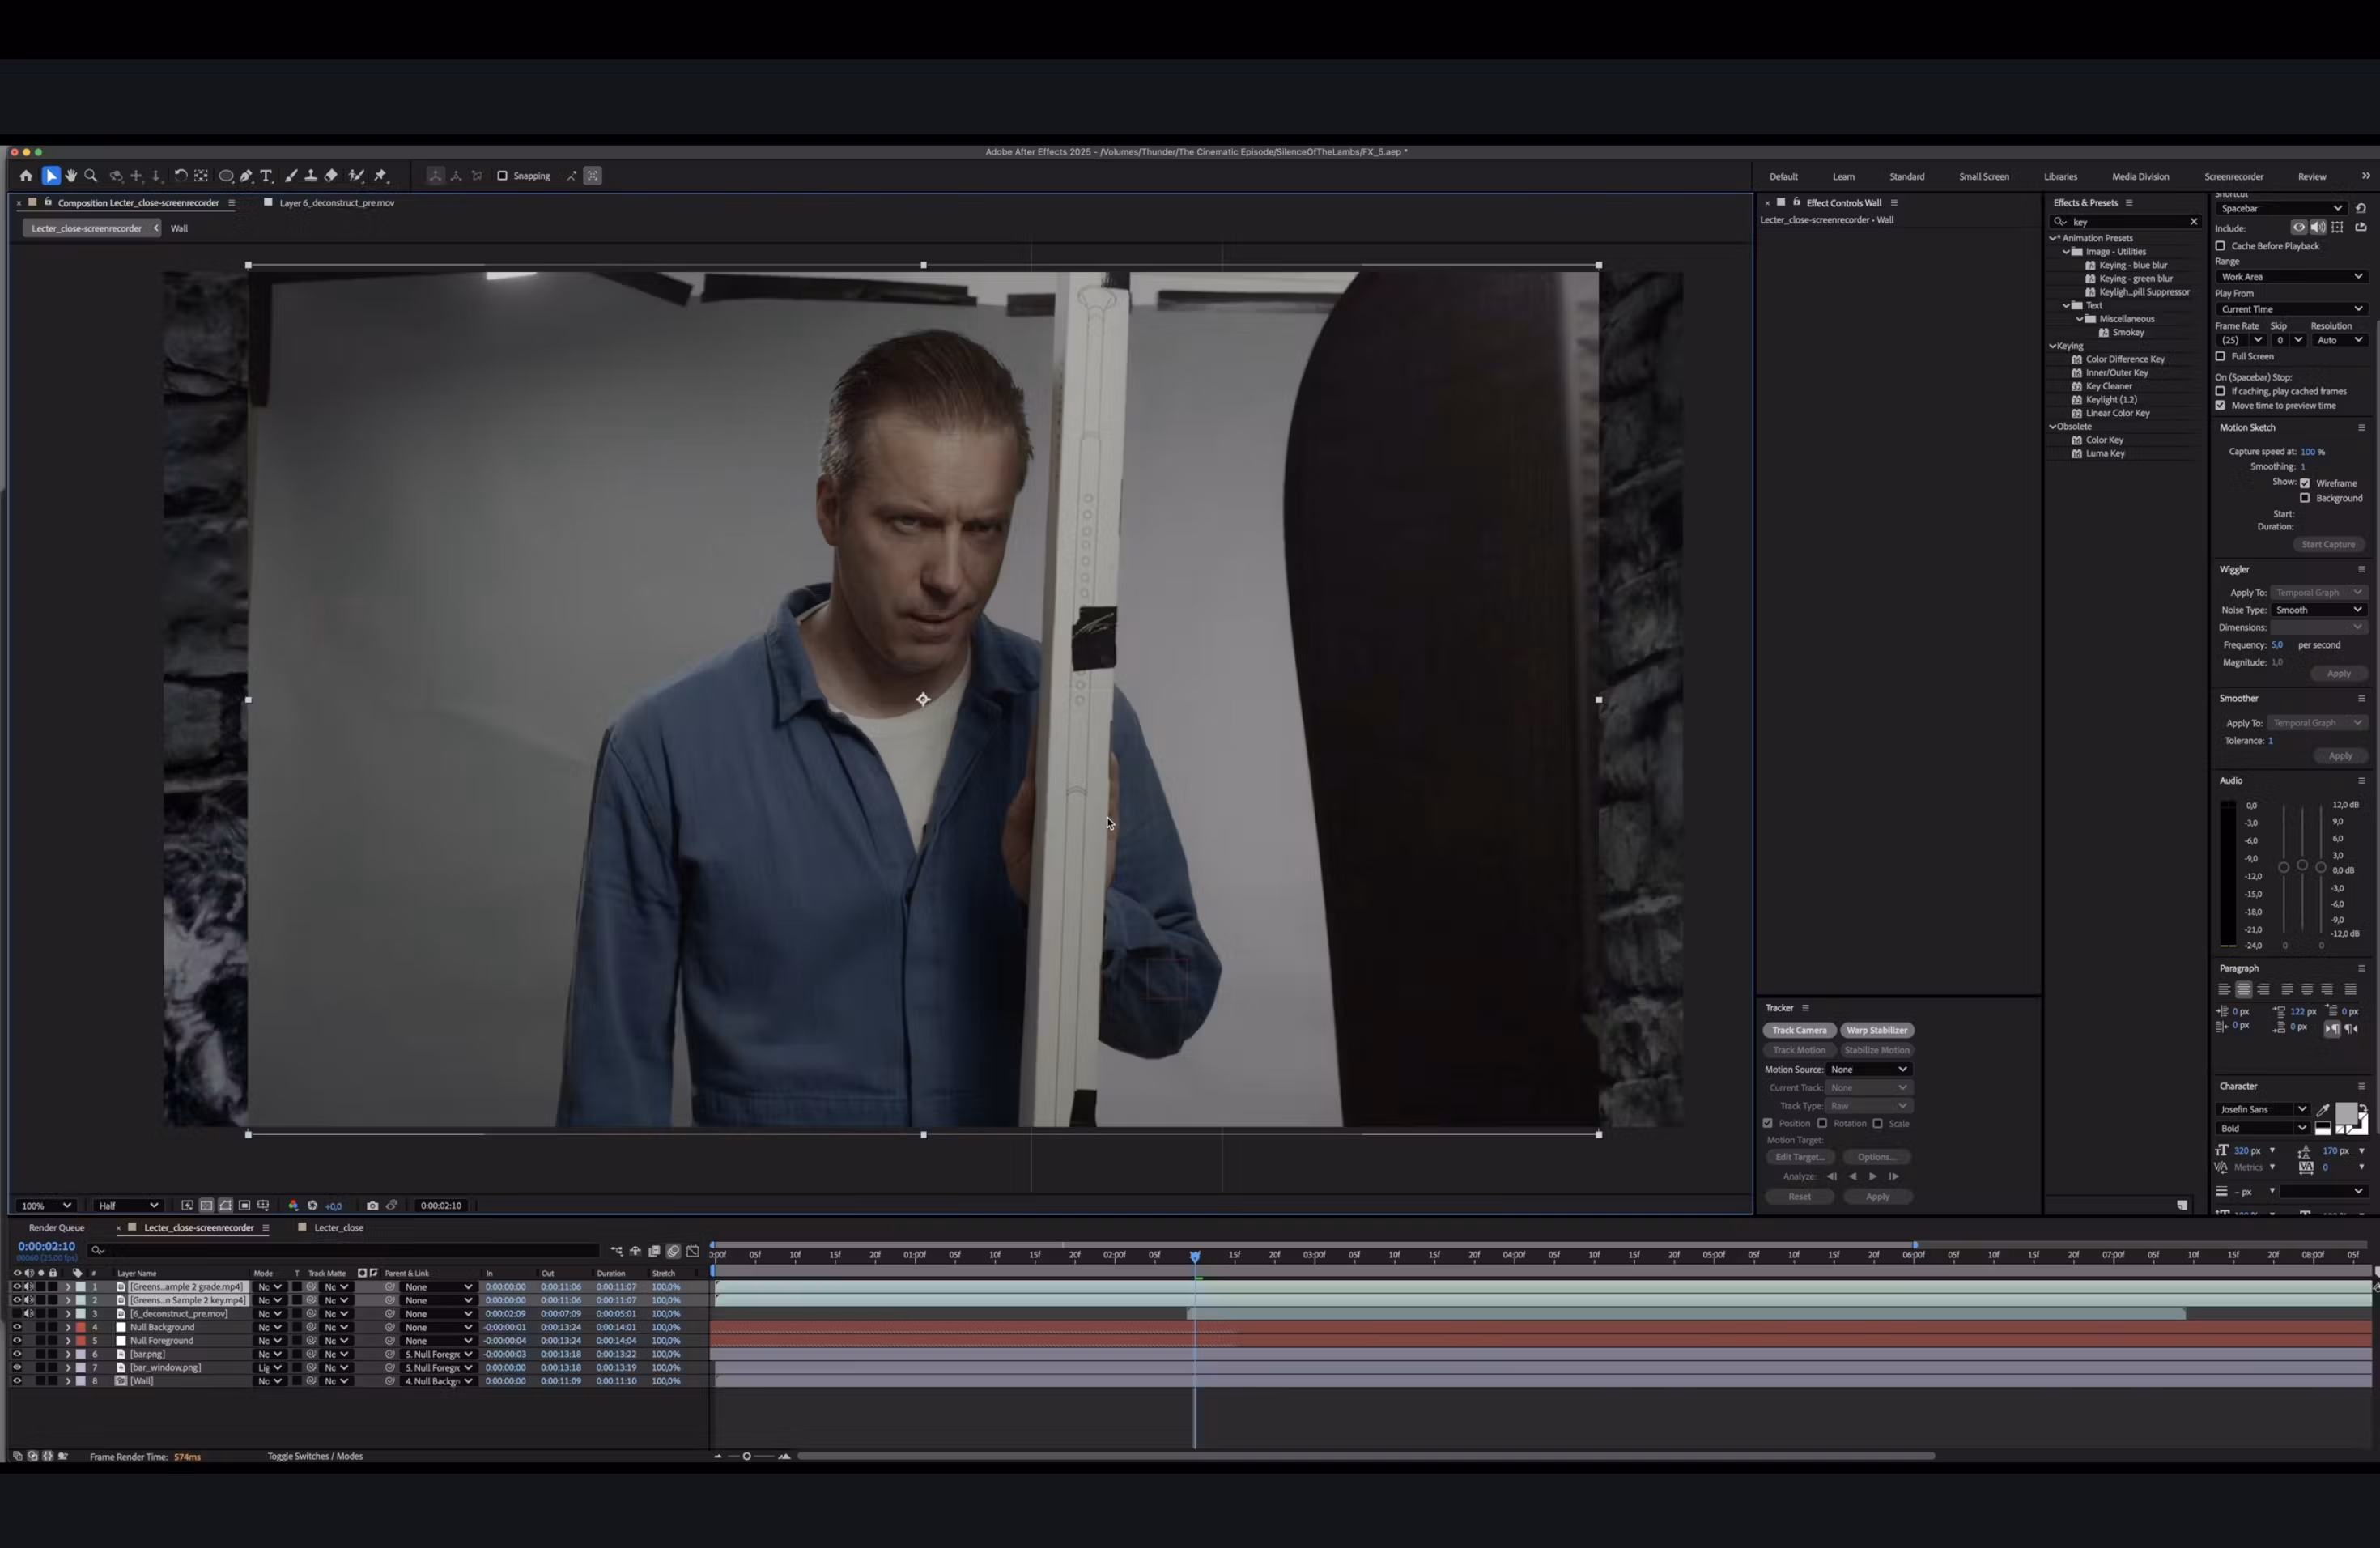
Step 8: Importing and Keying in After Effects
- Import footage into After Effects.
- Apply a Rec 709 LUT to improve keying.
- Use Keylight, Key Cleaner, and Spill Suppressor.
- Drop the green screen composition into the cell composition.
- Mask out unnecessary elements and adjust positioning.
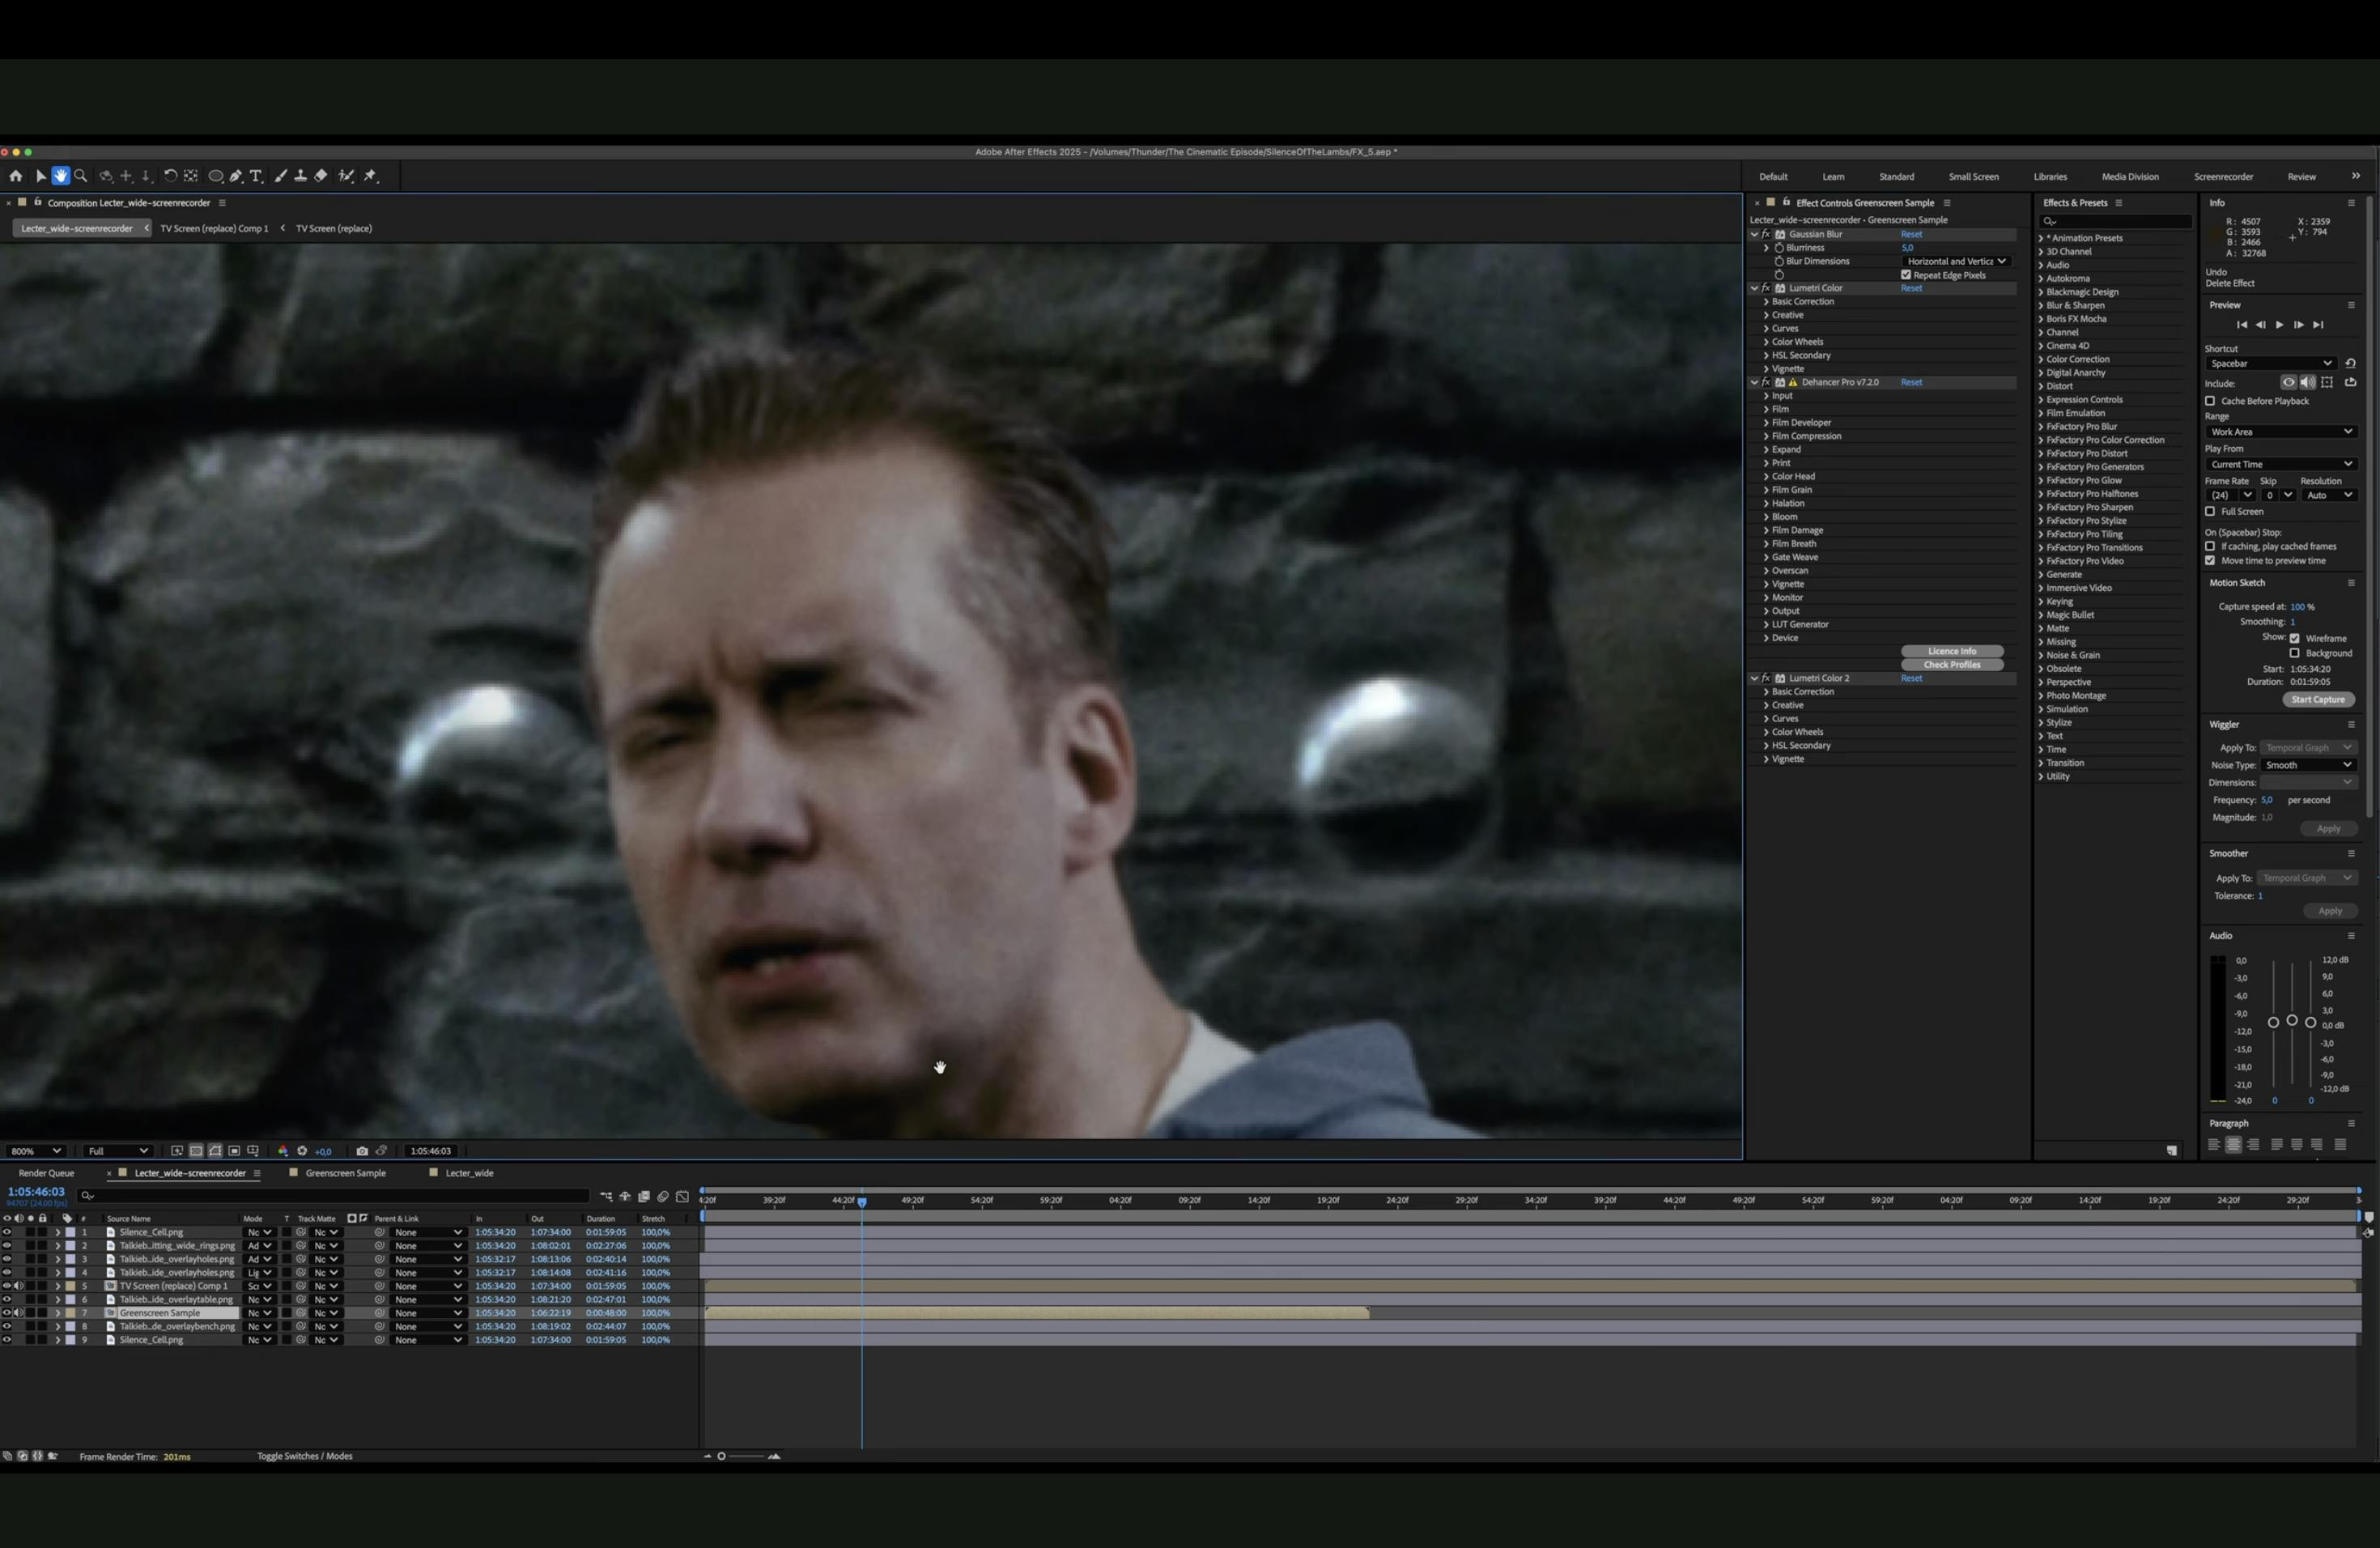
Step 9: Film Emulation Using Dehancer
- Apply Gaussian Blur and Lumetri Color before using Dehancer to soften details.
- Lower resolution in Dehancer for a more natural look.
- Use Gaussian Blur to further blend Lecter into the background.
- Adjust contrast and color balance within Lumetri.
- Apply the Kodak Vision 250D stock in Dehancer, balancing to 5600K LED lighting.
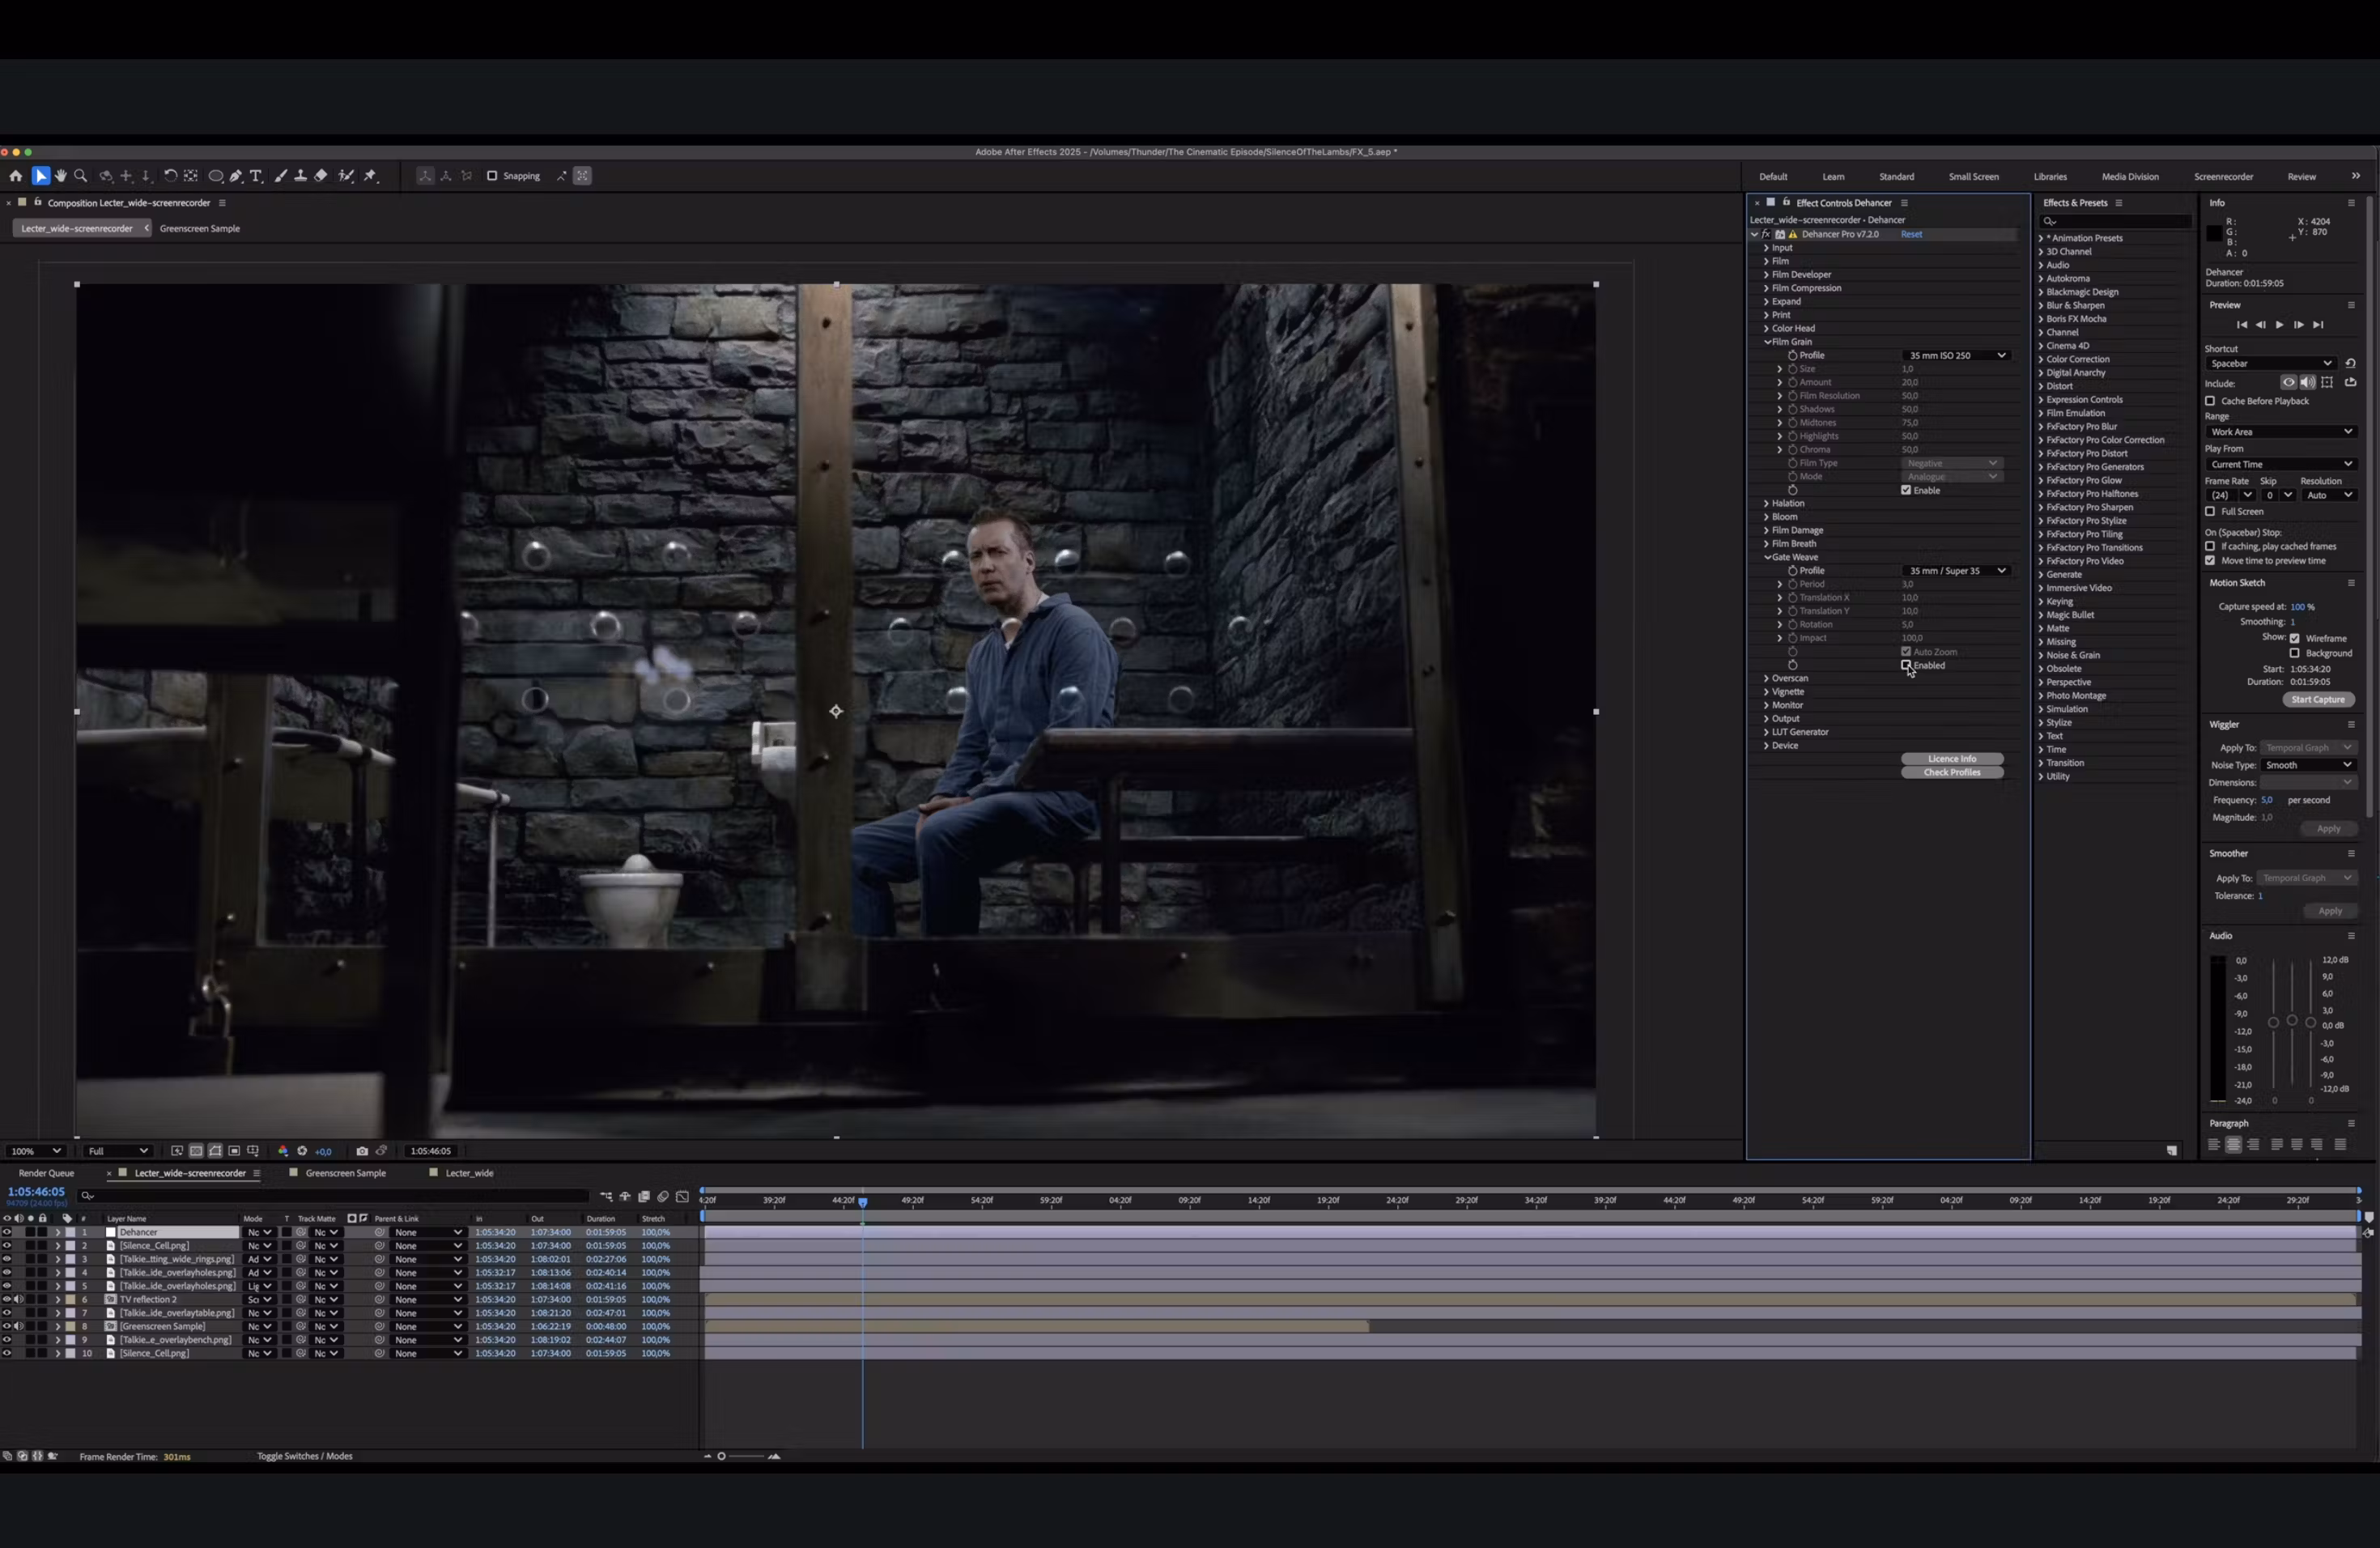
Step 10: Adding Grain and Gate Weaving
- Add an adjustment layer.
- Apply Dehancer, disabling film stock while keeping grain and gate weaving.
- Match grain to the original scene or adjust for better compression.
- Perform this step in NLE instead of After Effects for flexibility.
- Utilize Dehancer’s real-time processing in Resolve for a streamlined workflow.
Step 11: Preparing for a More Complex Scene
- Transition to a close-up shot with different challenges.
- Perform grading and film emulation in Resolve.
- Address camera movement complexity in the original scene.
- Replicate dolly movement using a slider.
- The main spoof shot was filmed on an Alexa camera.
- Pan and tilt movements simplify our approach.
Step 12: Mimicking Camera Motion
- Shoot green screen footage on a static camera and tripod.
- Reframe the image to mimic camera movement.
- Use the same lighting setup as in the intro sequence.
- Place a cardboard box as a stand-in for the window frame.
- Cast a realistic shadow on Lecter to simplify post-processing.
- Use practical effects whenever possible for better realism.
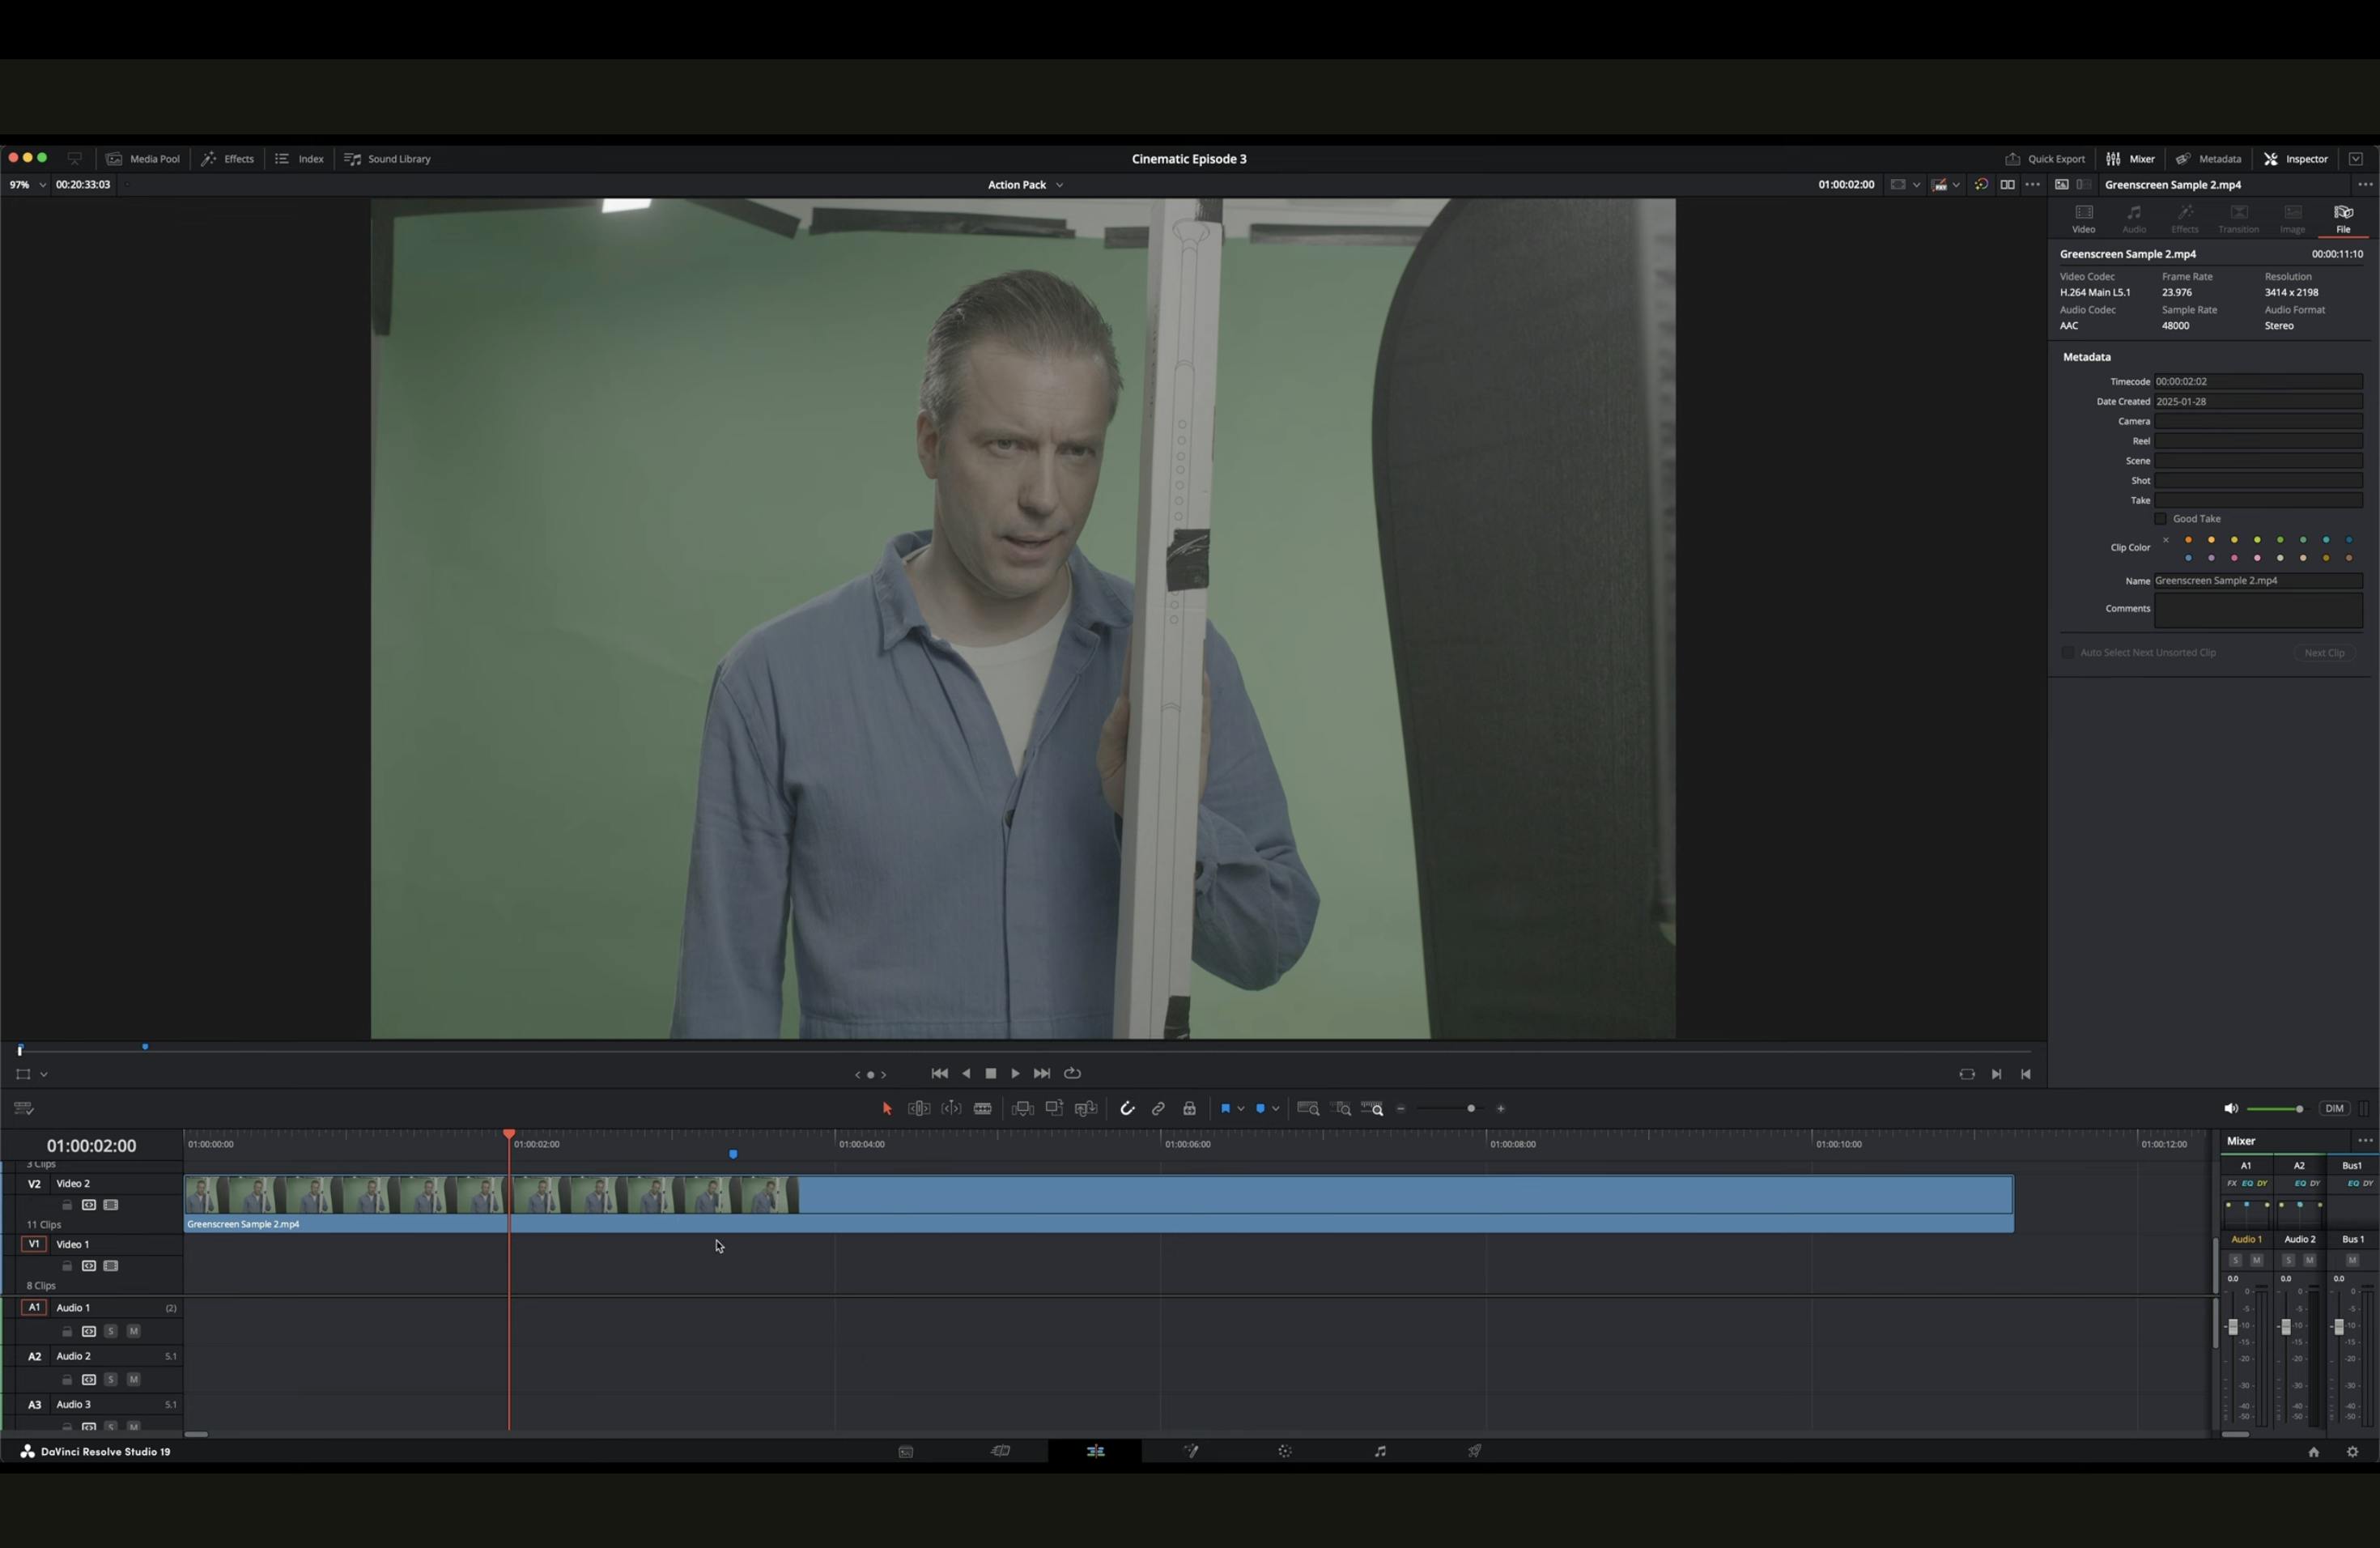
Step 13: Importing Green Screen Footage in Resolve
- Import the green screen footage into Resolve.
- Use pre-configured nodes to simplify the workflow.
- To monitor adjustments, overlay the original scene.
- Since lighting changes throughout the scene, view the original clip as a sequence.
- Place the original clip under the footage on the timeline for reference.
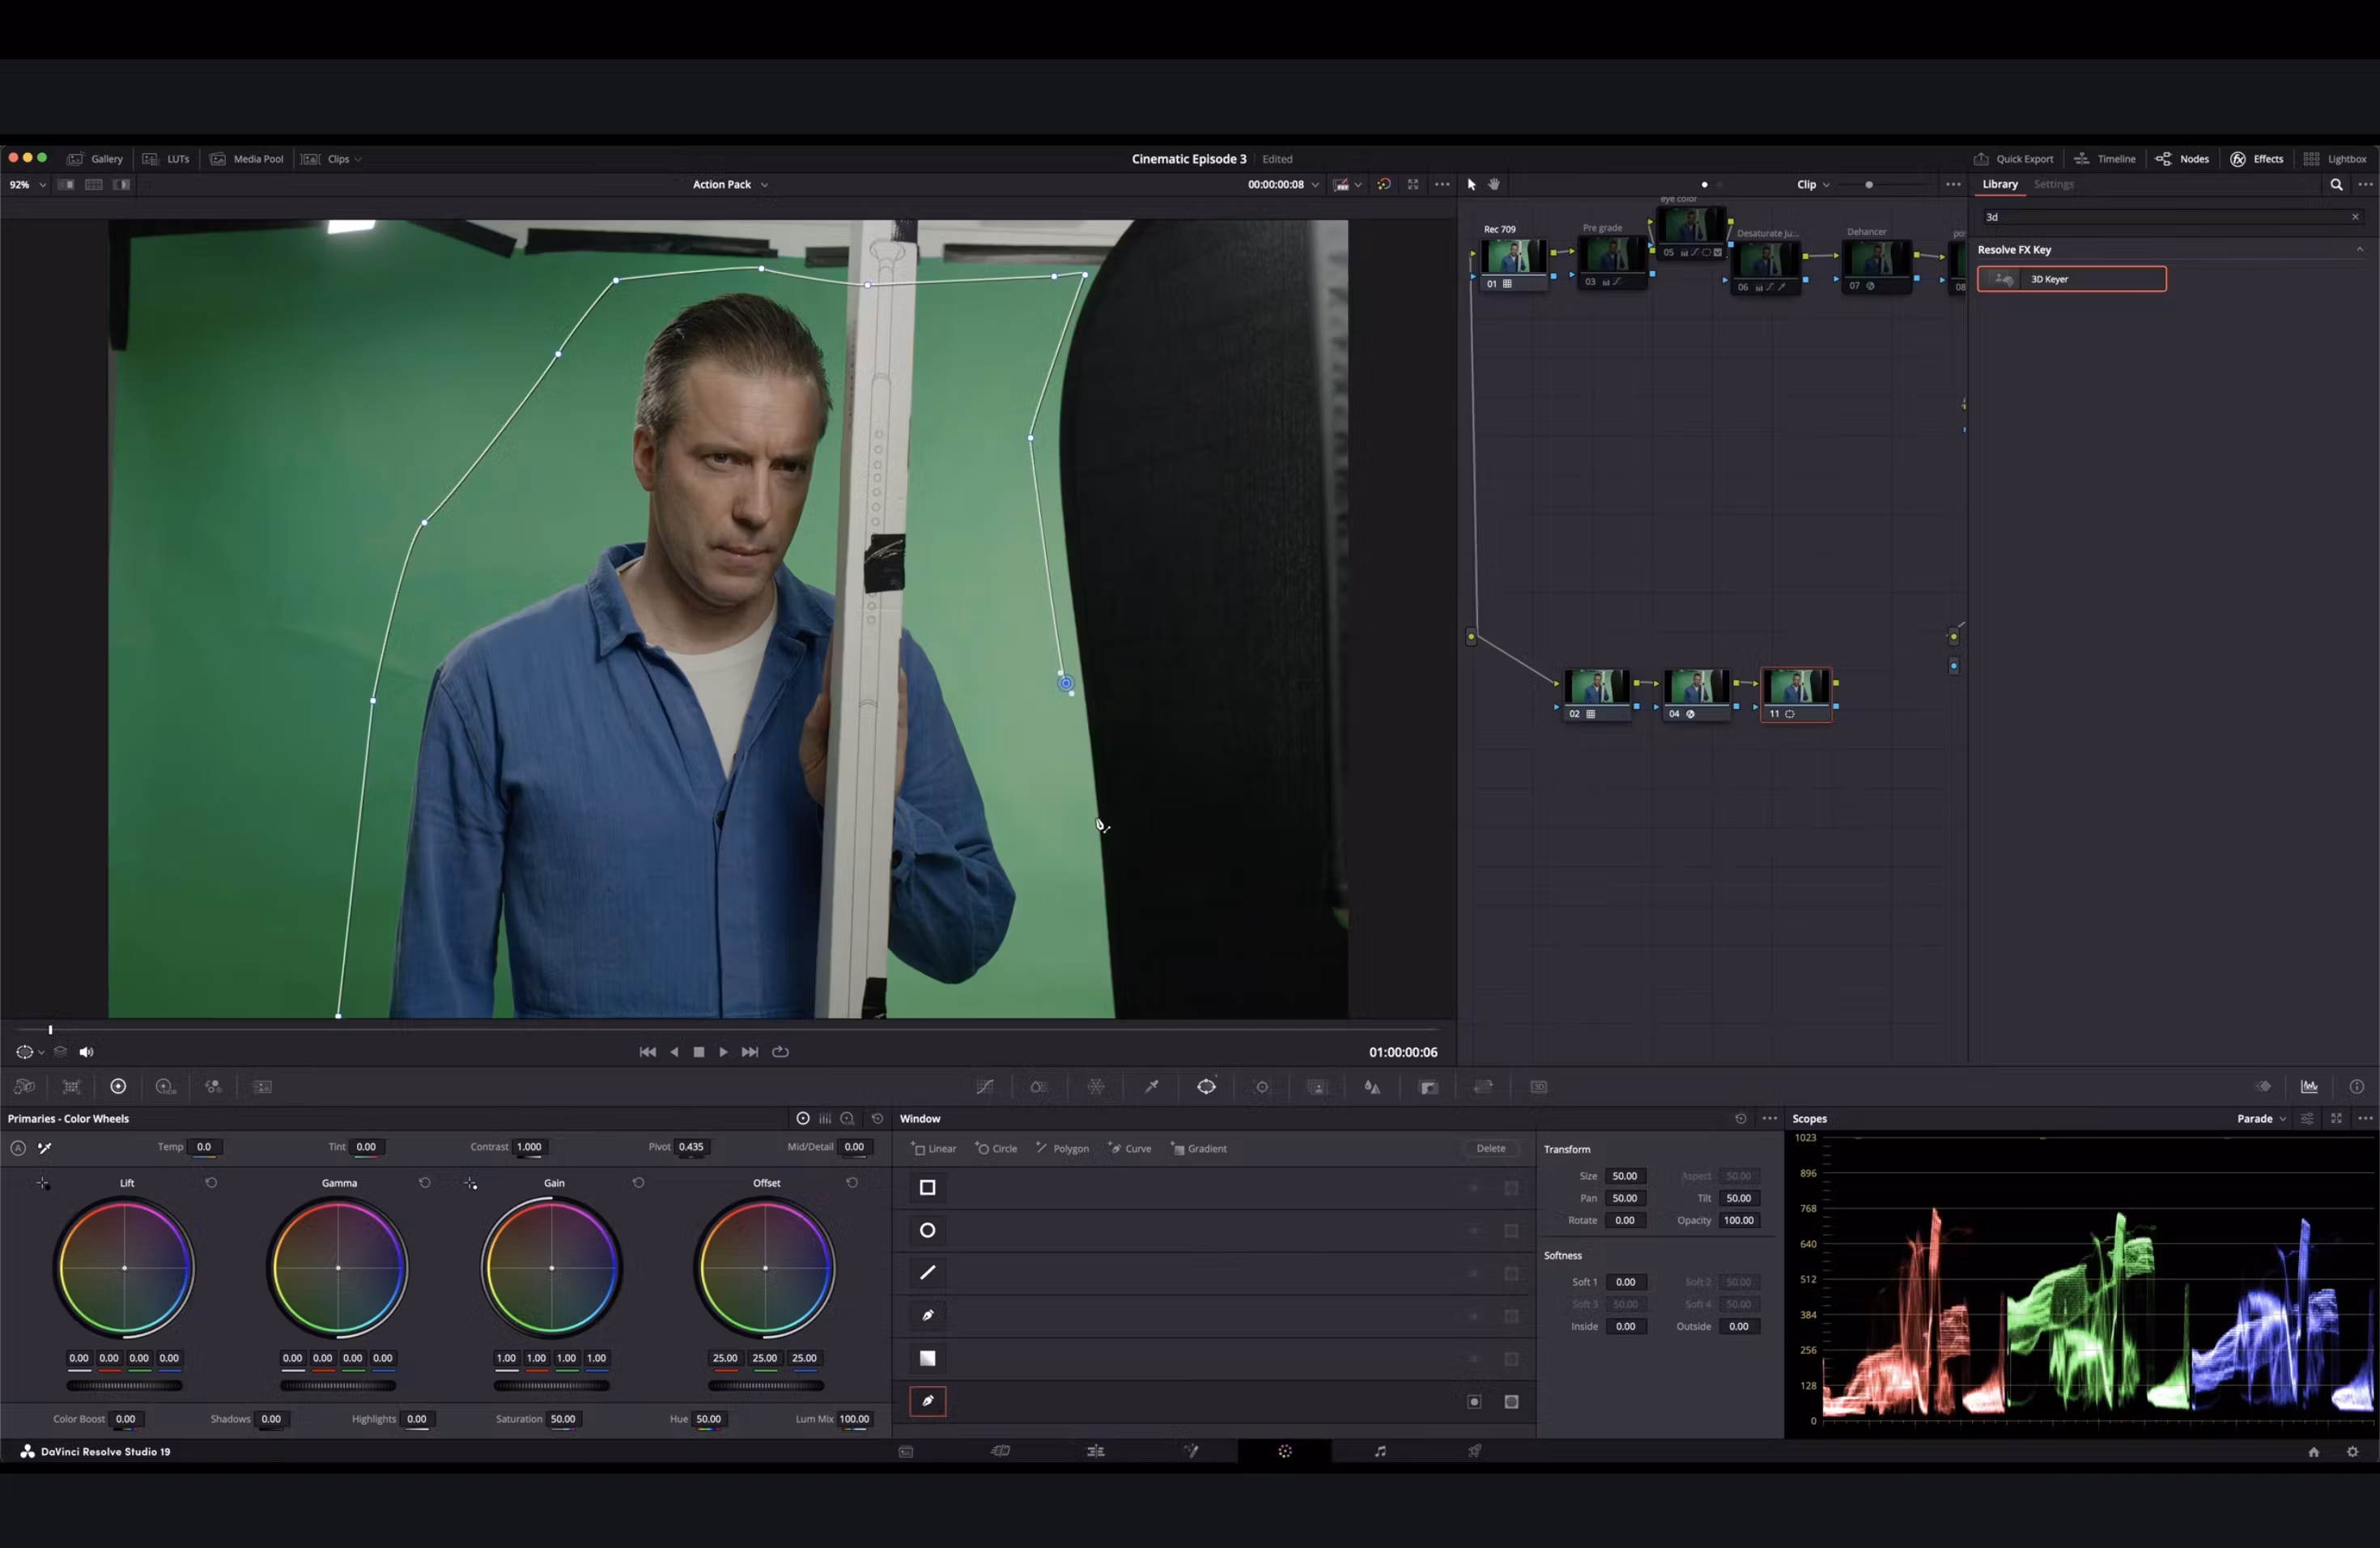
Step 14: Setting Up Nodes in Resolve
- In the color tab, add an alpha output to the image.
- Add a second node with a 709 LUT, followed by a 3D key node for workflow purposes.
- Keying will be refined later in After Effects.
- Add a garbage matte mask to refine the composition.
- Keep the original footage visible behind the edited footage for easier blending.
- Use reframing techniques and moving scopes to ensure precise color and position matching.
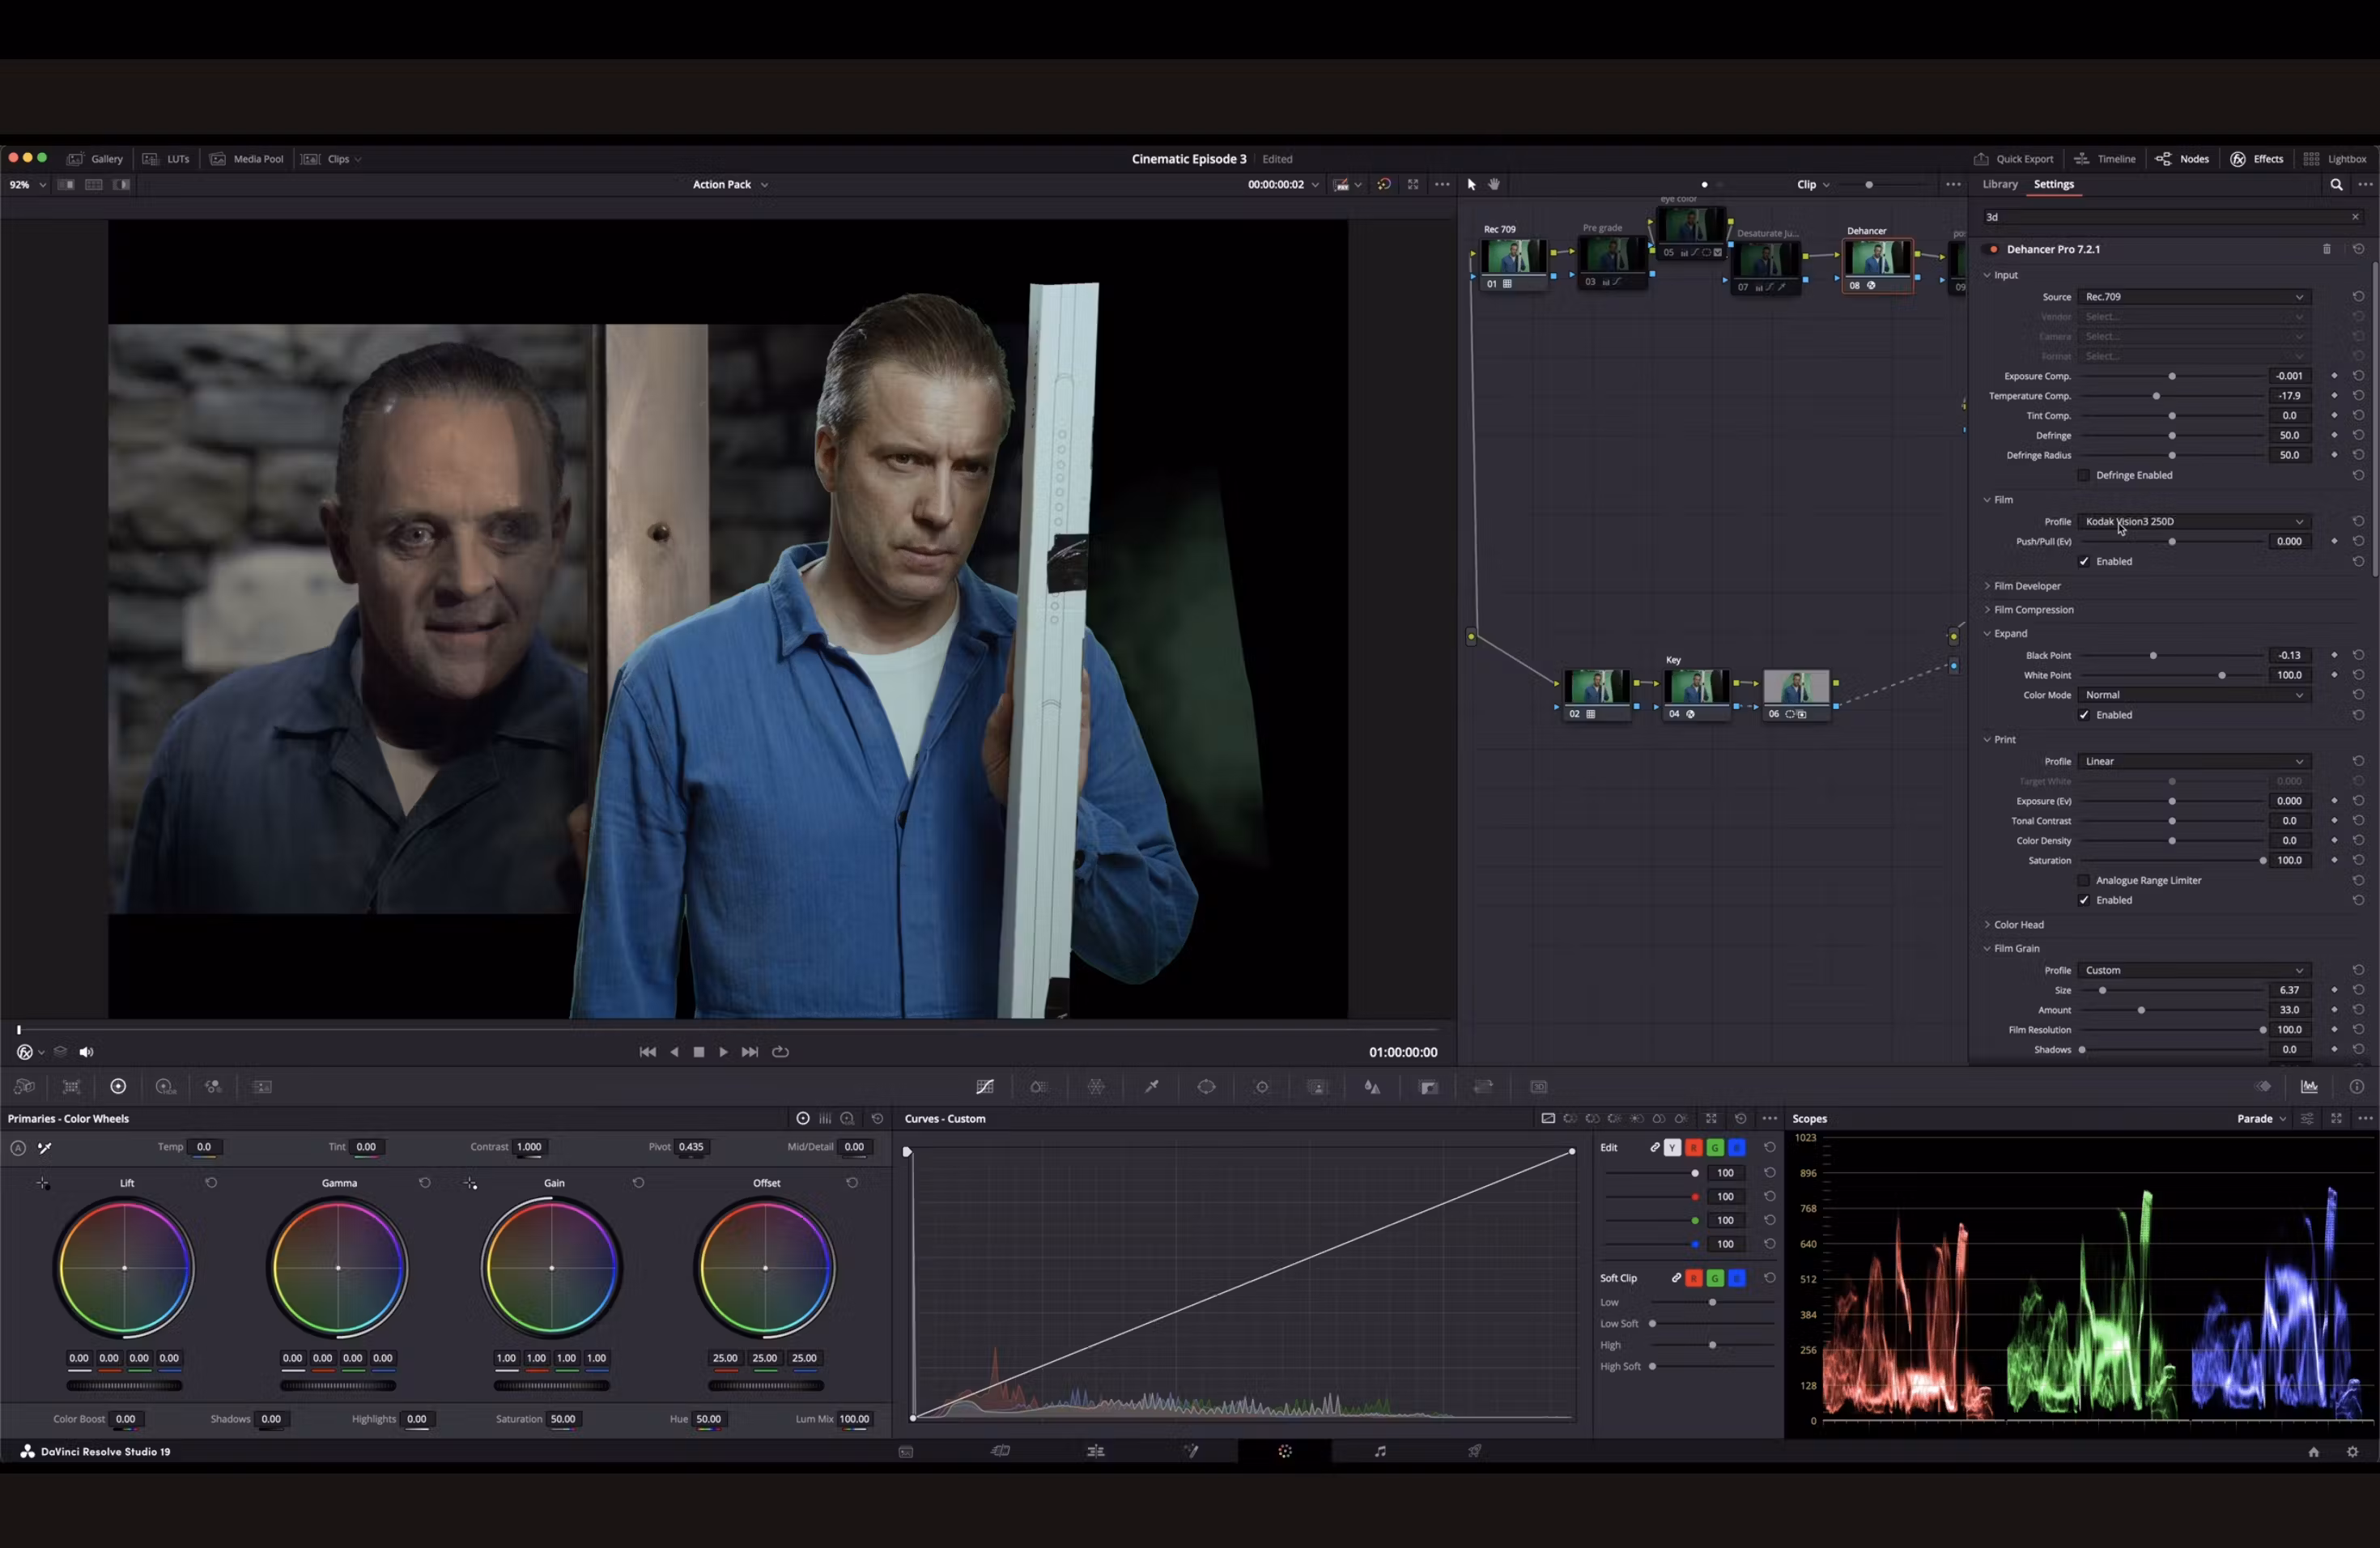
Step 15: Applying Film Emulation and Color Grading
- Apply general grading before adding the Dehancer plugin.
- Use the Kodak Vision3 profile for color emulation.
- Limit Dehancer’s role to stock color emulation, while handling grading separately.
- Disable grain at this stage—it will be added later in After Effects.
- First, set up Dehancer, then adjust surrounding nodes.
- Use the first node for balancing and exposure adjustments with waveform monitoring.
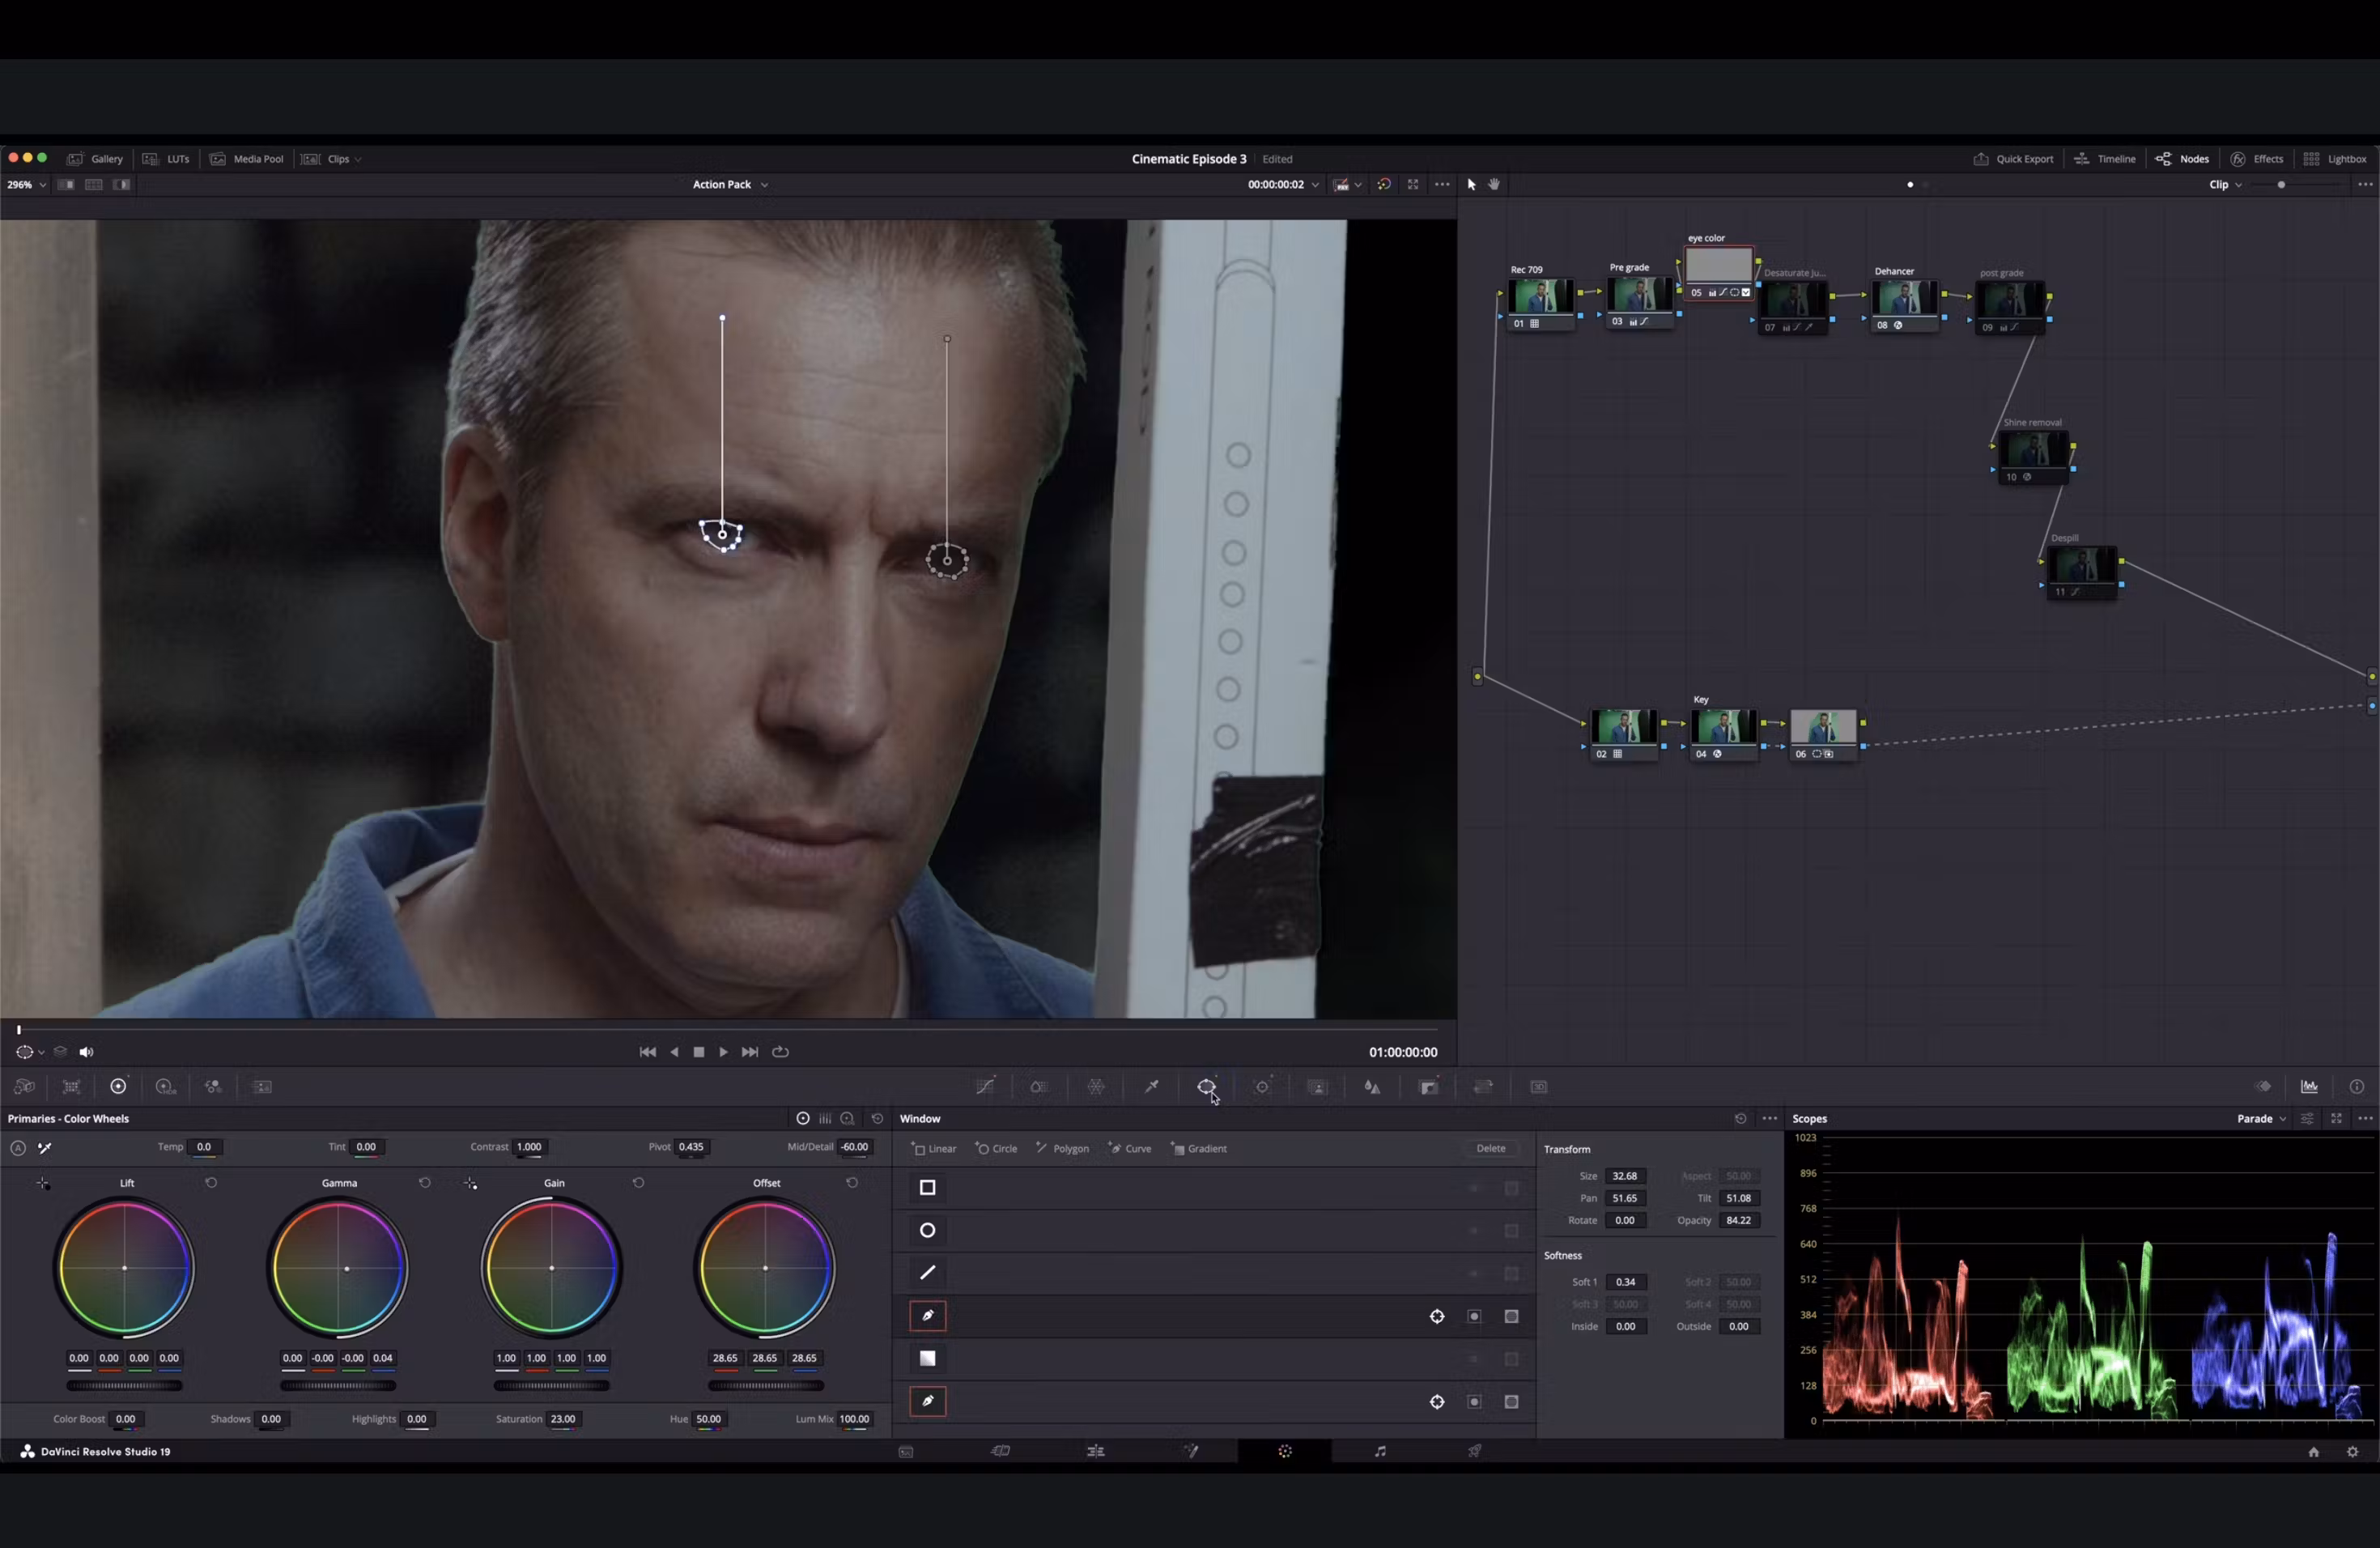
Step 16: Detailed Color Adjustments
- For eye color correction, draw small polygons around the eyes, use softness and curves to lighten them, and manually track each eye if necessary.
- For prison jumper correction, reduce excessive vibrancy, select the color range to slightly lower saturation, and push the shadows for better integration with the scene.
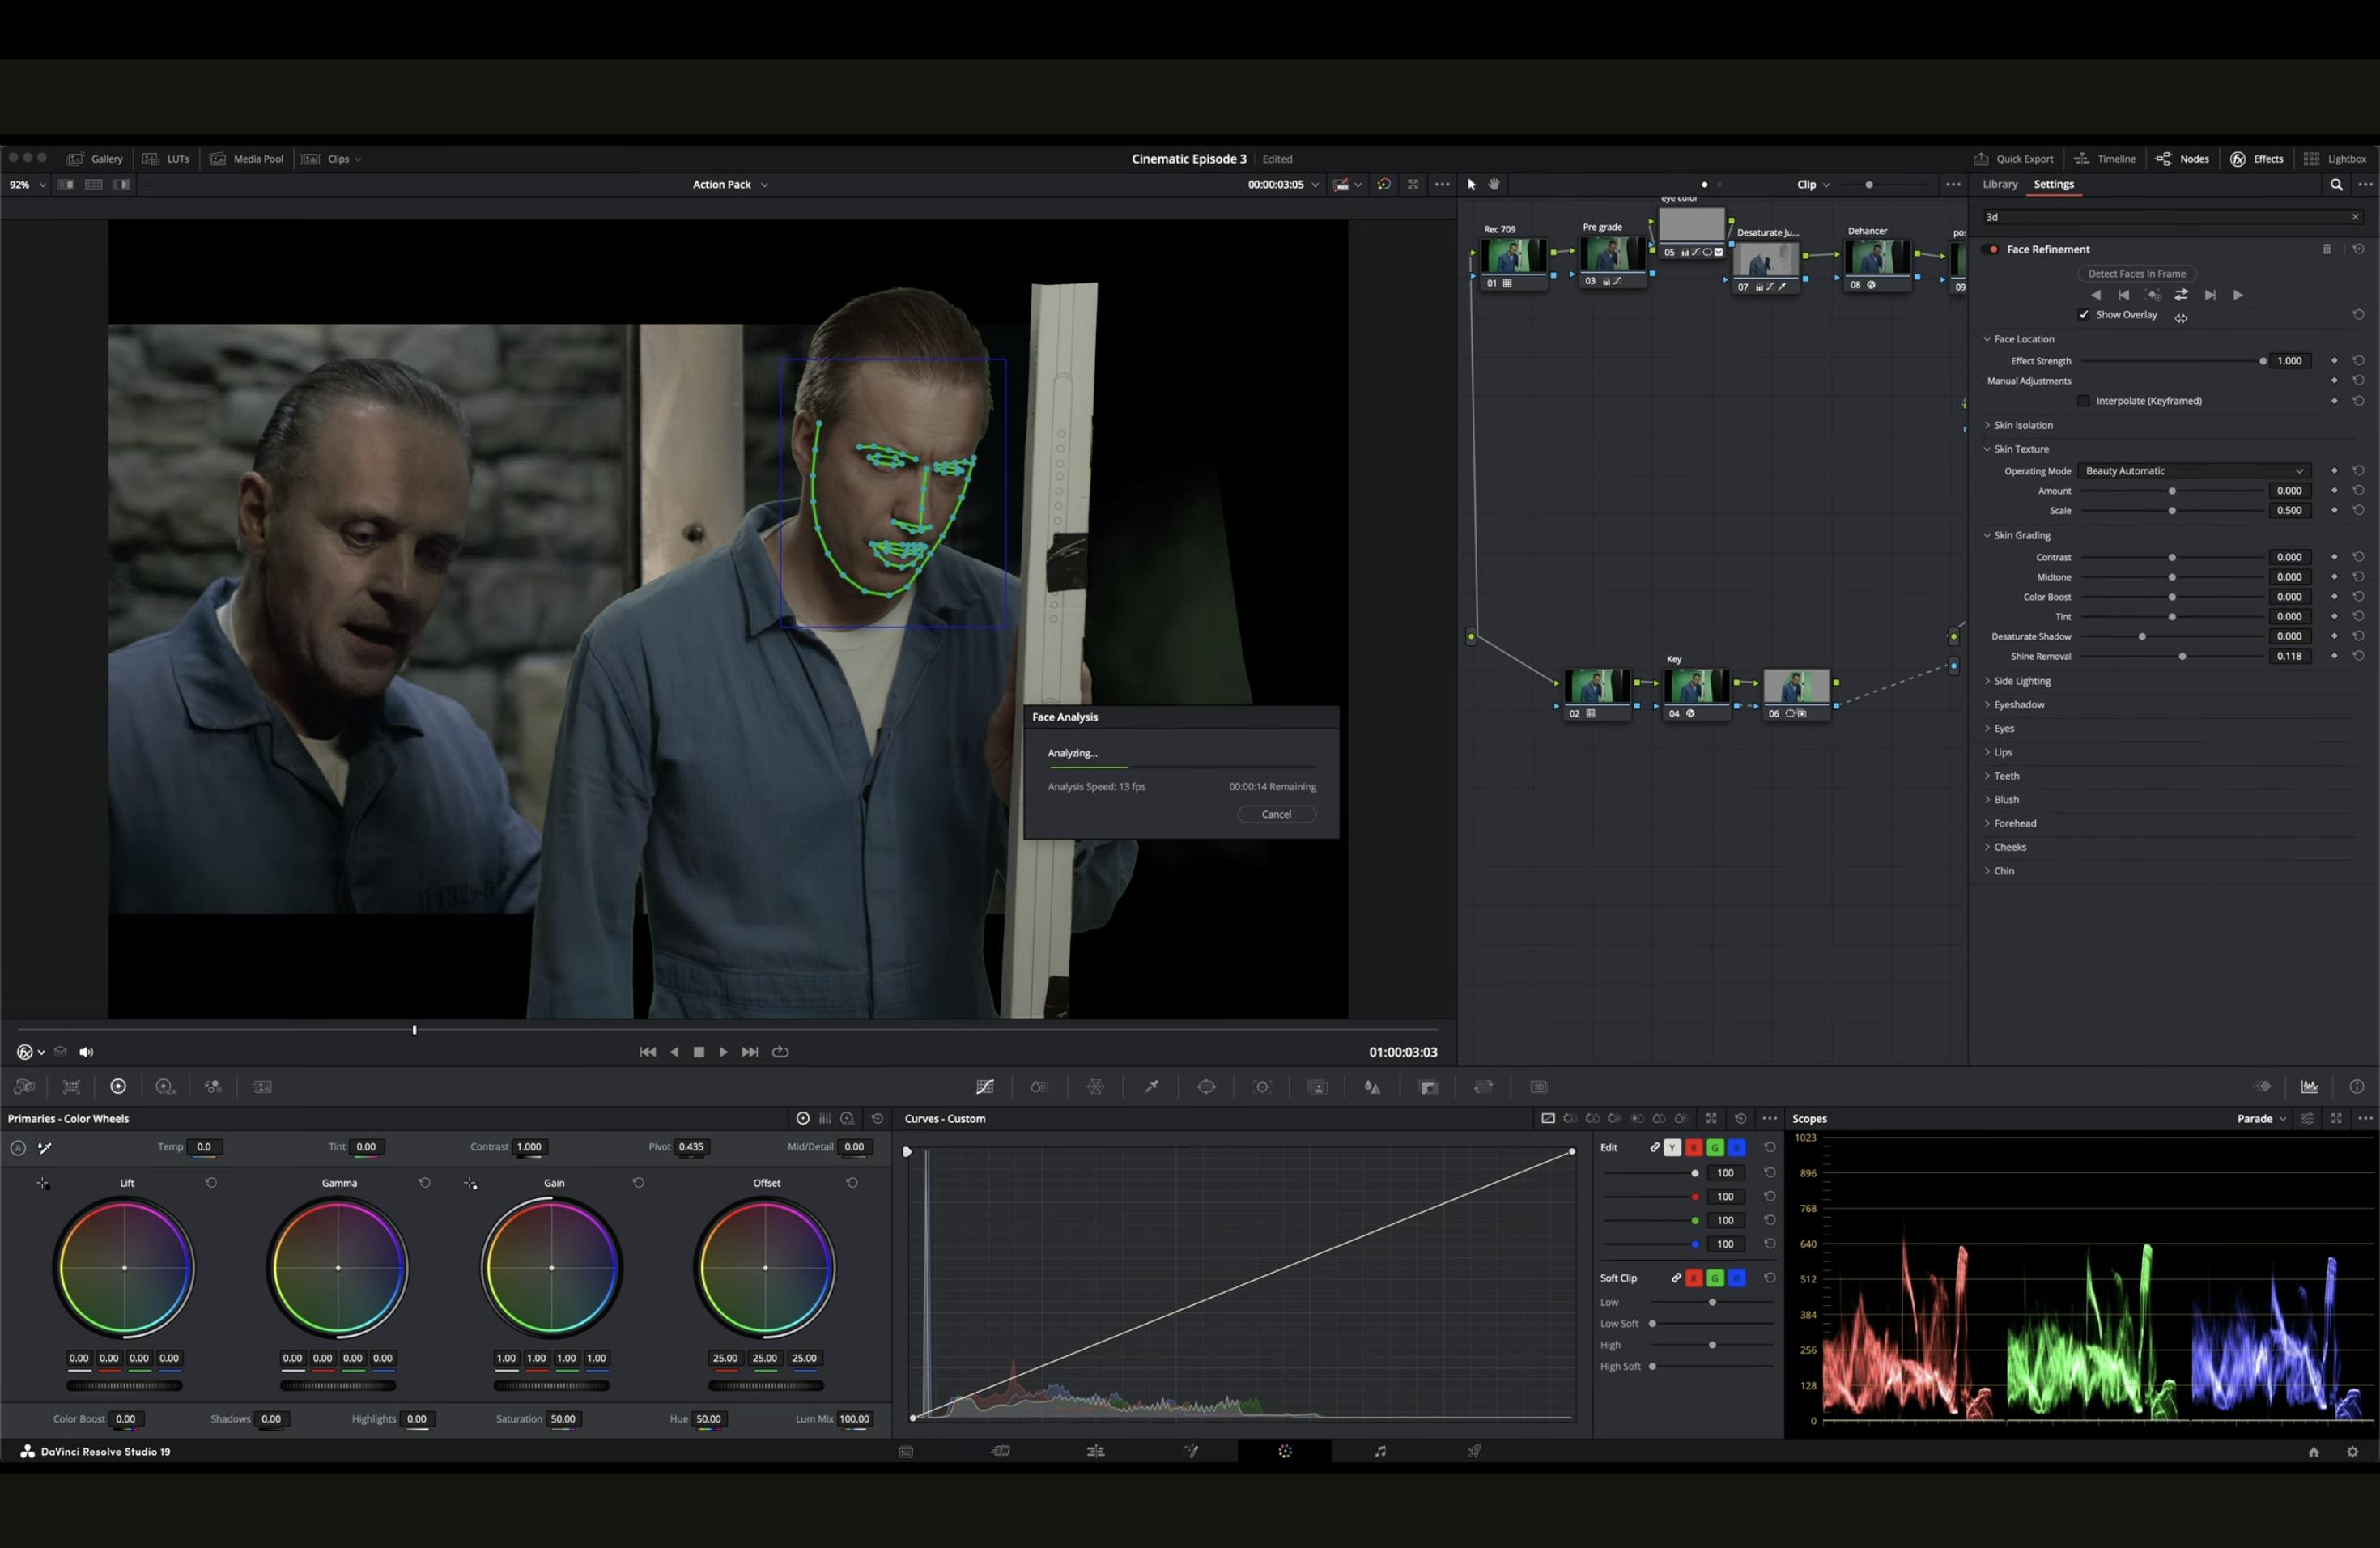
Step 17: Final Color Refinements Before Export
- Adjust post-emulation color correction in Dehancer to fix overly blue highlights.
- Reduce facial shine using Resolve’s Face Refinement tool.
- Apply minor shine removal to replicate subtle makeup effects from the original scene.
- Remove green spill from the green screen with hue and saturation adjustments.
- Deactivate the alpha output.
- Export the final grade in high color sampling (ProRes 444) for maximum quality.
Step 18: Transitioning to After Effects
- Open After Effects and analyze the original scene.
- Since removing Anthony for a clean background is not possible, use an alternative approach.
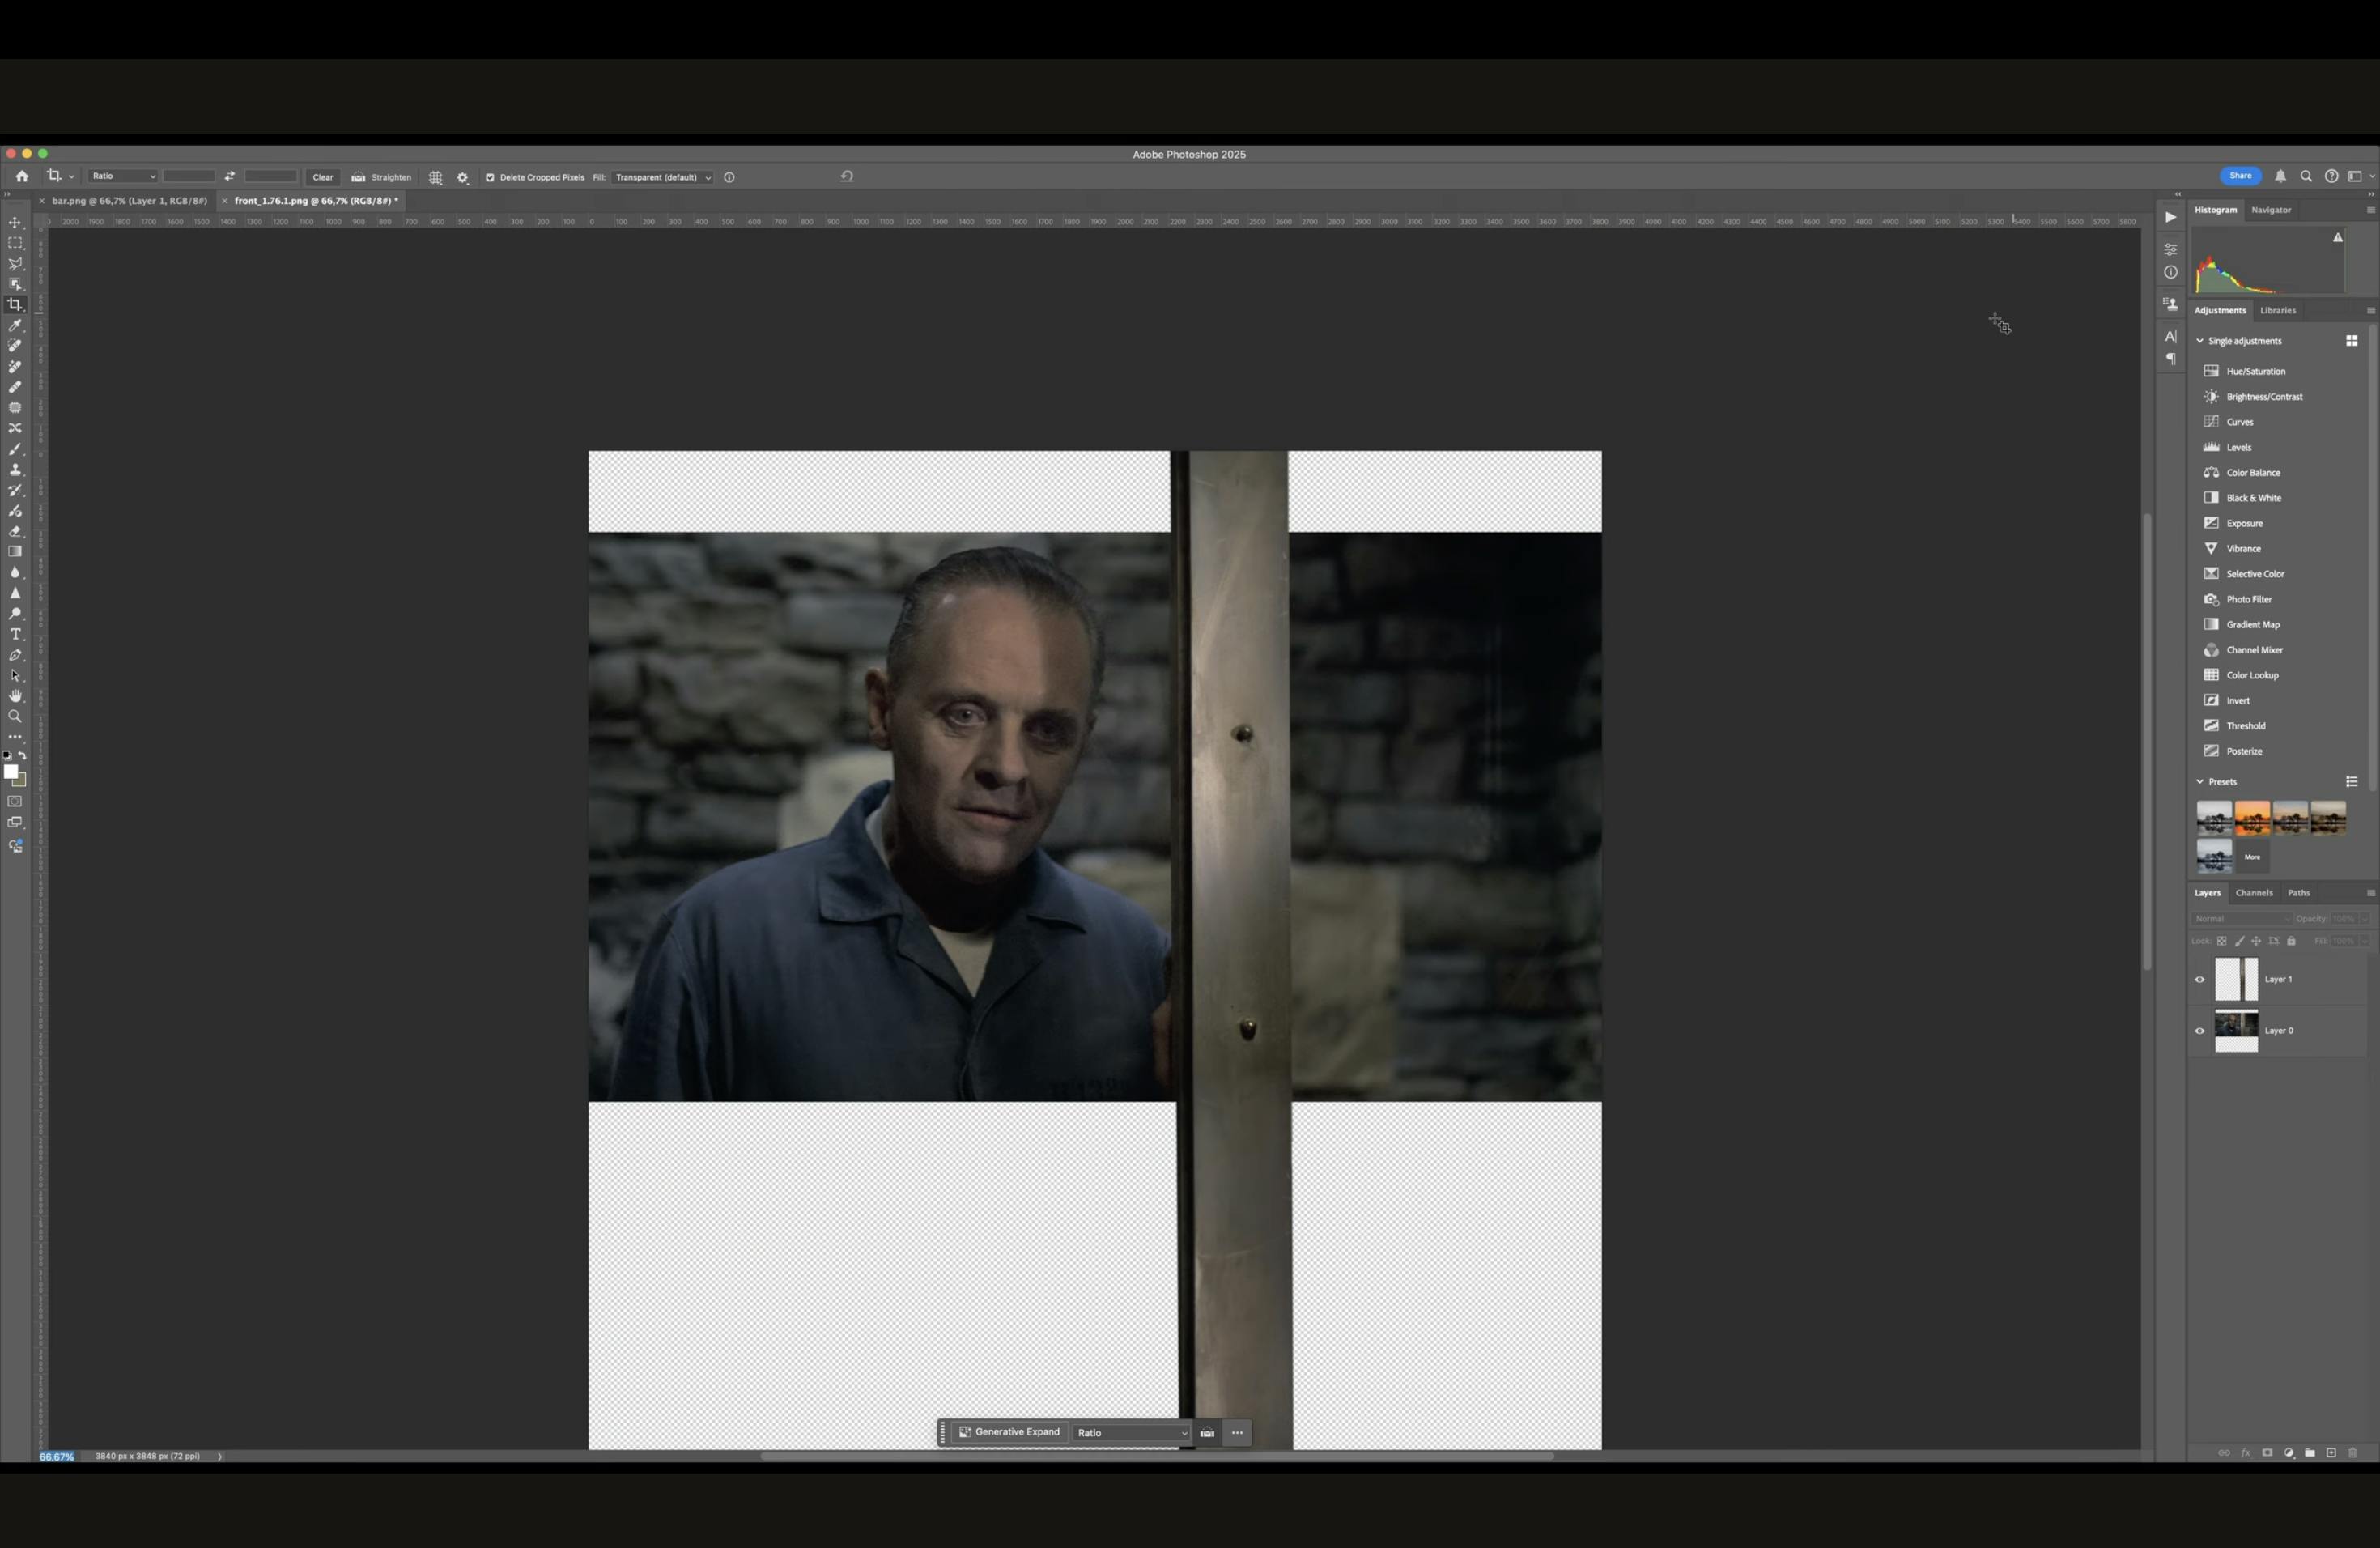
- Export two images: one with the window frame in focus and another with the background in focus.
- In Photoshop, extend the bar as an easy step, extend the background as a more complex step, and match incomplete background drawings from other scenes.

Step 19: Tracking and Foreground Setup in After Effects
- Track the foreground using a screw in the frame as a reference.
- Apply tracking data to a null object.
- Track the background wall parts and apply their tracking data to another null object.
- Import and align the foreground frame spar with the original scene.
- Set the foreground null as the parent.
- Create a glass foreground file with dirt and fingerprints for realism.
- Import and position the background wall to match the original.
- Set the background null as the parent.
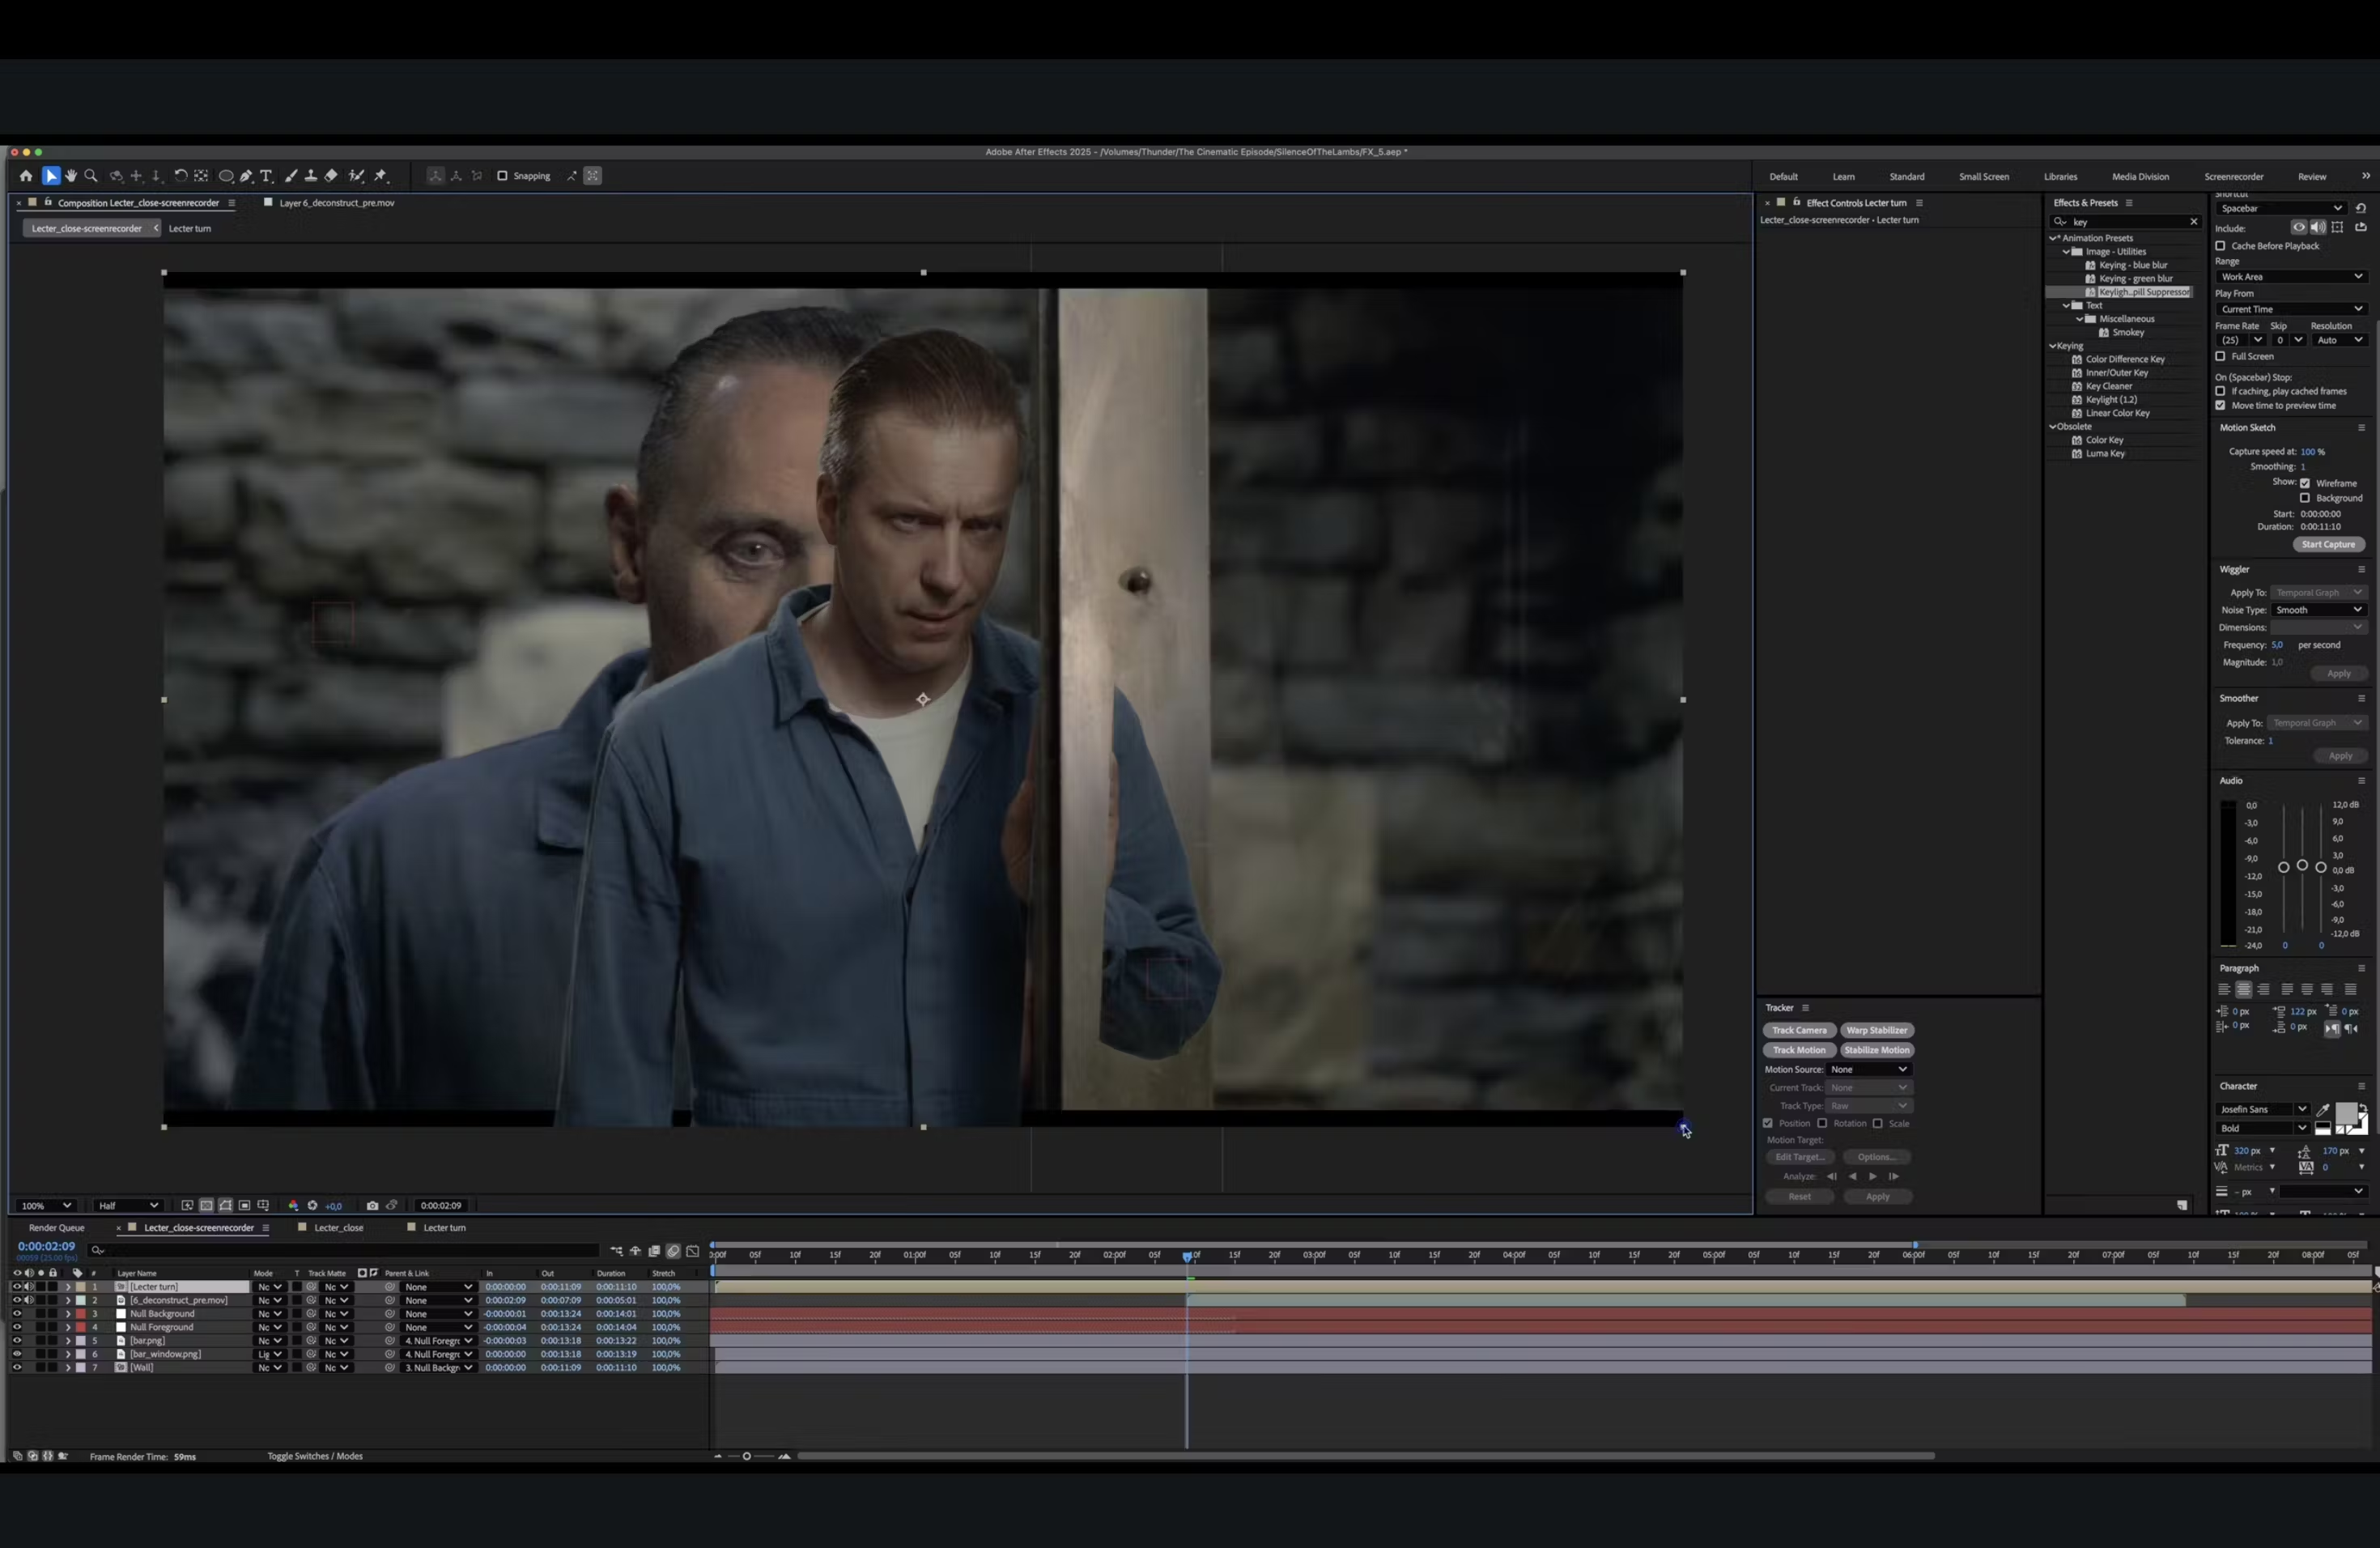
Step 20: Compositing Lecter into the Scene
- Import both the green screen version and the graded version of Lecter.
- Pre-compose them into a new composition.
- Apply Keylight to the Rec 709 version.
- Mask out unwanted elements, including the cardboard box from the graded footage.
- Set the keyed footage as a track matte.
- Scale and position the composition to match the scene.
- Set the foreground null as the parent for accurate movement.
Step 21: Simulating Camera Movement and Depth of Field
- Adjust Lecter’s position at the end of the fake camera move as he walks backward.
- Set position keyframes at the start and end of the movement.
- Ease the motion in and out using the graph editor.
- Add a depth of field effect by applying the Lens Blur effect to the background, setting keyframes from 40 at the start to 0 at the end, and applying the same effect to the frame bar and window with the keyframe order reversed.
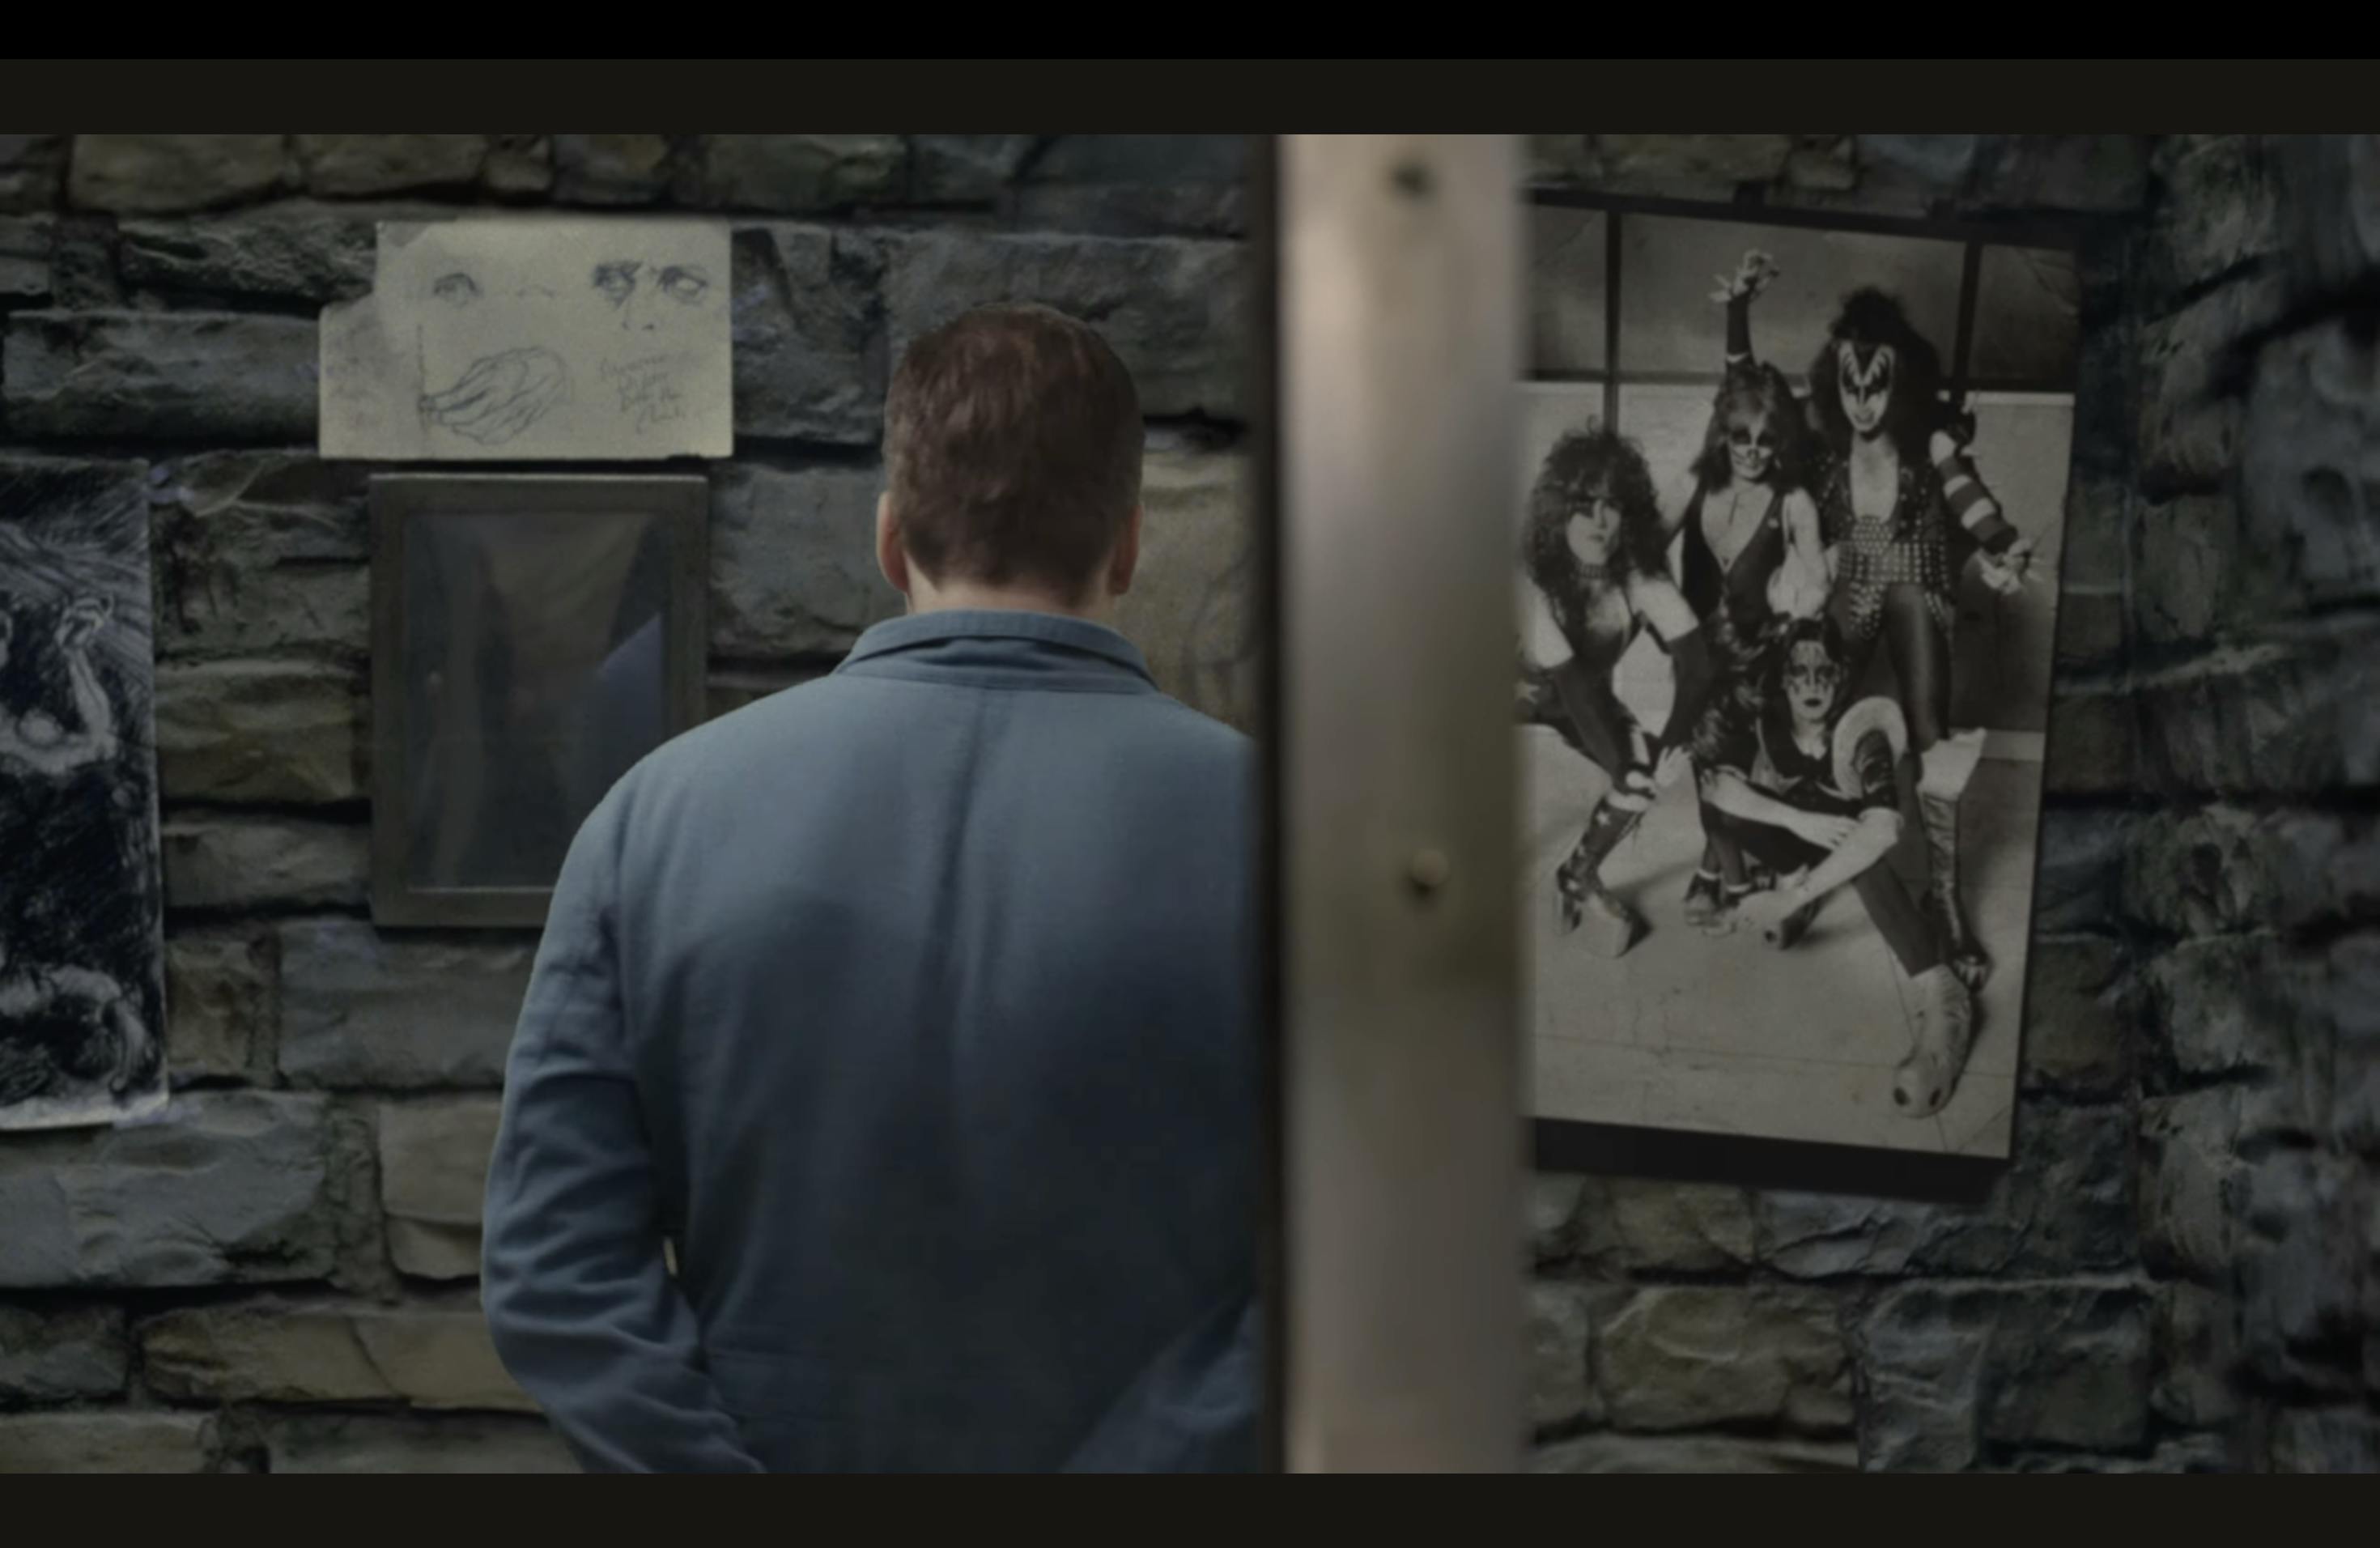
Step 22: Final Enhancements and Customization
- Add a reflection in the mirror, matching the original scene.
- Customize the background wall by dropping any image into the wall texture, such as adding a KISS poster to make Lecter’s cell more personalized.
- Complete the scene with realistic depth, movement, and customization options.
You can watch the full version of the tutorial at the following link:
Film Emulation & Compositing Tutorial with Dehancer